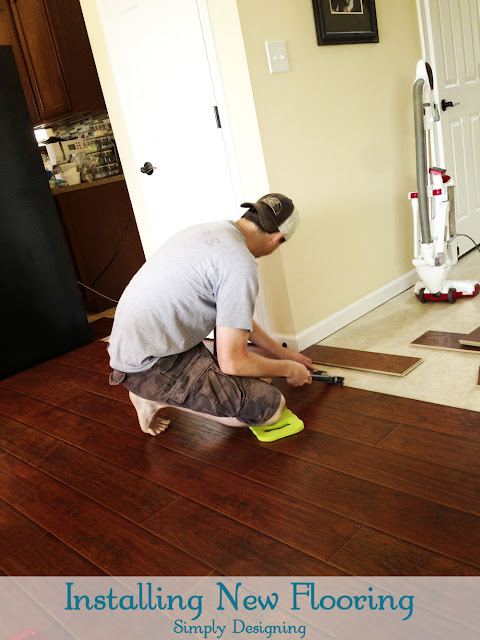
After our floors were prepared and we had determined the best way to lay our Floating Laminate Flooring, it was time to start the installation!
My husband already completed all the preparation and began installation while I was out of town! What an absolute sweetheart!! My husband rocks!
So I came home to a partially done floor and a garage full of laminate flooring! Not a bad surprise if you ask me.
Here are a few Tools you will want / need to install your laminate flooring:
Tools
- Table Saw (with a fine tooth blade)
- Compound Miter Saw (with a fine tooth blade)
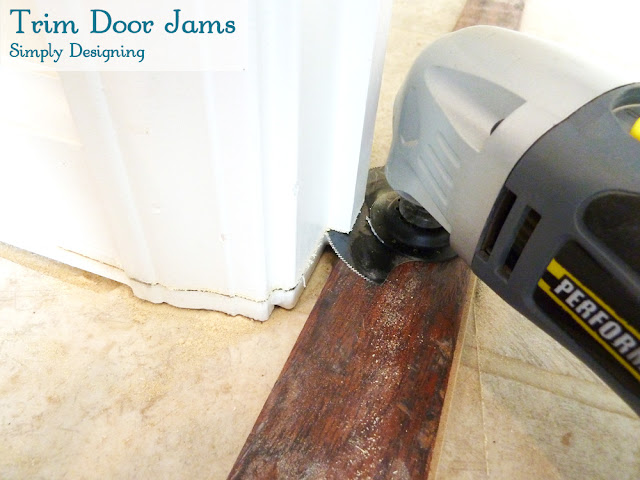
- Oscillating Multi-Tool
- Jig Saw or Reciprocating (depending on cuts you need to make)
- Tapping Block
- Pull Bar
- Hammer or Mallet
- Measuring Tape
- Pencil and / or Sharpie (to mark your cuts)
- Triangle (to help you draw your cuts)
- Spacers
- Safety Goggles
When it comes to the actual installation of the floating click-and-lock flooring, it is actually really quite simple. Here are a few things to remember:
Tips and Tricks for Installation
Leave a gap around all edges
There should be about ¼" - ½" gap in between the laminate flooring and your all of your walls. (The actual gap amount should be listed on your particular laminate floor instructions though, so please always read and follow those instructions!) Wood expands and contracts so you need to allow this space for when it expands so that the planks don't buckle.
The planks should be snug together
Planks should be nice and tight in between all long and short sides. That's what you use your Taping Block and hammer (or mallet) for. But not so tight that the planks start to buckle.
Seams should never line up
You need to alternate your planks so that all the seams don't end up in the same spot. The general guideline that I like to follow is to do your first row, then whatever piece you have left over at the end, no matter how long or short it is, that is your starting piece for row two. There is really no reason to stray from this guideline unless you have an area where your seams start to line up (ie in a long hallway they could start to do this). The main goal is to keep your seams random looking without a lot of extra work, effort or wood so this method almost always works.
To install, you will start along one wall and line your first row of laminate flooring up against your wall, length-wise.
Use spacers to allow your ¼" - ½" required gap between the wood and the wall.
You will match up the tongue-and-grooves of each plank along the short ends and use a Taping Block and a hammer (or mallet) to ensure that the edges are snug to each other.
At the end of the row, the last plank will most likely need to be shortened. Be sure to measure and cut it carefully.
Then take this extra piece from the end of the first row and use it to begin your second row. Be sure that short sided seams never match with the row before or after it.
You may need to use your Pull Bar to help snug the last plank of the row into place if a tapping block won't work. (ie the wall is in the way)
On row two through the end, you will use your tapping block or pull bar and hammer to snug both long and short ends together as you go. Be gentle and go slow. If you go too fast or too hard, you can get chipped laminate pieces so take your time with this.
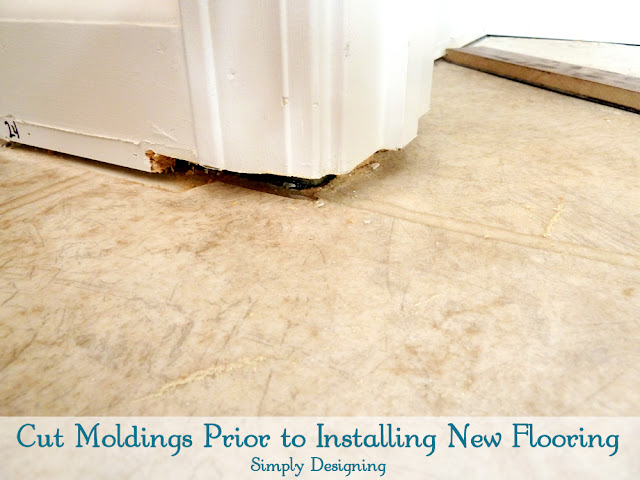
There will of course be exceptions to EVERY rule! You will have odd corners, angles or door jams that will cause you trouble. Use your measuring tape, triangle, pencil / sharpie to mark every cut you need to make. And use whichever saw you might need to to make the correct cuts.
You may have to back into a few places, put things in in a strange order, or muscle other pieces into tight fitting oddly shaped spots.
We happen to have a lot of corners, angles and door jams so we encountered a lot of tricky situations. There were times when we had to install the flooring up to a certain area, then take two whole rows out to fit a particular piece in, and then try to back the two rows back into place. Ugh.
You should see some of the crazy cuts my husband had to make for some of our angled areas! It is crazy!
So if you have a square or rectangle room with no doors, cabinets, islands or angles (besides the four corners) you will have the world's simplest installation ever!
If however, you have 7 doors, multiple crazy-angled walls, odd corners, kitchen cabinets and and island...it might take a little bit of time, creativity and perseverance to get your flooring installed!!
But it is Absolutely. Totally. Worth It!!
Next up...the finishing touches!!
Read More:
How to Install Floating Laminate Wood Flooring {Part 1}: The Preparation
How to Install Floating Laminate Wood Flooring {Part 2}: The Installation
(*Please note that we are not professional installers or contractors. I am simply sharing what we have done and what worked for us with the best knowledge we have on the topic. This is our second time installing laminate flooring and each project was a little different. Your experience may be different then ours depending on many factors. When in doubt, consult a professional.)


Mary
What is the name and color or the flooring?
Ashley Phipps
We used Select Surfaces from Sam's Club. I can not recall the name though 🙁 sorry! But they only have a couple of options available!
Jamietilton
Is it cocoa walnut?
Sandy
The floor from Sam's Club is Canyon Oak
Jo Ann
Hey did you empty your bottom cabinets before installing the floor?
Ashley Phipps
As long as you are not removing your cabinets in order to lay flooring underneath them, then no you do not need to empty them!
Mia Boyd
Thanks for the information. My husband and I have been thinking about redoing our flooring. We just hate our carpet. Actually, we've been thinking about installing solid wood flooring. Would you recommend it? Like you said, we'll make sure we prepare for it before we decide to install it!
Christie
Did you have to put t-moldings at your transitions of room to room? We are putting it from our living room to our kitchen and there is a doorway (no door). Thanks
Luke Smith
Thanks for your tips about the possibility of needing to install laminate flooring tiles in weird angles and corners. I would imagine that anticipating that several tiles may need to be cut into pieces could definitely affect your choices on how many tiles to buy. I have an uncle who was thinking of installing laminate flooring in his kitchen. I will definitely have to pass on this advice, thanks!
Karen
We are having a problem with our installing the laminate flooring. As we work our rows, we look back and see that the board has popped out back at our starting point . How can we fix this problem?