Did you enter my Giveaway for a SODASTREAM yet?? There is still time! Go here to enter!
We have a problem at our house. My daughter loves to create things. (We have NO idea where she gets that from 🙂
Unfortunately, she has trouble throwing things away. And she wants everything she does to be hung up on our fridge. Our fridge ran out of room the other day and she started taping things to our windows. Not an ideal solution in my opinion. So I needed a way to fix the problem and help her realize that we just can't keep everything she does, even though it is all beautiful and special!
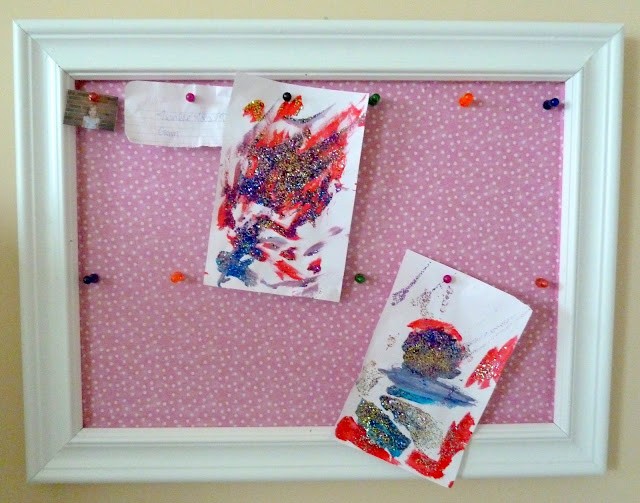
Luckily I found a bulletin board really cheap at Goodwill the other day so I snatched it up! I had originally planned on covering the cork board part with fabric and then painting the frame part white, but being inspired by another cork board re-do I saw recently, I decided to add a frame to it as well!
I enlisted my hubby's help and we went to work taking an ordinary cork board into a super cute girly bulletin board!
Here's how I did it:
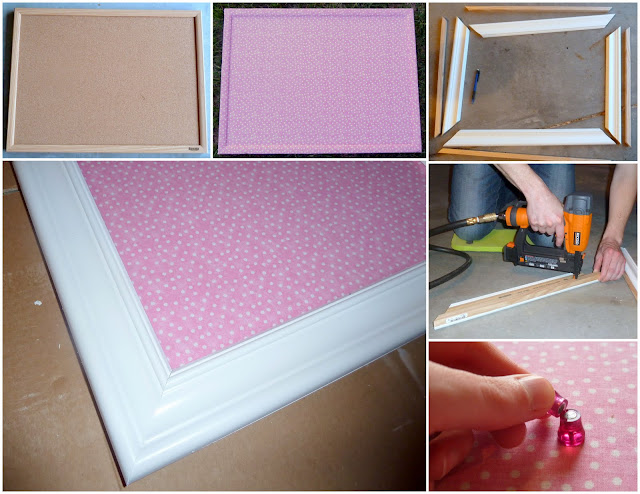
- First I found my bulletin board for just a couple of dollars at my local Goodwill store
- Using spray mount, I glued fabric (my daughter's choice) onto the entire board and even let it wrap around the sides
- Next we cut molding and 1x1 to fit around our bulletin board
- Then I had my husband use his nail gun to attach the 1x1 to the back of the molding. This created a "lip" and makes a nice clean edge all around the board.
- After the frame was built, we painted it white with good 'ole spray paint!
- We then attached the frame to the bulletin board using the nail gun
- Puttied, sanded and touched up the paint as needed.
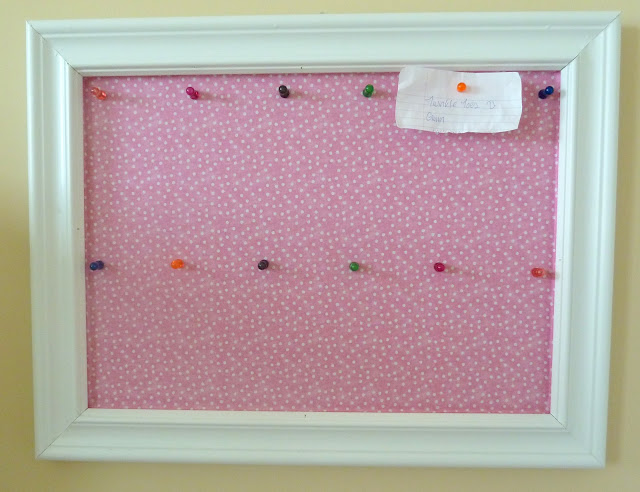
Then I found these really cool pins. By complete mistake!
I was in the clearance section at our WalMart (they are in the middle of remodeling it so it is kind of a disaster at the moment) but I grabbed these pins knowing my daughter would need pins to hang things on her bulletin board. They were 50 cents and had 6 pins in a box...not a great price but the looked a bit larger then normal pins and so I thought they would be easier for her to use then typical pins so I picked up two boxes.
When I actually went to put them on the board I realized the pins "broke" in half. You left the bottom part pinned into the bulletin board and the top came off and could be used as a magnet! (see photo above)
This sounds weird I know...but the thought of my four year old taking pins in and out of a cork board worried me a bit. Not that she couldn't do it, but that one would accidentally be left on the ground and my 1 year old would find it...you get the idea! So, this MAGICALLY solved my concerns by mistake! Now my daughter just uses the magnet portion of the pins to hang her things up!
It is super cool, way cute and girly, and so much cuter then the original one I bought!!
And, it solves our problem because if it doesn't fit on the bulletin board, something has to go! 🙂
I participate in the link parties found here.
Subscribe to Simply Designing by Email


A Lived in Home
Super cute! I was going to paint mine and cover with fabric, but I might have to try this instead!!
Celestial Charms
Wow, what a wonderful idea. Thanks so much for sharing this project.<br />Maureen
Megs
Great idea! That husband of yours is so handy 😉
Kelli @ RTSM
I love the new frame that you added and the fabric is too cute!
DigiMom
How fun! I love your bulletin board make-over. The fabric and molding really dress it up. 🙂
Ginger
Cute! That would look awesome in my girl's room. 🙂 (Came over from Sugar Bee Crafts) New follower. :)<br /><br />Just started my own link up party over at gingersnapcrafts.blogspot.com.<br /><br />Would love to have you link up. A giveaway is involved. :)<br /><br />Ginger <br />gingersnapcrafts.blogspot.com
The One Stop Baby Shop
Hi Ashley.. I'm your newest follower, I'm visiting from At the Picket Fence, I saw your link up there! Cute project! You can find me over here:<br />http://onestopbabygifts.blogspot.com
Gabe
I love how you added the pretty frame! It looks great! I love setting those boundaries for the kids, every one is so much happier that way!<br /><br />Those pins are great too!
At The Picket Fence
That is so adorable and I'm sure she just loves it! My son is a bit of a hoarder too so I totally get it! 🙂 Thanks so much for linking this up to Inspiration Friday this week~<br />Vanessa