A while ago, we decided to redo stairs in the main part of the house: you know, rip up the carpet and have hardwood stairs! And it was quite the project. Refinishing our stairs proved to be an exciting project and I am so excited to share our whole process with you!
Our home is lovely. We bought it as a spec home and the builder did a LOT of great things to our house. Many areas of our home are upgraded very nicely, but our carpet was not one of them. It is decent, and not much more.
And after only a year and a half of living in our home, the carpet on the stairs started to look really bad, worn and it actually became slippery. It was honestly dangerous to walk down our stairs. I took numerous spills because it was a little slick and I wasn't paying attention. So did my daughter. We knew we needed to do something.
I had a feeling that we had actual, nice wood underneath the carpet. My interior design instinct helped me pick up on a few things that lead me to believe that we might have great wood hidden under our carpet, but my husband wasn't totally convinced. And replacing all the treads is a costly thing.
So I decided to go check out another home that was being built in our neighborhood at the time and their carpet had not been installed yet. And I noticed the most amazing thing!! The hardwood used to construct the stairs was beautiful.
The treads were a nice yellow pine with rounded fronts. Yup. Seriously.
Being 95% sure we had the same thing underneath our carpet, I convinced my husband to rip a little of the carpet up, and sure enough!
We scored the redo stairs jackpot!! We had beautiful pine, rounded treads! AMAZING!
How redo stairs by removing carpet and prepping the wood.
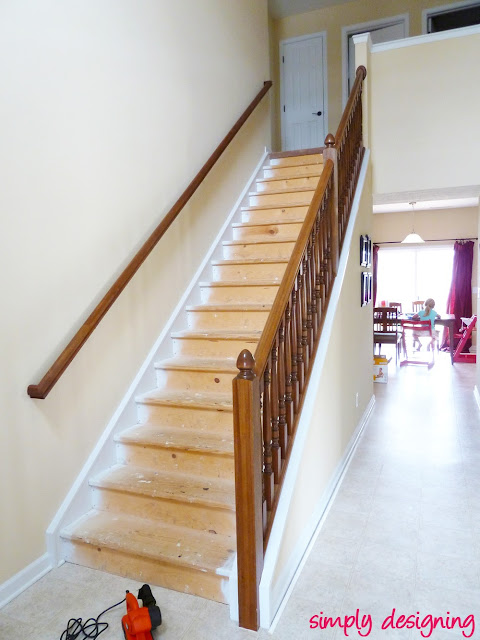
As soon as we knew we had nice wood under the carpet we ripped the carpet and padding up and began our journey to re-doing our stairs!
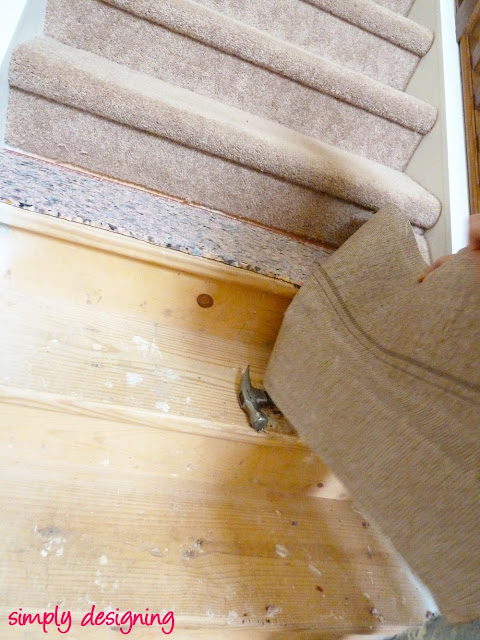
Carpet rips up quite easily! And the pad came up quickly as well.
The trick is being sure to get all of the staples out that kept the carpet and pad down.
It is tedious but not a hard process, just use a pair of pliers and start ripping the staples out.
When all the carpet was ripped off of the stairs and all of the staples were taken out, we ran into our first (of many) snafus.
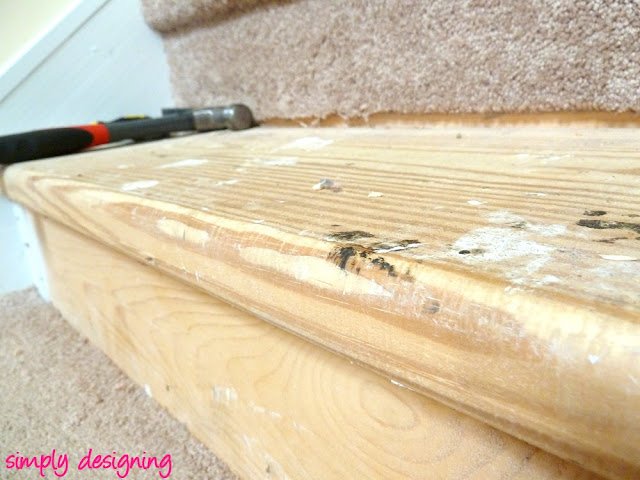
We noticed that when the molding was painted, the painters over-sprayed white paint all over the stairs. Since we were planning to paint the risers white that was no problem, but you can't stain over paint so we knew we would need to do an immaculate sanding job on the treads in order for the stairs to turn out nicely.
So after hours of sanding, and buying a second electric sander so we could both work on sanding at the same time, and a LOT of sandpaper, we finally got our stairs sanded, de-painted and prep-ed for the next step in refinishing our stairs.
However, this was only the beginning of our journey...
{to be continued}
You can read the whole Redo Stairs Series here:
Staircase Make-Over {Part 2}: and it all went downhill
Staircase Make-Over {Part 3}: the downhill spiral continues
Staircase Make-Over {Part 4}: are you kidding me!?!?
Staircase Make-Over {Part 5}: this was our final attempt...no matter what!
Staircase Make-Over {Part 6}: the finishing touches
*I am splitting this up into multiple posts because I have a LOT of information I want to share with you: a complete step-by-step guide. Along with every single mess-up we did. So stay tuned as I share our failures and our successes on our road to re-doing our stairs!
I would love for you to follow me on Facebook, Twitter, Google+, Pinterest and via email.
I participate in the link parties found here.


Party Box Design
what a huge project, it looks so nice! slipping on stairs... not fun! 🙂
Ashley Phipps
Oh thank you so much!! And thanks for stopping by!!<br /><br />Ashley
Suzy
My carpets are over 20 years old and today I just got fed up and started ripping out. We then looked up how to refinish stairs and came across your site. I never read a blog that game me hope and made me laugh at the same time. Thank you for telling about all your mistakes so I hope that we won`t make them. You are very inspiring.
Suzy
Ashley Phipps
I am so glad it was helpful Suzy! Thanks for stopping by and best of luck!
minhster
Been following your blog for awhile now, mostly for ideas for the silhouette but this post is also exactly what I'm looking for! We ripped out the carpet on our stairs about a year ago planning to do the same thing but we sort of "forgot" about it after that and just left it bare. Like your stairs, the wood underneath was still good as well, we haven't sanded or stained yet
Ashley Phipps
Oh I'm so glad this will be of use for you!!<br /><br />Stay tuned...we learned a lot and I want to share everything with you so you have an easier time then we did 🙂 We totally made a few rookie mistakes.<br /><br />But it actually is an easy process! So don't stress, just stay tuned and you'll know exactly how to do your stairs!!<br /><br />Thanks so much for stopping by! I'm
Heidi @ Happiness is Homemade
I can't wait to see the rest of this! I'm in the exact same situation, and I've been begging my hubby to let me tear out just a bit of carpet so I can see what's under there! So glad you're sharing the nitty gritty details! 🙂
Ashley Phipps
Oh thank you so much Heidi!! Oh gosh...I totally understand! Just get up a tiny corner and you'll know if it is good or if the wood will have to be replaced!! I hope you have great wood underneath it! :):)
Capturing Joy
Oh wow, that looks fabulous!!!
Ashley Phipps
Oh thank you so much Kirsten! And thanks for stopping by 🙂
grace
HI!--We are about to do our stairs...did you put anything down on the tread so no one slips? we are trying to find something to "rough" it up a little so we don't "bust it"!! Our stairs are straight up like yours with no landing...<br />Yours looks great!
Ashley Phipps
Grace - <br /><br />Good luck with your staircase re-do! Ours are not slippery at all. In fact they are far less slippery as wood then they were with carpet. It might have to do with the poly we used though...all details are coming I promise!!<br /><br />Ashley
cooking with curls
You are so lucky! I pulled up my carpet thinking I would have nice wood underneath, like the homes on HGTV! Nope, it was mismatched scrap lumber. I love the way it turned out, but it was ten times more work and money than I expected! 🙂 It will be fun to watch your transformation, and not have to do the work!
Ashley Phipps
Cooking with Curls,<br /><br />Oh man!! That does make it a lot more work!! Sorry :(<br /><br />But I bet they look lovely in the end!<br /><br />Ashley
Rebecca
I'm so happy to see this as I've been trying to convince my husband to do this for months now. Since we have 2 sets of stairs, one leading into the basement, he was able to check under the laundry room closet and look at the staircase for the bottom steps. The wood was nice pine, so we are assuming that they used the same material for the upstairs staircase. I can't wait to send
Ashley Phipps
Oh I'm so happy this will help you Rebecca!! And you are so luck to have nice wood as well! That makes the process a lot easier and a lot cheaper!<br /><br />Good luck!
Mandy Beyeler
Thanks for linking to Take-A-Look Tuesday over at Sugar Bee Crafts - you were featured today!<br />--Mandy, SugarBeeCrafts.com
Ashley Phipps
Thank you so much for the feature Mandy!!!
Caroline
Love what you did with your stairs! What did you use to fill the holes from the nails and staples? We used Wood filler but I am worried it will show with the stain...
Ashley Phipps
You can get wood filler that is stainable and you don't notice it as much.