• Skip to primary navigation
  • Skip to main content
  • Skip to primary sidebar

Simply Designing with Ashley

  • DIY
  • Oils
  • Recipes
  • Craft
  • Travel
  • Decor
  • Holiday
menu icon
go to homepage
  • DIY
  • Oils
  • Recipes
  • Craft
  • Travel
  • Decor
  • Holiday
search icon
Homepage link
  • DIY
  • Oils
  • Recipes
  • Craft
  • Travel
  • Decor
  • Holiday
×

Master Bathroom Remodel: Part 6 { How to Install New Shower Fixtures }

Published: Sep 4, 2014 · Modified: Mar 7, 2015 by Ashley Phipps · 615 words. · About 4 minutes to read this article. · 12 Comments · This post may contain affiliate links · This blog generates income via ads and sponsored posts · This blog uses cookies · See our privacy policy for more info Filed Under: DIY, Home Decor, Sponsored Post, Video

Did you see my post yesterday!?  I finally revealed my amazing new shower!!  If you missed it, be sure to hop on over HERE to read all about it and see the amazing photos!  I shared our whole process for tiling our shower including our stunning before and after photos!  But today I am so excited to share how we put the final touches on our shower with today's post: how to install new shower fixtures!

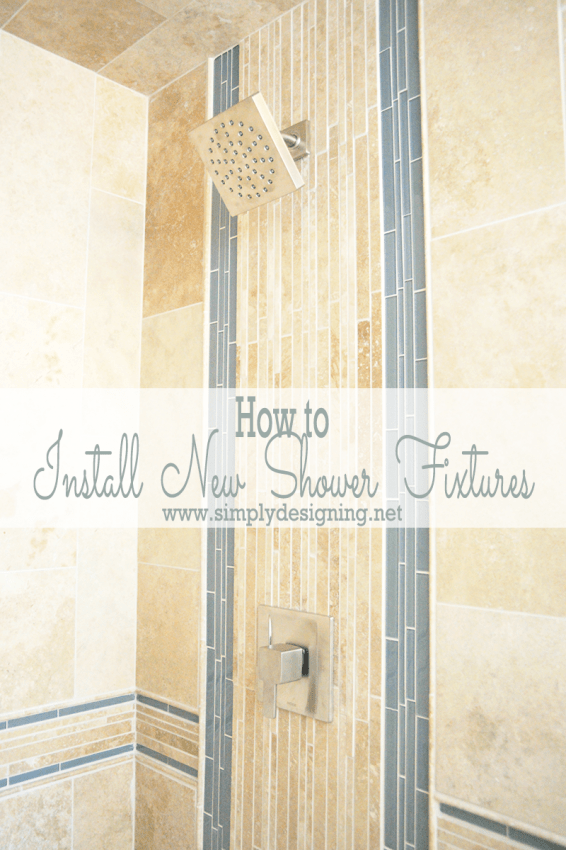
how to install new shower fixtures | #diy #bathroom #remodel

First of all, a huge thank you to Moen for sending me their incredible 90 Degree line of products to update and upgrade our bathroom!  I am a HUGE fan of Moen!  Their products are amazing (we have Moen in our downstairs bathroom here and in our kid's bathroom here).  They are incredibly sturdy, very well built and beautiful!  Everything a good bathroom fixture should be!  And even though we chose the 90 Degree line for our bathroom, if this isn't your style, there are so many options available to suit everyone's preference!

Instead of a typical tutorial, I decided to do a video of this project instead!!  So click below and watch my 3 minute video to see

How to Install New Shower Fixtures

Isn't it so easy!?  In about 3 minutes I showed you how to install new shower fixtures, and the entire project took no longer then 10-15 minutes to complete!  But by simply replacing our shower fixtures we have completely transformed our bathroom!

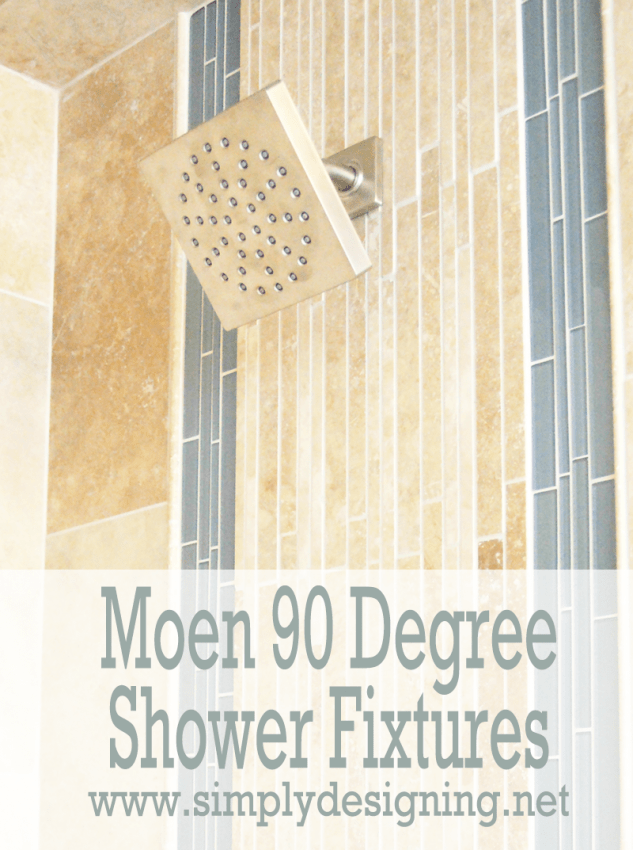
Here is a close-up of our shower head!  Isn't it so beautiful!  We love the clean lines and the modern style.  Our remodeled bathroom will have a modern spa-like feel to it and so these perfectly complimented the style we are going for.

And their LifeShine® finish guarantees that the finish won't tarnish, corrode or flake off!

Moen 90 Degree Shower Head | #diy #bathroom #remodel

And here is a close-up of our new 90 Degree Posi-Temp® control!  It is so smooth to turn!  I love the Posi-Temp® feature because it helps regulate water temperature.  Which means if someone flushes a toilet in the house, your shower water will remain the same temperature!  And if you have ever had this happen to you, and have been startled by either freezing cold or scalding hot water, you know that this is actually an amazingly important feature!

Moen 90 Degree Posi-Temp Shower Fixtures | #diy #bathroom #remodel


For this portion of our project we used: Moen 90 Degree Posi-Temp Shower Fixture, in Brushed Nickel

And as a sneak peak...we will also be installing Moen's 90 Degree Vessel Faucets, accessories and a grab bar in our bathroom soon!

I can't wait to finish up our master bathroom and share the rest of our process with you!

Check Out Our Master Bathroom Remodel Series:

Part 1:  Master Bathroom Inspiration

Part 2:  Master Bathroom Demo

Part 3:  Shower Remodel Prep

Part 4:  Building a Shower Pan

Part 5:  Tile the Shower

Part 6:  Installing Moen Posi-Temp® Shower Fixtures

Part 7:  How to Install Radiant Heated Tile Floors

Part 8:  Install New Tile Counter Tops

Part 9:  Install a Tile Accent Wall

How to Install a new Shower Door

How to Install new Bathroom Mirror Frames (in about 10 minutes!)

DIY Board and Batten

DIY Framed Mirror with Hidden Jewelry Organization

Please note that I am not a professional.  I am just sharing what worked for us.  As always please use all proper safety precautions and read and follow all manufacturer instructions.  Please note that I am not responsible in any way for any outcome if you try this yourself.  I am not liable for any injury or additional cost or expense incurred.  I always recommend consulting and hiring a professional if needed.  And always be sure to check with local building codes to obtain all permits needed for any DIY project.

More Home DIY

  • woman installing lpv flooring
    How to Install LVP Flooring and Why it is my FAVORITE Flooring for Families
  • image of guy in jeans installing lvp or laminate flooring - LVP vs LAMINATE FLOORING
    LVP vs Laminate Flooring: Differences, Pros and Cons
  • woman filling square firewood holder with firewood
    DIY Firewood Rack
  • bat house high up in a tree
    How to make a Bat House

Reader Interactions

Comments

  1. Kim (TheKimSixFix)

    September 04, 2014 at 11:40 pm

    What a beautiful shower!! I love the fixtures you chose.

    Reply
    • Ashley Phipps

      September 05, 2014 at 1:47 pm

      Thank you so much Kim! And thanks for stopping by!

      Reply
  2. sharon garofalow

    September 04, 2014 at 11:49 pm

    What a gorgeous shower head! What a gorgeous shower!

    Reply
    • Ashley Phipps

      September 05, 2014 at 2:16 pm

      Thank you so much Sharon!

      Reply
  3. Emily

    September 05, 2014 at 9:58 am

    Oh that is awesome!! I need mine done :o) Pinned it..

    Reply
    • Ashley Phipps

      September 05, 2014 at 2:17 pm

      Thank you so much Emily! And thanks for pinning!

      Reply
  4. Jennifer Priest

    September 05, 2014 at 9:21 pm

    Wow that is gorgeous!!! I love the tutorial as well-- answers alot of questions!!

    Reply
    • Ashley Phipps

      September 14, 2014 at 11:33 pm

      Thank you so much Jennifer! And thanks for stopping by!

      Reply
  5. Kelly

    September 05, 2014 at 11:27 pm

    Thanks for the tutorial -- congrats on the fab bathroom remodel too!

    Reply
    • Ashley Phipps

      September 14, 2014 at 11:34 pm

      Oh thank you so very much Kelly! 🙂

      Reply
  6. Stacy Molter

    September 06, 2014 at 7:18 pm

    Absolutely gorgeous! Thank you for all the great tutorials and information too!

    Reply
    • Ashley Phipps

      September 14, 2014 at 11:34 pm

      Oh thank you Stacy!! I appreciate you stopping by!

      Reply

Leave a Reply Cancel reply

Your email address will not be published. Required fields are marked *

Primary Sidebar

Hello Friends!

Ashley Phipps Simply Designing I'm Ashley Phipps and I love sharing SIMPLE DIY, home, travel, food, craft and essential oil ideas with you! Learn more about me here. Contact me here. Find Media/PR info here. Privacy is important to us. Please read my Privacy Policy.
  • Email
  • Facebook
  • Instagram
  • Pinterest
  • Twitter
  • YouTube

Join our mailing list

Get our latest updates & exclusive content!

Privacy Policy, Disclaimer & Terms of Use

Favorite Posts

image of guy in jeans installing lvp or laminate flooring - LVP vs LAMINATE FLOORING

LVP vs Laminate Flooring: Differences, Pros and Cons

St. Patrick's Day Printables


COPYRIGHT: You’re welcome to link to Simply Designing or use a single image with a brief description to link back to any post. Republishing posts in their entirety is strictly prohibited.  Any use for commercial purposes is strictly prohibited. Feel free to pin on Pinterest. Find out more in my Privacy Policy.  Simply Designing with Ashley Phipps LLC is a participant in the Amazon Services LLC Associates Program, an affiliate advertising program designed to provide a means for sites to earn advertising fees by advertising and linking to Amazon.com . Simply Designing with Ashley Phipps LLC and it’s owner, employees and affiliates are not liable in any way for injury or loss (whether physical, emotional, monetary or any other kind of loss) resulting from any inspiration, ideas, directions or information gained from this website. We advise you to always follow manufacturer instructions, take appropriate safety precautions and hire a professional when in doubt. We love it when you use our site for inspiration, but by using it, you agree that you do so at your own risk.

Privacy Policy 

Copyright © 2025