• Skip to primary navigation
  • Skip to main content
  • Skip to primary sidebar

Simply Designing with Ashley

  • DIY
  • Oils
  • Recipes
  • Craft
  • Travel
  • Decor
  • Holiday
menu icon
go to homepage
  • DIY
  • Oils
  • Recipes
  • Craft
  • Travel
  • Decor
  • Holiday
search icon
Homepage link
  • DIY
  • Oils
  • Recipes
  • Craft
  • Travel
  • Decor
  • Holiday
×

DIY Modern End Table and Chatbook Holder

Published: Jul 15, 2017 · Modified: Nov 30, 2017 by Ashley Phipps · 997 words. · About 5 minutes to read this article. · 4 Comments · This post may contain affiliate links · This blog generates income via ads and sponsored posts · This blog uses cookies · See our privacy policy for more info Filed Under: DIY, Home Decor, Sponsored Post

This is a sponsored post written by me on behalf of Devine Color for IZEA. All opinions are 100% mine.

ad?ca=55061&cr=blogs&ce=izea&ci=nlsnci1013&am=3&aa=1&at=view&rt=banner&r=[RANDOM] DIY Modern End Table and Chatbook Holder 1 end table

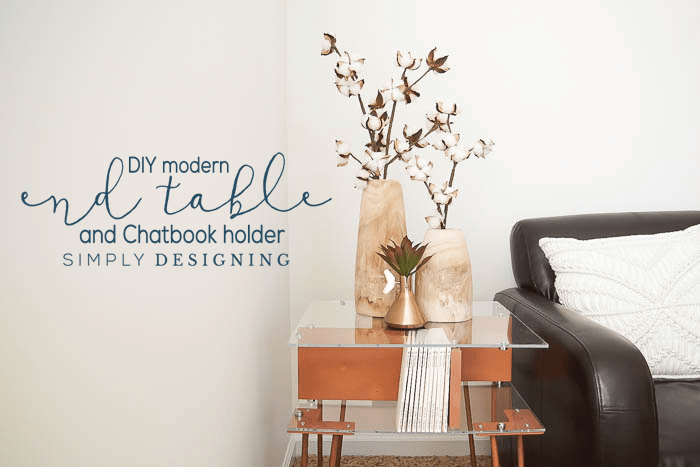
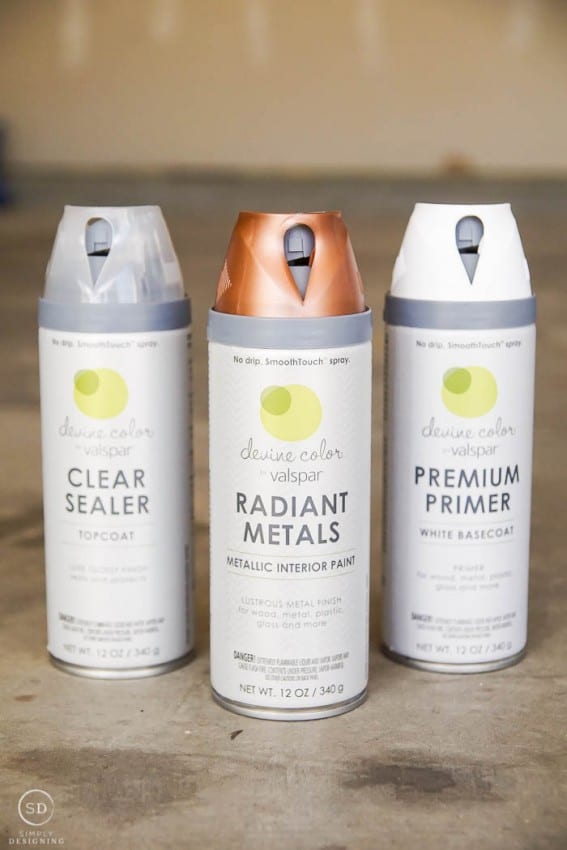
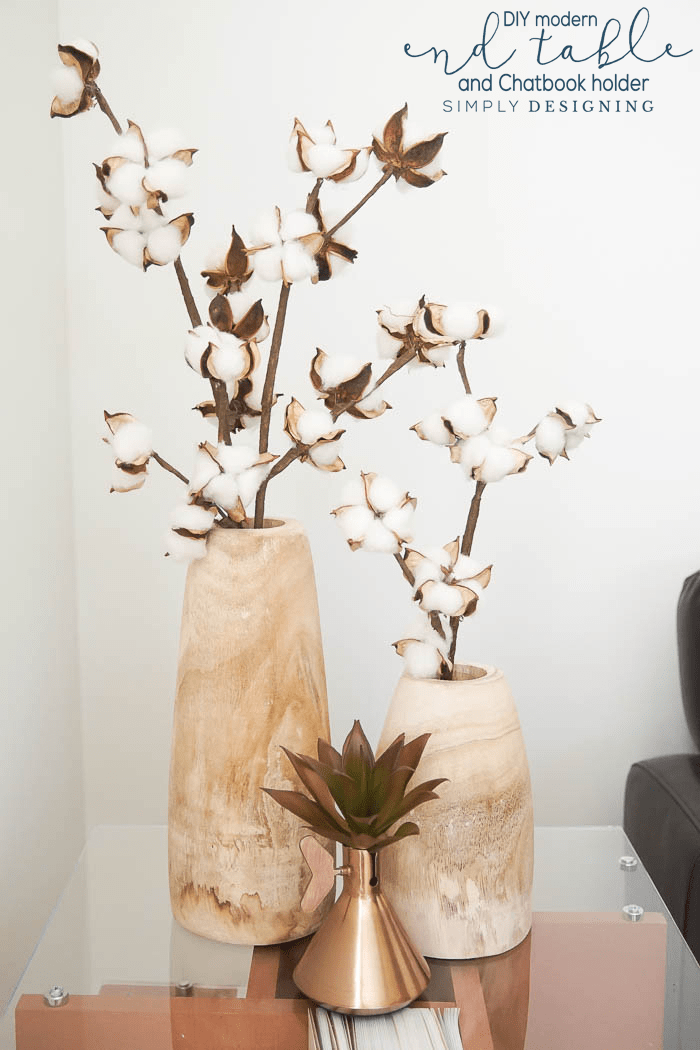
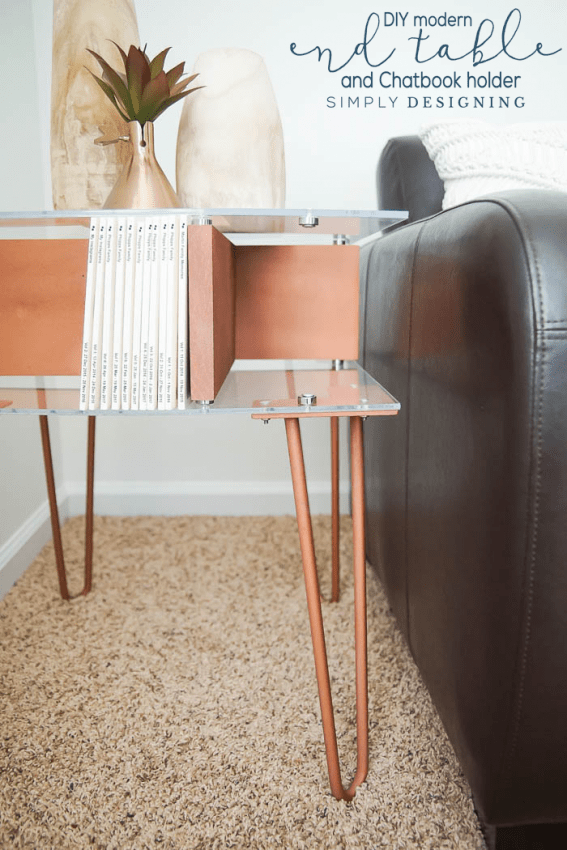
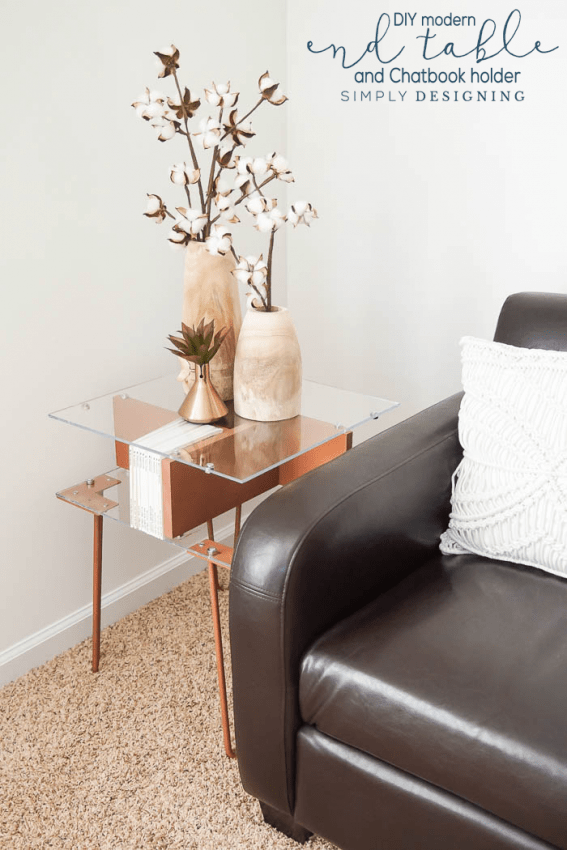
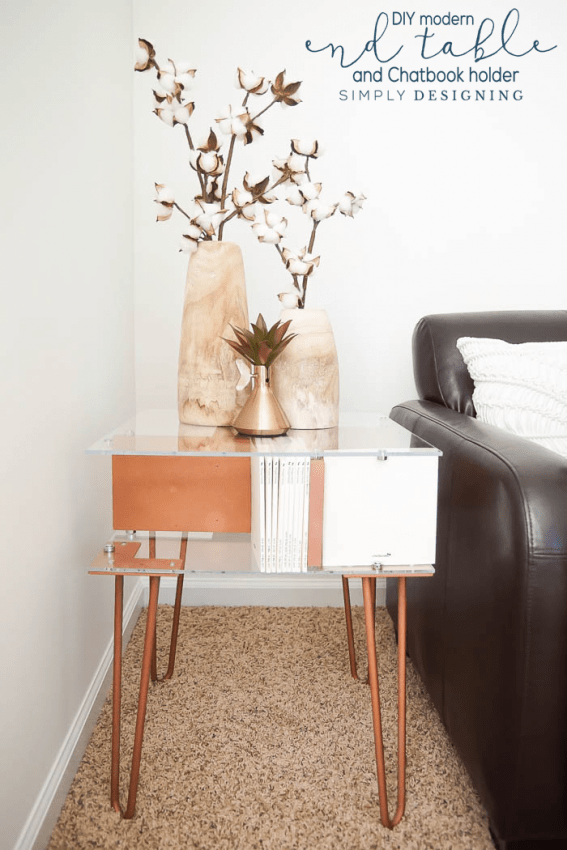
ad?ca=55061&cr=blogs&ce=izea&ci=nlsnci1013&am=3&aa=1&at=view&rt=banner&r=[RANDOM] DIY Modern End Table and Chatbook Holder 2 end table ad?ca=55061&cr=blogs&ce=izea&ci=nlsnci1013&am=3&aa=1&at=view&rt=banner&r=[RANDOM] DIY Modern End Table and Chatbook Holder 2 end table In our bedroom we have a chair.  I love that chair.  I read in it.  I feed my baby in it.  It is an often used, well loved chair.  But for a long time I have been wishing I had a modern end table beside it.  Somewhere to set my book or a drink.  And so after a lot of stewing and brainstorming I came up with a fun plan to build my own DIY modern end table and chatbook holder.  Yes, that's right, this end table also doubles as chatbook storage or any other small book storage, or just a fun place to put some unique decor items.  Really the options are so endless!  This is the perfect little end table and it fits perfectly in my bedroom next to my cozy little chair!  And today I am excited to show you how to make your own DIY Modern End Table and Chatbook Holder. DIY Modern End Table and Chatbook Holder - this end table has a lot of style and storage - photobook storage - chatbook storage - end table - modern end table - copper end table - diy end table The great thing about this modern end table is that you can truly modify this to meet your needs.  If you need it a little smaller, taller, longer, wider you can totally do that!  Just tweak the measurements to fit your space and your needs!  If you have something else you want it to hold instead of photobooks, you can tweak the sizes to fit that as well!  The options are really endless! Modern End Table that is easy to make yourself in a weekend When I was designing this little end table in my head, what I really wanted was something fun, unique, modern and in a color that was different and fun!  I was hoping for a metallic but not just any metallic, I wanted COPPER!  Yes.  Copper!  I just adore copper!  It is such a warm and beautiful metallic and when I found Copper Spray paint from the Devine Color line at Target, I knew this would be the perfect color for my table! metallic spray paint devine   I love shopping at Target and I really love that while I am in the store already, I can quickly grab a can of paint or spray paint from their exclusive Devine Color brand.  In my store this is located in the Home Improvement section near the light bulbs and other home improvement items.  I chose Devine Metallic Copper for this project and I really do love how it turned out.  I also used a Devine Primer and a Devine Clear Coat both in spray paint.  And I love how the color choices available work really well with the decor options available at Target. modern end table with farmhouse style decorations Since I grabbed my paint for this project at Target, I also grabbed two really cool wood vases, a copper candle holder and a succulent as well!  I used some cotton stems I already had at home in the wood vases and then placed the succulent into the copper candle holder and it makes my new end table so pretty!  I also grabbed a fun macrame pillow to put on my chair too!  I love how it all coordinates and looks great together!

DIY Modern End Table and Chatbook Holder

DIY end table supplies

Supplies You Will Need:

  • (2) sheets 18" x 18" x ¼" Plexiglass (Pro tip: if you can't find it pre-cut in this size, ask the hardware store to cut it for you!)
  • (4) 16" Hairpin Legs
  • 1" x 6" x 6' Wood Board
  • (16) ¼" x ¼" Chrome Spacers
  • (8) ½" Screw Post
  • (8) #8 1 ¼" Wood Screws
  • (12) #8 Lock Nuts and #8 ¾" Screws
  • Wood Glue
  • Nail Gun with Brad Nails
  • Compound Miter Saw
  • Electric Sander
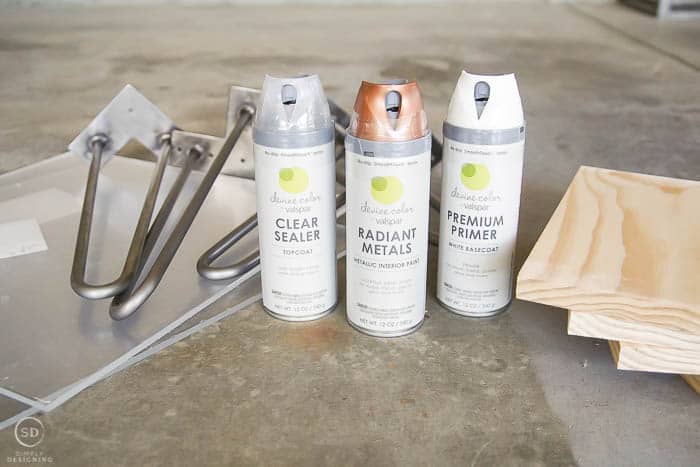
  • (2) cans of Devine Color + Target Metallic Copper Spray Paint
  • (2) cans of Devine Color + Target Primer
  • (1) can of Devine Color + Target Clear Coat

Instructions:

cut wood with compound miter saw

*Remember to always follow manufacturer instructions when using any tools or supplies.  Please wear and use appropriate safety gear and follow all safety guidelines, especially when using tools. 

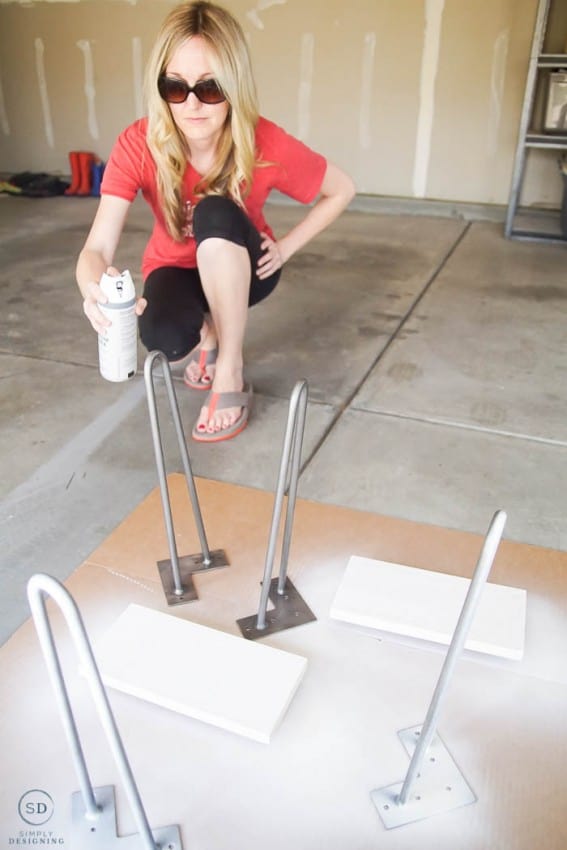
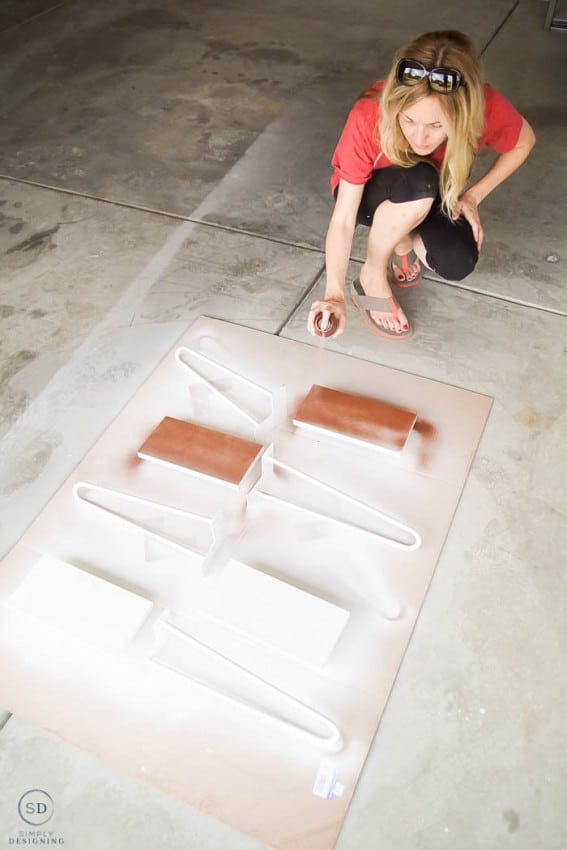
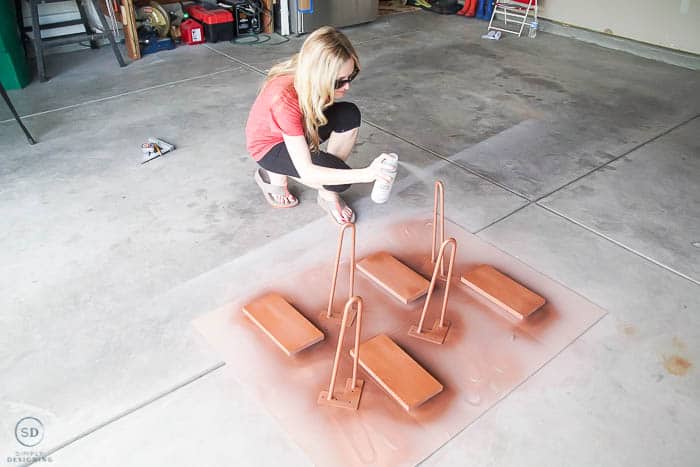
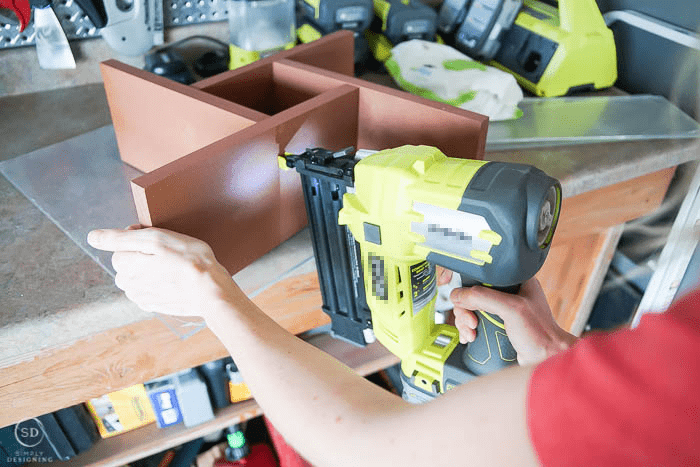
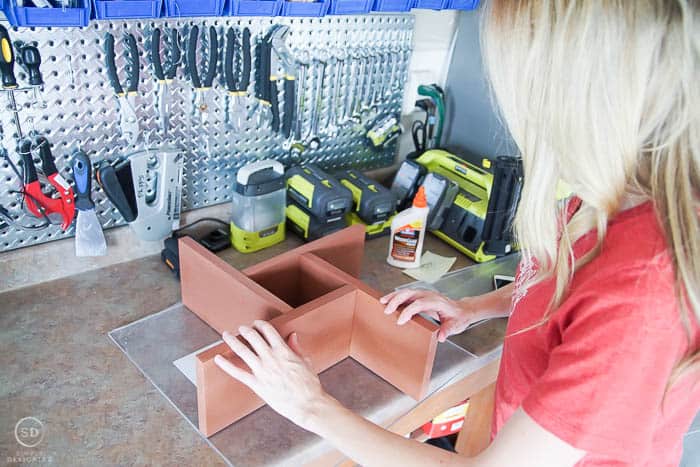
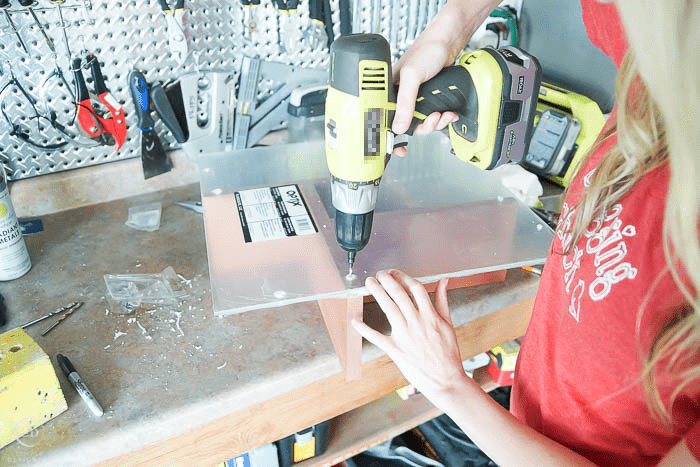
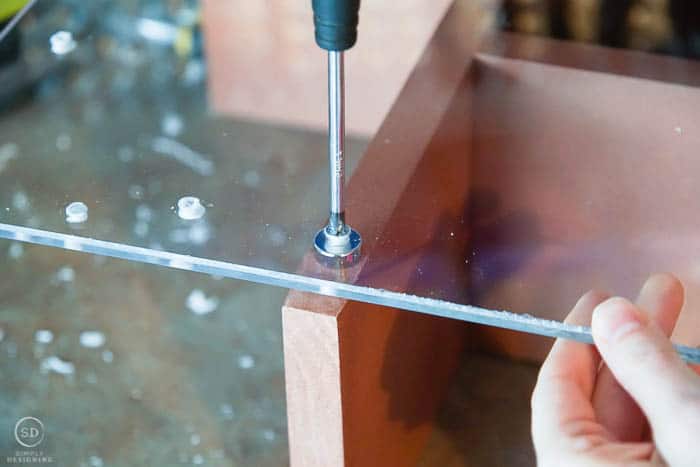
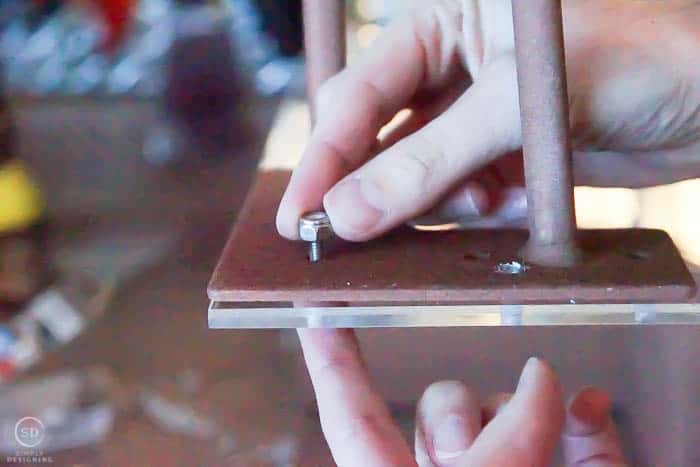
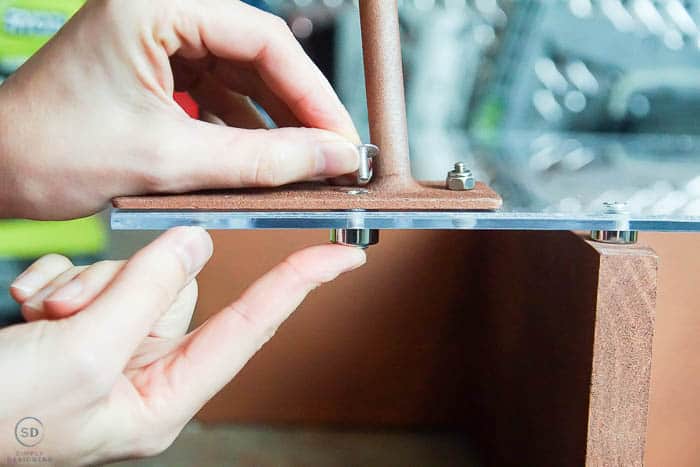
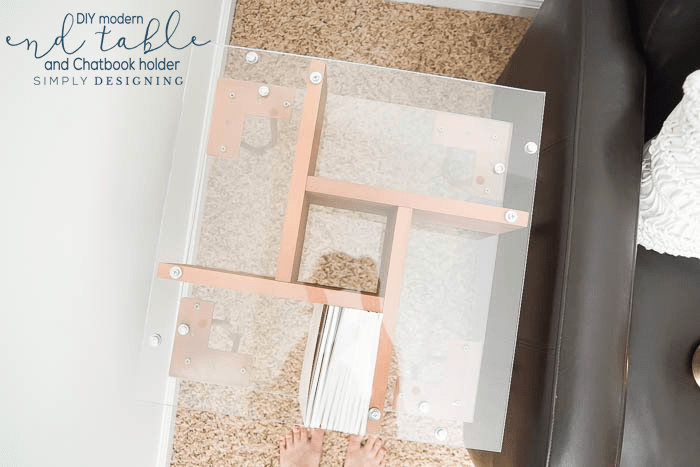
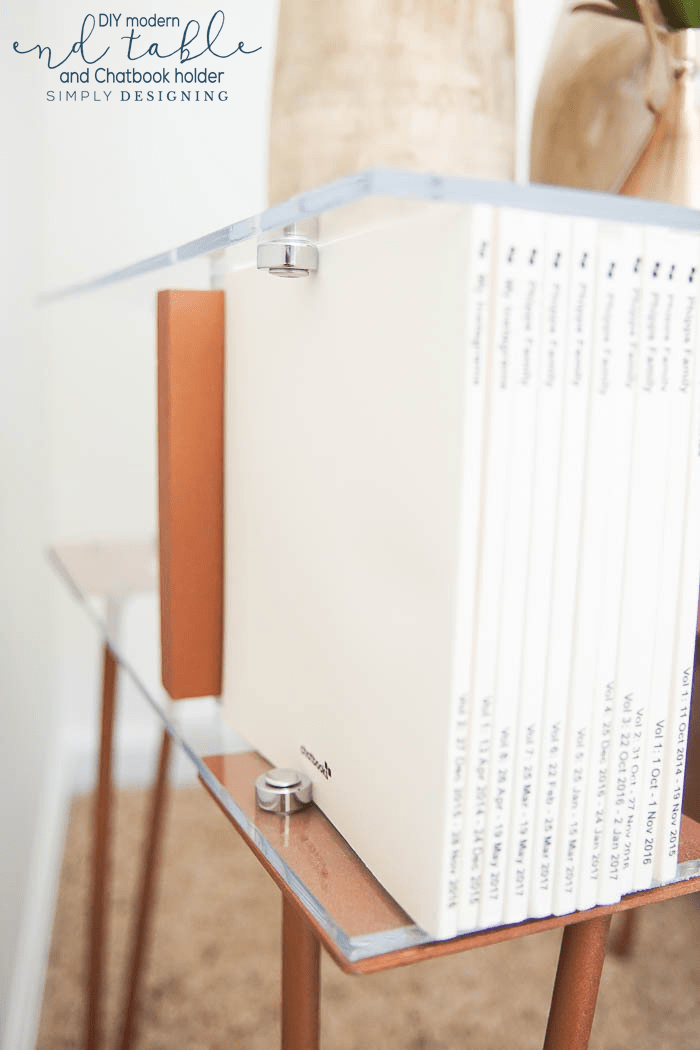
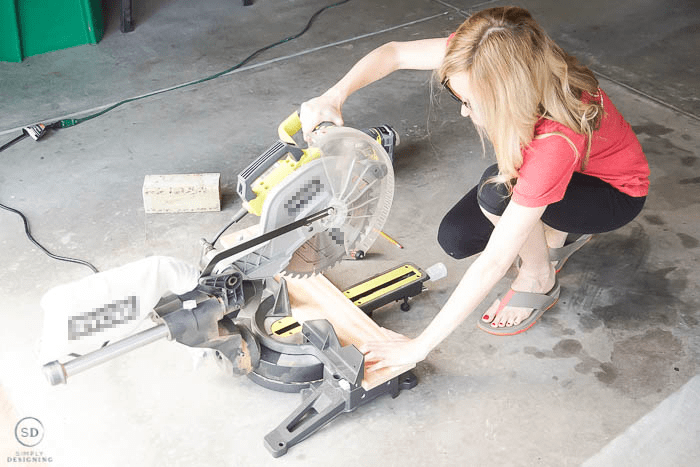
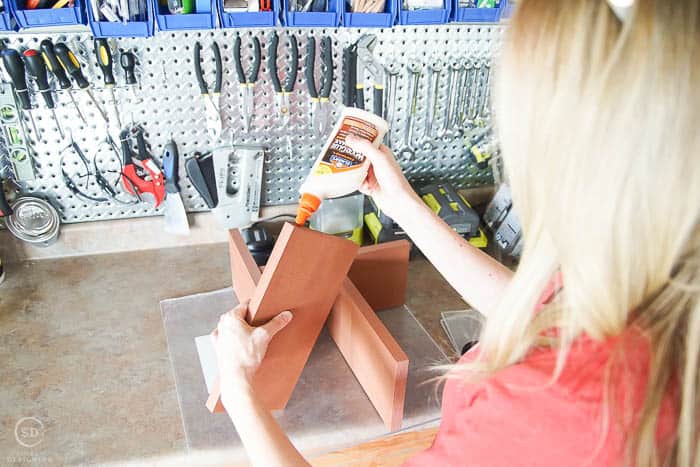
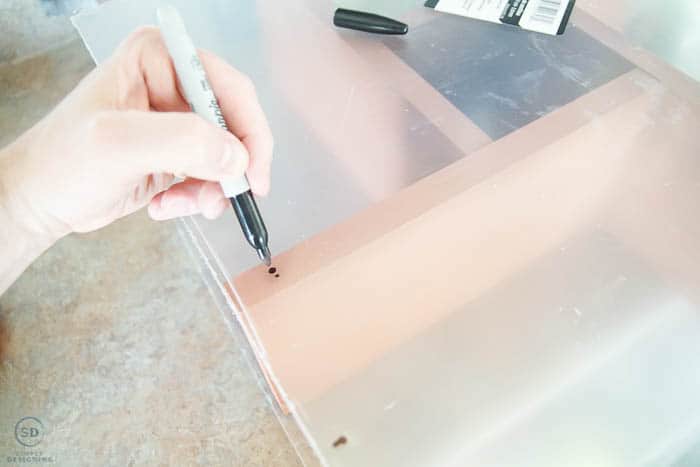
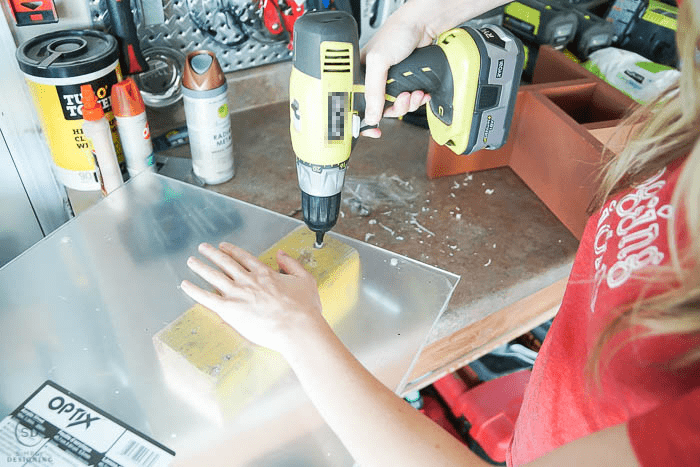
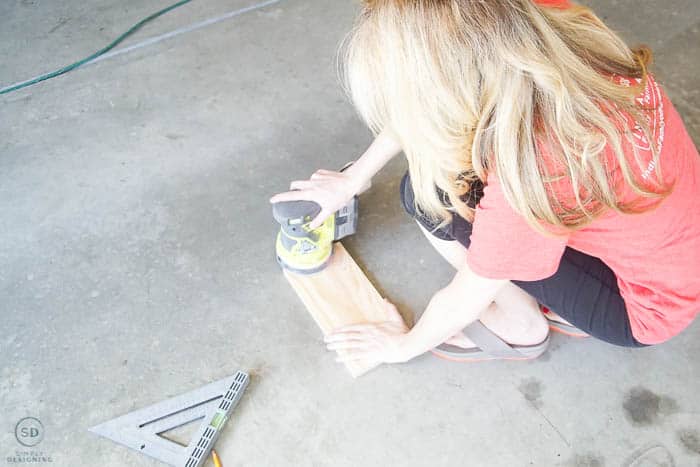
First we used our compound miter saw to cut the wood into (4) 11 ¼" lengths. sand wood prime parts for diy end table paint parts for diy end table with metallic copper spray paint clear coat parts for diy end table Then we sanded, primed, painted and clear coated the boards.  We followed all the recommended application and dry times on the back of the spray can.  We also primed, painted and clear coated the hairpin legs at the same time. glue end table togethernail gun end table together modern end table After they were dry, we used wood glue and a nail gun to attach the wood boards together as shown in the image. mark holesdrill holes in plexiglassdrill pilot holes into table Then we used a countersink drill bit to drill 4 holes in the top and bottom of the plexiglass in order to attach the wood boards to the plexiglass pieces.  We also added 4 additional holes for the bookend pieces in both pieces of plexiglass.  And 12 holes for the hairpin legs only on the bottom piece of plexiglass.  (Pro tip: go really slow when drilling through plexiglass, if you go too fast it can melt the plexiglass and if you try to push the bit through too hard, you can break the plexiglass.)  We also drilled pilot holes into the wood using a bit smaller than a #8 screw in order to avoid splitting the wood. attach end table top and bottom attach legs to end table invisible book ends At this point we attached the plexiglass to the wood using #8 wood screws and chrome spacers.  Then we attached the legs to the plexiglass using the #8 screws and lock nuts.  We attached the bookend spacers using the screw posts.  (The point of these screw posts and spacers is to help keep the books from falling out the end without being too obvious, like an invisible bookend.) Modern End Table Design I love how this table looks from the top down. chatbook storage - chatbook holder - photobook storage - photobook holder - invisible bookends And I love how the little "invisible" book ends keep our photobooks perfectly in place! Modern End Table with Hairpin Legs and photobook storage And that's it! DIY Modern End Table and Chatbook Holder We brought it up to our bedroom and decorated it with a few fun items we found at Target! Copper Modern End Table with Photobook Storage It is the perfect modern end table to place by our chair!  And I love that it's the perfect chatbook holder too! For more great ideas you can check out Devine Color on Instagram.
Visit Sponsors Site

ad?ca=55061&cr=blogs&ce=izea&ci=nlsnci1013&am=3&aa=1&at=view&rt=banner&r=[RANDOM] DIY Modern End Table and Chatbook Holder 4 end table

More diy Recipes

  • DIY Farmhouse Shelf perfect shelf to add to your home to create a pretty farmhouse look How to Make a Farmhouse Shelf 5 end table
    How to Make a Farmhouse Shelf
  • How to Build your own Industrial Loft Bed with Rock Climbing Wall and Firemans Pole Industrial Loft Bed with Rock Wall and Fireman's Pole 6 end table
    Industrial Loft Bed with Rock Wall and Fireman's Pole
  • How to Make a Karate Belt Holder Easily How to Make a Karate Belt Holder Easily 7 end table
    How to Make a Karate Belt Holder Easily
  • How to Make Industrial Planter Boxes How to Make Industrial Planter Boxes 8 end table
    How to Make Industrial Planter Boxes

Reader Interactions

Comments

  1. Jenna

    July 19, 2017 at 8:44 am

    What a great table! So pretty, but modern at the same time! Love those colors you used!

    Reply
  2. Bobbi

    July 19, 2017 at 4:46 pm

    What a great design! I'm a modern girl so this look is right up my alley.

    Reply
  3. Lynn Woods

    July 24, 2017 at 4:34 pm

    This would great in my office! Thanks fr sharing at the #HomeMattersParty!

    Reply
  4. Allen Michael

    January 29, 2018 at 5:43 am

    I love that this end table is versatile and has so many compartments. This is really a perfect design for a minimalist, modern living room as well.
    Painting the wood into copper is a great touch, it made the design look more on trend. And great job on the "invisible" book stopper too! Thanks for sharing!

    Reply

Leave a Reply Cancel reply

Your email address will not be published. Required fields are marked *

Primary Sidebar

Hello Friends!

Ashley Phipps Simply Designing I'm Ashley Phipps and I love sharing SIMPLE DIY, home, travel, food, craft and essential oil ideas with you! Learn more about me here. Contact me here. Find Media/PR info here. Privacy is important to us. Please read my Privacy Policy.
  • Email
  • Facebook
  • Instagram
  • Pinterest
  • Twitter
  • YouTube

Favorite Posts

School Supplies for Grownups - featured image

Back to School Supplies for Grownups

Back to School Printable _ Youre Off to Great Places _ Featured Image

Back to School Printable | "You're off to Great Places"


COPYRIGHT: You’re welcome to link to Simply Designing or use a single image with a brief description to link back to any post. Republishing posts in their entirety is strictly prohibited.  Any use for commercial purposes is strictly prohibited. Feel free to pin on Pinterest. Find out more in my Privacy Policy.  Simply Designing with Ashley Phipps LLC is a participant in the Amazon Services LLC Associates Program, an affiliate advertising program designed to provide a means for sites to earn advertising fees by advertising and linking to Amazon.com . Simply Designing with Ashley Phipps LLC and it’s owner, employees and affiliates are not liable in any way for injury or loss (whether physical, emotional, monetary or any other kind of loss) resulting from any inspiration, ideas, directions or information gained from this website. We advise you to always follow manufacturer instructions, take appropriate safety precautions and hire a professional when in doubt. We love it when you use our site for inspiration, but by using it, you agree that you do so at your own risk.

Privacy Policy 

Copyright © 2022