• Skip to primary navigation
  • Skip to main content
  • Skip to primary sidebar

Simply Designing with Ashley

  • DIY
  • Oils
  • Recipes
  • Craft
  • Travel
  • Decor
  • Holiday
menu icon
go to homepage
  • DIY
  • Oils
  • Recipes
  • Craft
  • Travel
  • Decor
  • Holiday
search icon
Homepage link
  • DIY
  • Oils
  • Recipes
  • Craft
  • Travel
  • Decor
  • Holiday
×

How to Install Tile {Tile Installation: Part 3} #thetileshop @thetileshop

Published: Feb 25, 2014 by Ashley Phipps · 1317 words. · About 7 minutes to read this article. · 3 Comments · This post may contain affiliate links · This blog generates income via ads and sponsored posts · This blog uses cookies · See our privacy policy for more info Filed Under: DIY


Please read Part 1 of our Tile Installation Journey HERE first.
Please read Part 2: How to Install Concrete Backer Board HERE first. 

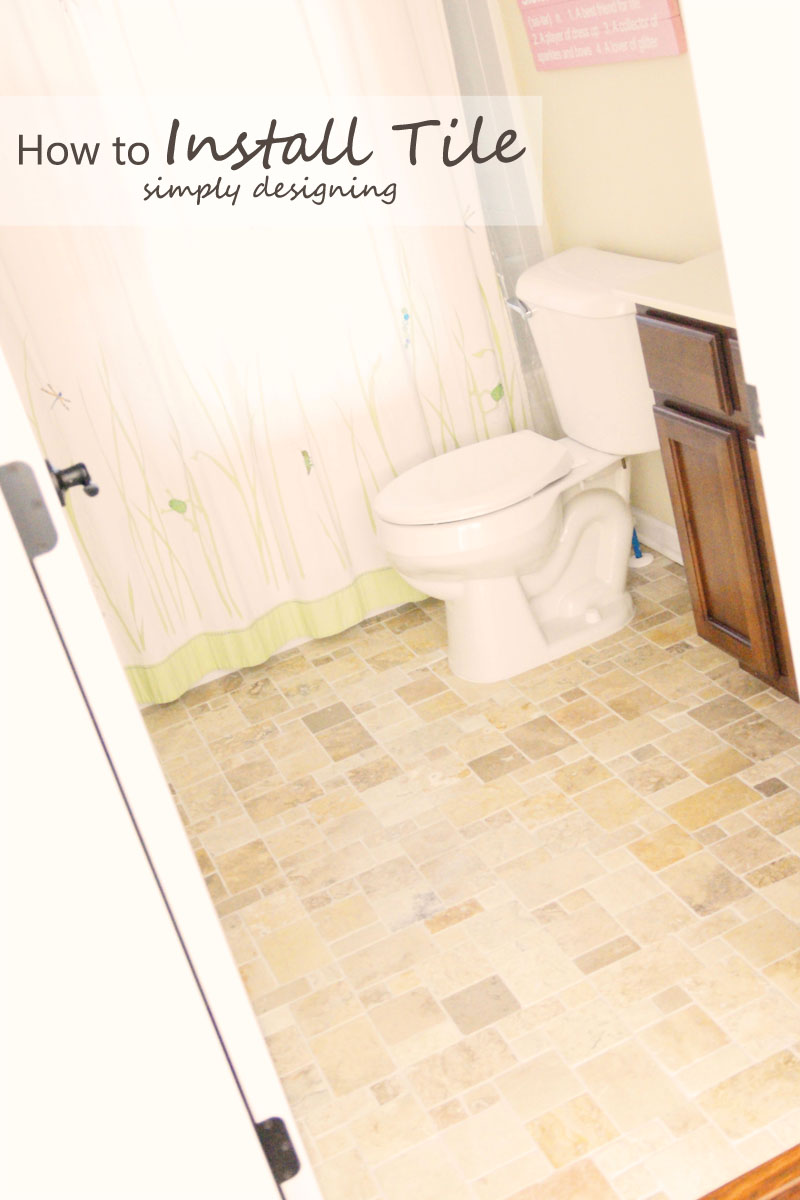
We have been hard at work prep-ing our kid's bathroom floors for tile installation!  You should read all about how we picked our tile and demo'd our floors and how to install concrete backer board first!  If you want a good tile installation, it is important to do all of the prep work well first.  After we had completed that, our tile installation actually went very very quickly!  This tile was much quicker to install then our Herringbone Tile was and it still ended up looking amazing!

How to Install Tile | a complete tutorial for how to demo, prep, install concrete backer board and install tile | #diy #bathroom #tile #thetileshop @thetileshop

  
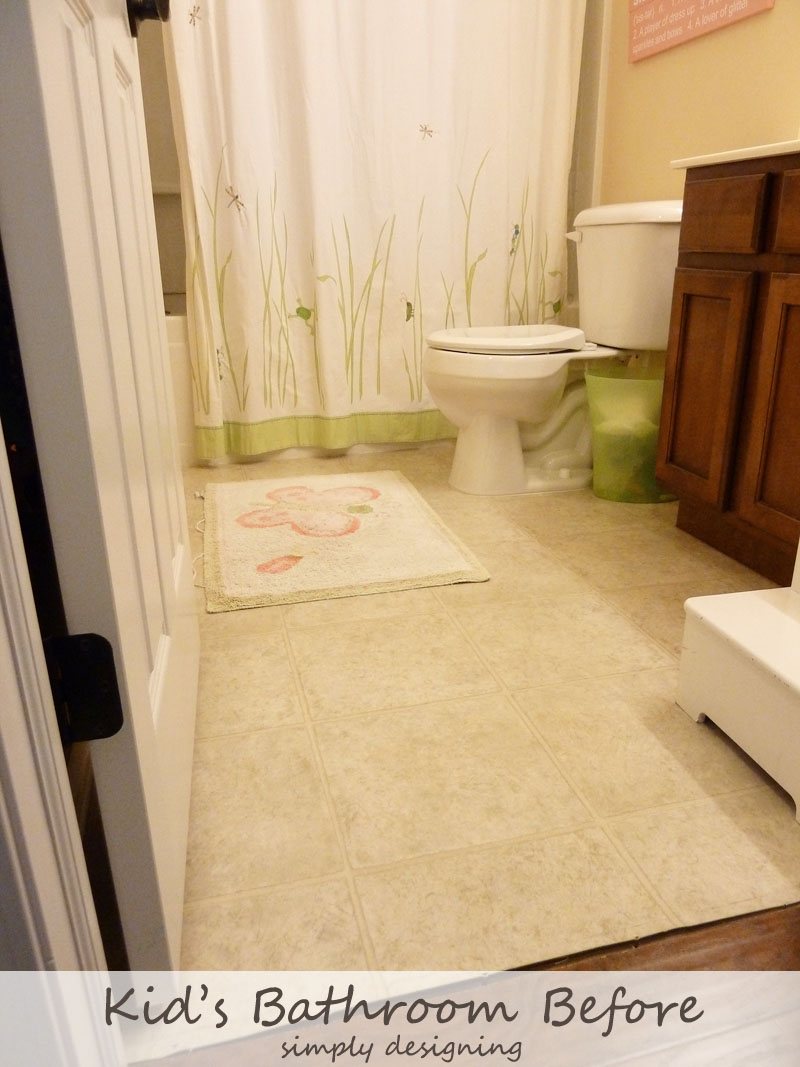
We absolutely LOVE how our bathroom tile floors turned out!  In case you don't remember, here is how they looked before.

How to Install Tile: before photo | a complete tutorial for how to demo, prep, install concrete backer board and install tile | #diy #bathroom #tile #thetileshop @thetileshop


Here is a basic supply list of what we used to complete this project.  (Thank you to The Tile Shop for sending us many of these supplies in order to complete our project.)

Supplies

  • Tile:  Summit Random 30cm ST - 180 657816
  • Grout:  Desert Sand, Sanded
  • Flexible Grout Admixture
  • Poultice Stain Remover
  • Proflex Thinset (aka mortar)
  • Travertine Sealer
  • Trowel
  • Notched Trowel
  • Grout Float Tool
  • Mortar Mixing Paddle (for use with a power drill)
  • Large Sponge
  • Sealer Sponge
  • ⅛" Spacers
  • Tile Saw
  • Eye Protection
  • Ear Protection
  • 3+ Buckets (one for mortar, grout and water)
  • Ryobi AirStrike Nail Gun
  • Caulk
  • Touch-Up Paint and Foam Brush
  • Bristle cleaning brush
  • Items to re-install toilet

Here is how you will install new tile floors!

Random Pattern Travertine Tiles | a complete tutorial for how to demo, prep, install concrete backer board and install tile | #diy #bathroom #tile #thetileshop @thetileshop


How Much Tile Do I Need?

To figure out the correct tile amount, you will take the square footage of your room (length times width) and add 10%.  Then round up to the next full box size and order that many boxes. 

You need to account for a bit of breakage as well as cuts, and mistakes and this formula does just that.


How to Install Concrete Backer Board | a complete tutorial for how to demo, prep, install concrete backer board and install tile | #diy #bathroom #tile #thetileshop @thetileshop


Demo and Prep

See HERE for more information about our Demo.
And see HERE for more information on our concrete backer board installation.


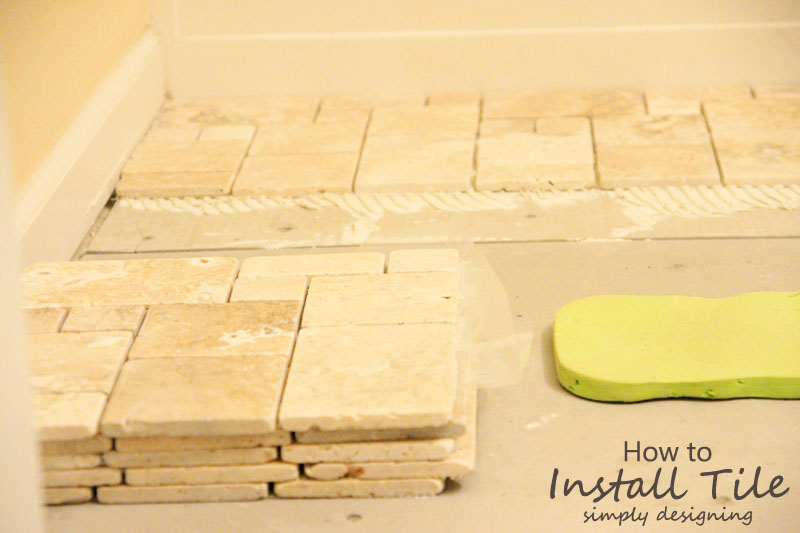
Travertine Tile Installed without Grout | a complete tutorial for how to demo, prep, install concrete backer board and install tile | #diy #bathroom #tile #thetileshop @thetileshop


Where to Begin My Tile?

It only sort of matters where you begin your tile installation, there are many "right" answers.  Here are a few things to take into consideration:

  • The tiles should be centered left to right
  • Where do you want your cut lines to be?  Do you want a full row of tile right by your door, or against another wall?  Or would you prefer to split it in the middle?
  • Take into consideration the size of your tile and any pattern you may have.
  • Lay it out first to be sure you like it prior to final installation

After laying our tile out several ways, we decided to start along the tub and work our way towards the front of the bathroom.  


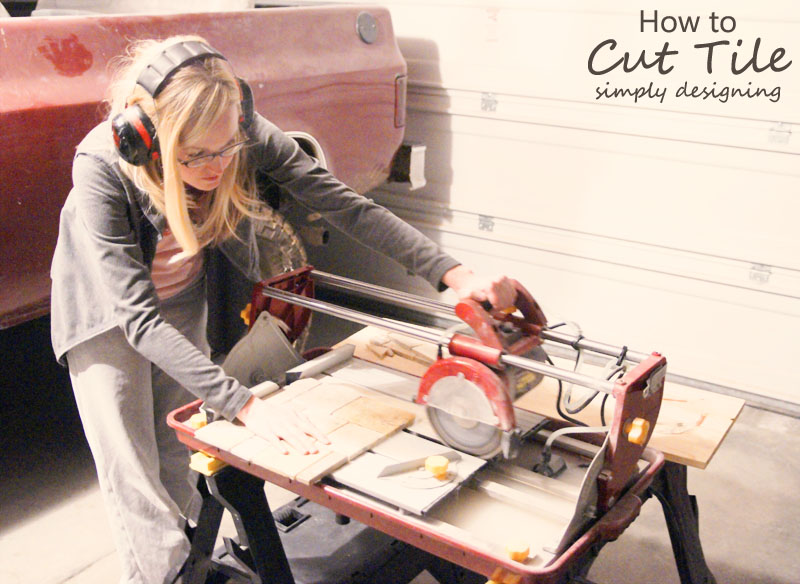
How to Cut Tile with a Tile Saw | a complete tutorial for how to demo, prep, install concrete backer board and install tile | #diy #bathroom #tile #thetileshop @thetileshop


Cut Tile
Because I had already used our tile saw on our herringbone tile project, I was not worried about using it this time!  Go HERE to read tips and tricks for using and purchasing a tile saw.
Please be sure to use eye and ear protection when using a tile saw.  Also always read manufacture instructions and use common sense!  While tile saws are easy to use, you do want to be careful to not injure yourself!  
But, if I can use one, so can you! (In my unprofessional opinion.)


Installing Tile : Apply Thinset | a complete tutorial for how to demo, prep, install concrete backer board and install tile | #diy #bathroom #tile #thetileshop @thetileshop


Thinset (mortar)
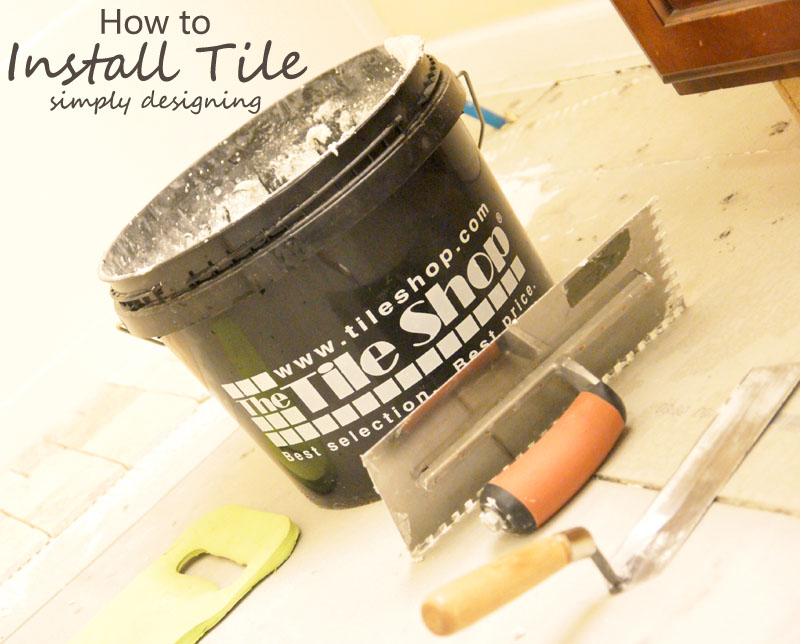
You will mix your thinset powdered mixture with water until it is a toothpaste-like consistency.  We used a mortar mixing paddle attached to our drill and it was really easy and quick!


Installing Tile | a complete tutorial for how to demo, prep, install concrete backer board and install tile | #diy #bathroom #tile #thetileshop @thetileshop


Lay Your Tile

There are several ways to lay your tile (I talk more about them here) but because of how simple and quick this installation would be, we decided to spread the thinset directly onto the concrete backer board using our notched trowel. 
After you spread thinset onto your backer board, you will hold the notched trowel at a 45 degree angle to the floor to create grooves.  This allows room for the tile to be put into place without the thinset expanding too much.  
Because this tile came in a 12" x 12" pattern on a mesh backing, the installation only took a couple hours total.  We honestly demo'd, laid the concrete backer board and laid our tile in a single day.  This tile was so quick to install!
As you are installing your tile, be sure that your tile is level and no edge is sticking up too far as you lay your tiles.


How to Grout Tile | a complete tutorial for how to demo, prep, install concrete backer board and install tile | #diy #bathroom #tile #thetileshop @thetileshop

Spacers
Our tile pattern was predetermined and came on a 12" x 12" mess backing.  However we did need and use spacers in between our 12" x 12" tiles.  We used ⅛" spacers to keep the spacing consistent throughout this project.
Spacers also make a great tool to scrape out any extra thinset that oozes out between the tiles.  


How to Grout Tile | a complete tutorial for how to demo, prep, install concrete backer board and install tile | #diy #bathroom #tile #thetileshop @thetileshop


How to Grout and Clean Tile | a complete tutorial for how to demo, prep, install concrete backer board and install tile | #diy #bathroom #tile #thetileshop @thetileshop


Grout

You will need to let your tile set completely prior to grouting.  (The thinset and grout instructions give time frames to follow).  To grout you will mix the powdered grout mixture with your grout admixture.  You will again be looking for a toothpaste-like consistency.  
Use your grout float at a 45 degree angle to apply your grout to your tiles.  Be sure you don't miss any spots and be sure that the grout fills the grout lines completely.  
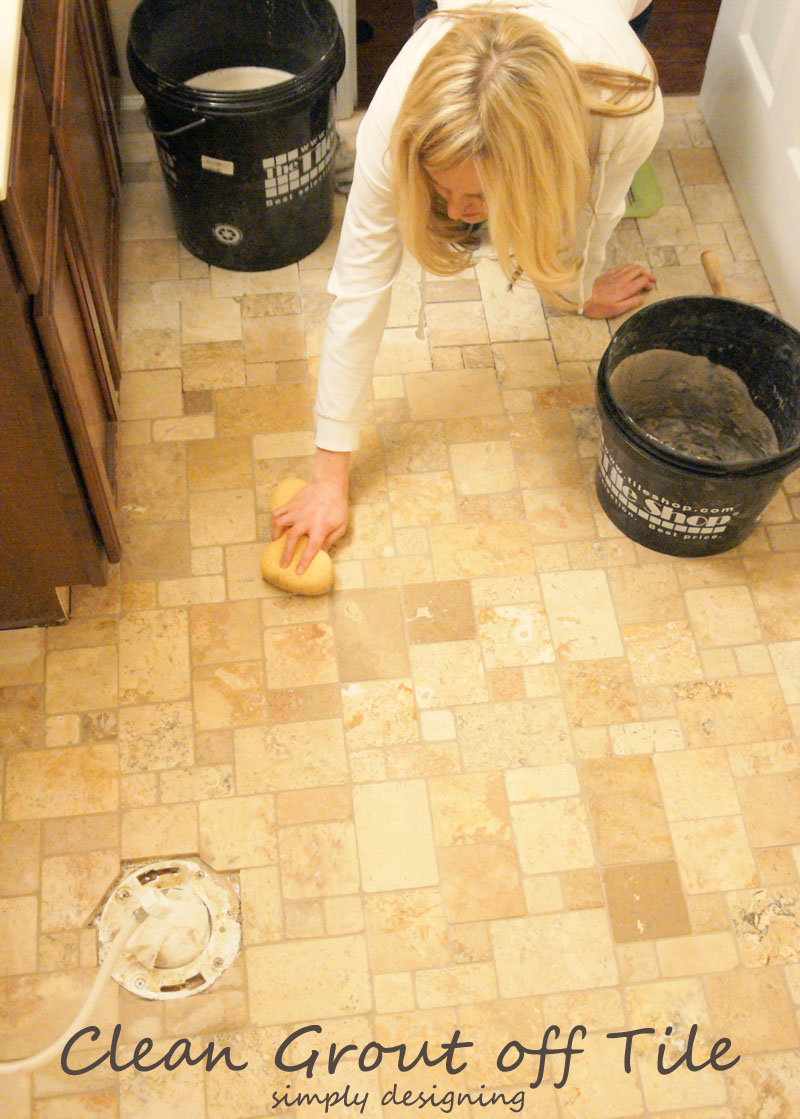
You will work one area at a time and every 15 minutes take a break and wipe the area you were working on with a wet sponge.  


How to Dehaze Tile | a complete tutorial for how to demo, prep, install concrete backer board and install tile | #diy #bathroom #tile #thetileshop @thetileshop


De-Hazing
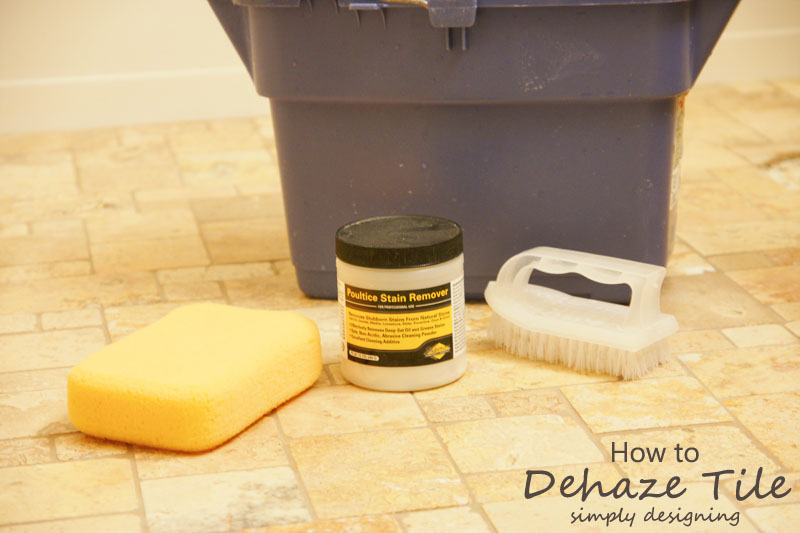
After your grout has completely set (again refer to the grout instructions for exact dry time), you will want to use Poultice Stain Remover to clean the grout haze off of your tile.  Follow the instructions on the back of the container, but basically you will pour your powder onto your tile and scrub it with a wet bristle brush.  
Work one area at a time, and then wipe it off with a clean wet sponge and/or paper towels.   


Install Travertine Tile | a complete tutorial for how to demo, prep, install concrete backer board and install tile | #diy #bathroom #tile #thetileshop @thetileshop


Seal
Again you will need to wait to seal your tile until about 48-72 hours after you have de-hazed your tile.  Follow the instructions on the back of the bottle, but basically you will wipe a coat of sealer onto your tile using a sealer sponge.  Let the sealer soak into the stone for about 10 minutes and then wipe it off with a clean, dry cloth.  Wait about 30 minutes and repeat with a second coat of sealer if needed.

You will know if you have enough sealer on your floor by doing a drip test.  Drip a few drops of water onto your stone and if the water beads up, you do not need another coat of sealer.  If the water absorbs into the stone, you will want to apply another coat of sealer to your stone.

Be sure to follow all manufacture instructions and let your sealer dry completely prior to use.

Travertine Tile in a Random Pattern | a complete tutorial for how to demo, prep, install concrete backer board and install tile | #diy #bathroom #tile #thetileshop @thetileshop

I love all of the beautiful inspiration that The Tile Shop has in their stores!  Did you know that they have amazing tile displays in their stores that are changed our regularly!?  They are fabulous inspiration for any tile project!

Random Summit Travertine Tile | a complete tutorial for how to demo, prep, install concrete backer board and install tile | #diy #bathroom #tile #thetileshop @thetileshop

After your floors are complete, be sure to reattach all of your moldings!  We used our Ryobi AirStrike to attach all of our moldings!

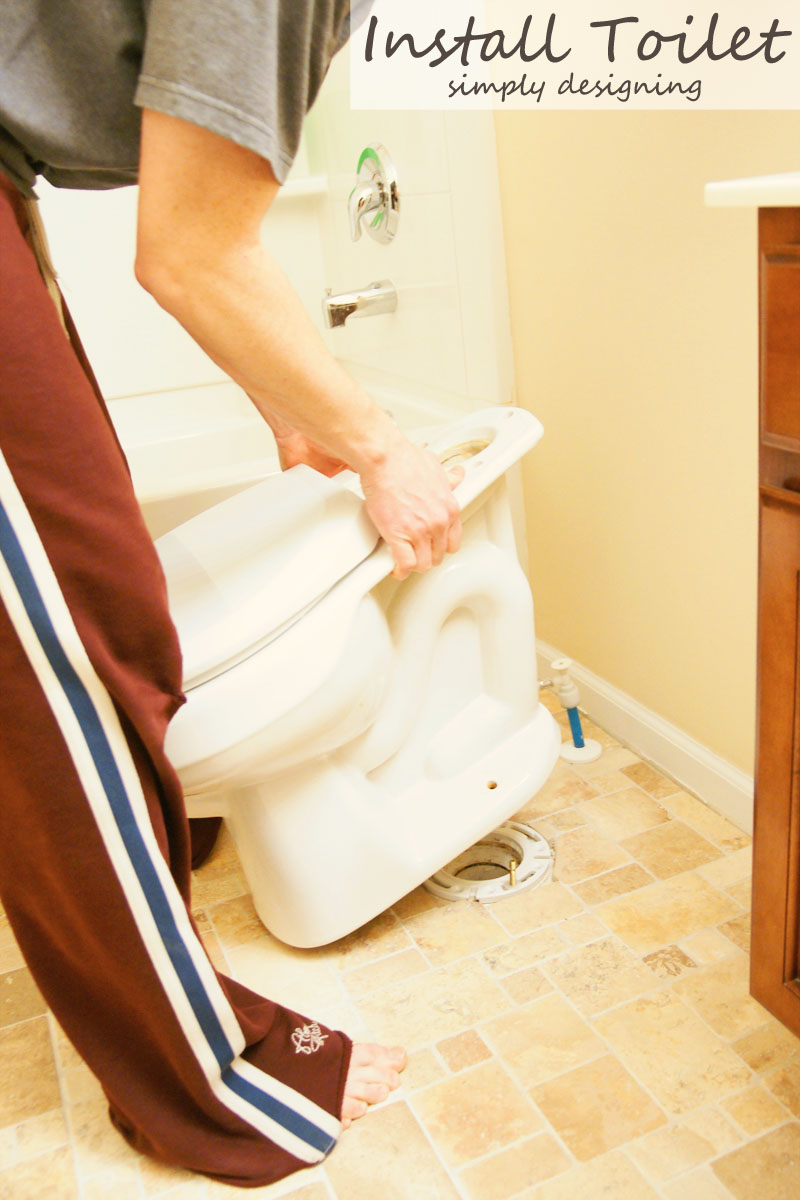
Re-Install a Toilet | a complete tutorial for how to demo, prep, install concrete backer board and install tile | #diy #bathroom #tile #thetileshop @thetileshop

Re-install your toilet using a spacer and a new wax ring.  Be sure to caulk around the bottom of your toilet for a finished look.
When in doubt, always seek the help of a professional!  

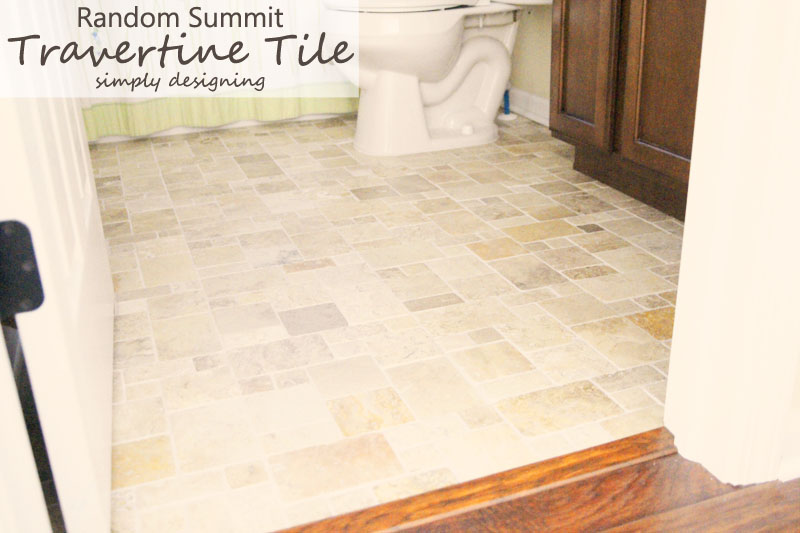
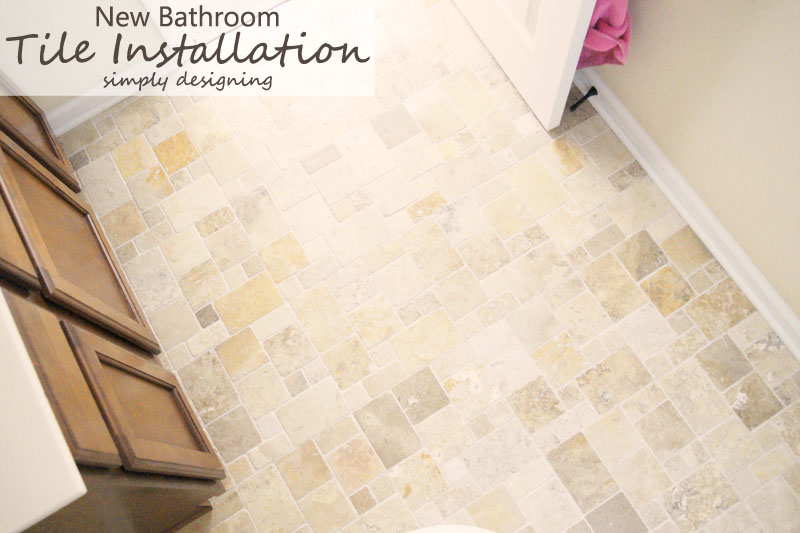
We love the transformation!  And we love how upgrading the floors instantly made our entire bathroom look so much nicer!

New Bathroom Tile Installation | a complete tutorial for how to demo, prep, install concrete backer board and install tile | #diy #bathroom #tile #thetileshop @thetileshop


You Might Also Enjoy:

How to Install a new Bathtub Faucet with it is Incompatible with your Existing Faucet
How to Install new Bathroom Fixtures
DIY Plank Walls

How to Prep a Floor for Tile

How to Install Concrete Backer Board
How to Install Herringbone Tile


As always, I am no professional.  I am just sharing how we installed our Tile Floors!  Be sure to read and follow ALL manufacture instructions prior to completing any project like this.  Be sure to take all necessary safety precautions.  And if you get stuck, you may need to hire a professional.  

Follow via | Email | Facebook | Pinterest | Google+ | Instagram | Twitter | YouTube
How to Install Tile {Tile Installation: Part 3} #thetileshop @thetileshop 3
This post appeared first on Simply Designing.  All blog posts, text and images are subject to my Privacy and Use Policy here.  I participate in the link parties found here.

More Home DIY

  • DIY Firewood Rack 09979 DIY Firewood Rack 4
    DIY Firewood Rack
  • How to make a Bat House 09477 How to make a Bat House 5
    How to make a Bat House
  • How to make an Address Sign 09259 How to make an Address Sign 6
    How to make an Address Sign
  • DIY Cat House 09103 DIY Cat House 7
    DIY Cat House

Reader Interactions

Comments

  1. Randi~Dukes and Duchesses

    March 04, 2014 at 1:41 pm

    I am SO glad I read this post. We removed a built-in desk from our kitchen and I tiled the spot it was pulled from but I have a total haze from the grout ... I just assumed I did a terrible job wiping it up and had no idea I could do anything with it. So glad to read about the poultice stain remover!!<br /><br />I&#39;m planning on tiling my kids&#39; bathroom and your tutorial is fantastic!

    Reply
    • Ashley Phipps

      March 04, 2014 at 7:13 pm

      Oh no! I am so sorry you still had a haze left! That is the worst :/ So sorry!! <br /><br />And thank you so much 🙂 I am so glad it helped! I can&#39;t wait to see you kid&#39;s bathroom!!

      Reply
  2. Suzie HomeCaker

    March 10, 2014 at 1:24 am

    Just an fyi...never caulk around the toilet. If there&#39;s a leak, you wont know until there is a lot of damage to the subfloor.

    Reply

Leave a Reply Cancel reply

Your email address will not be published. Required fields are marked *

Primary Sidebar

Hello Friends!

Ashley Phipps Simply Designing I'm Ashley Phipps and I love sharing SIMPLE DIY, home, travel, food, craft and essential oil ideas with you! Learn more about me here. Contact me here. Find Media/PR info here. Privacy is important to us. Please read my Privacy Policy.
  • Email
  • Facebook
  • Instagram
  • Pinterest
  • Twitter
  • YouTube

Favorite Posts

minimalist living room with white and grey background

Easy Minimalist Living for a clutter-free home and mind

Color-Blocked Easter Eggs Featured Image

Color Blocked Easter Eggs


COPYRIGHT: You’re welcome to link to Simply Designing or use a single image with a brief description to link back to any post. Republishing posts in their entirety is strictly prohibited.  Any use for commercial purposes is strictly prohibited. Feel free to pin on Pinterest. Find out more in my Privacy Policy.  Simply Designing with Ashley Phipps LLC is a participant in the Amazon Services LLC Associates Program, an affiliate advertising program designed to provide a means for sites to earn advertising fees by advertising and linking to Amazon.com . Simply Designing with Ashley Phipps LLC and it’s owner, employees and affiliates are not liable in any way for injury or loss (whether physical, emotional, monetary or any other kind of loss) resulting from any inspiration, ideas, directions or information gained from this website. We advise you to always follow manufacturer instructions, take appropriate safety precautions and hire a professional when in doubt. We love it when you use our site for inspiration, but by using it, you agree that you do so at your own risk.

Privacy Policy 

Copyright © 2023