• Skip to primary navigation
  • Skip to main content
  • Skip to primary sidebar

Simply Designing with Ashley

  • DIY
  • Oils
  • Recipes
  • Craft
  • Travel
  • Decor
  • Holiday
menu icon
go to homepage
  • DIY
  • Oils
  • Recipes
  • Craft
  • Travel
  • Decor
  • Holiday
search icon
Homepage link
  • DIY
  • Oils
  • Recipes
  • Craft
  • Travel
  • Decor
  • Holiday
×

DIY Chevron Magnetic Board

Published: Sep 18, 2013 by Ashley Phipps · 740 words. · About 4 minutes to read this article. · 6 Comments · This post may contain affiliate links · This blog generates income via ads and sponsored posts · This blog uses cookies · See our privacy policy for more info Filed Under: Craft, DIY, Home Decor

If you follow me on Instagram, a week or so ago I was teasing you with a pretty red chevron photo!  (If you don't follow me, come and follow me here.)
I am so excited to reveal what I was making today!  I absolutely love how it turned out!
My daughter has a cork board in her bedroom and I realized that my son needed something too!  Since he is a three year old boy though, I didn't trust him with a bulletin board and pins.  Boys + sharp objects = trouble
So I decided that he needed a magnetic bulletin board!  And I am thrilled with how it turned out!
DIY Chevron Magnetic Bulletin Board | includes a full tutorial on how to create this project | from Simply Designing | #diy #chevron #organization
This project started out in one direction and ended up in another!  But that happens sometimes.  And I actually like my end result better then  my original plan!  So it all worked out well!
To complete this project you will need:
  • a frame
  • hardback board
  • metal that is magnetic (more on this below)
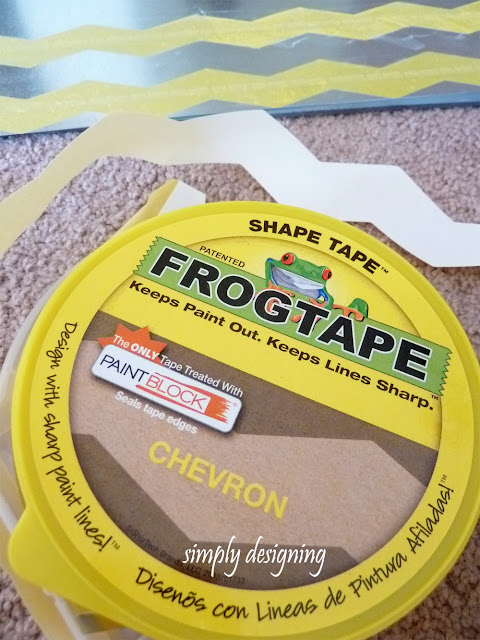
  • +FrogTape Shape Tape, Chevron
  • spray paint
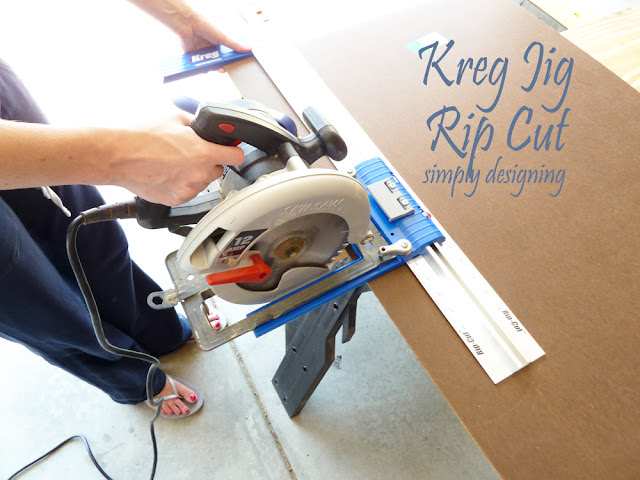
  • tools to cut the hardback board (I used a +Kreg Jig Rip Cut and a circular saw)
  • tin snips to cut the metal
  • staple gun
Kreg Jig Rip Cut | perfect to cut straight lines with a circular saw | #tools #kreg #diy

First you will cut your hardback board to size to fit inside your frame.  I used my brand new Kreg Jig Rip Cut and LOVE it!!  It makes cutting straight lines with your circular saw simple and stress-free.  I highly recommend picking one of these up HERE (affiliate link).

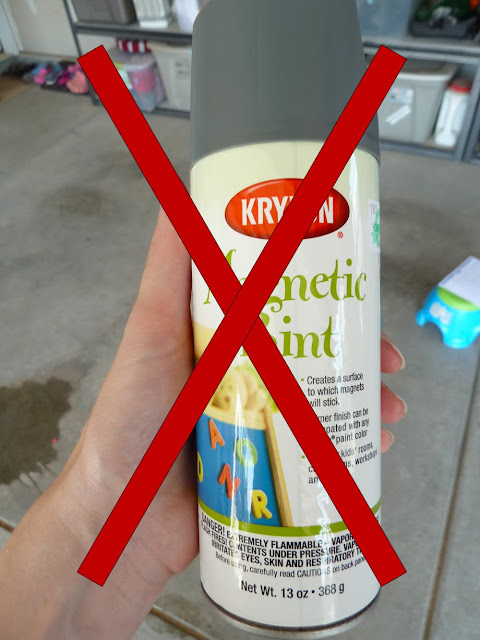
I love Krylon!  But this didn't work on hardback board for me.

My original plan was to spray my hardback board with magnetic spray paint so that the board was magnetic.  I used the entire can and my board was not at all magnetic 🙁  I typically love Krylon products!  I really do!  And perhaps this particular product just doesn't work well on hardback board, I admit it could be a user error.  However, this did not work for me for this particular project.

So back to the drawing board I went.  Sheet metal was more expensive then I was hoping to pay, so I went searching the aisles of my local hardware store for another option.  With magnets in my pocket I tested out each and every piece of metal I came across!

Finally in the airduct aisle I came across a thin sheet of metal that was inexpensive and magnetic!  Wahoo!  So off we went to try this again.

We used tin snips to cut the metal down to size (and by "we" I mean I asked my husband to do this task for me!).  Be careful though as you can easily get cut with this metal...it has sharp edges.

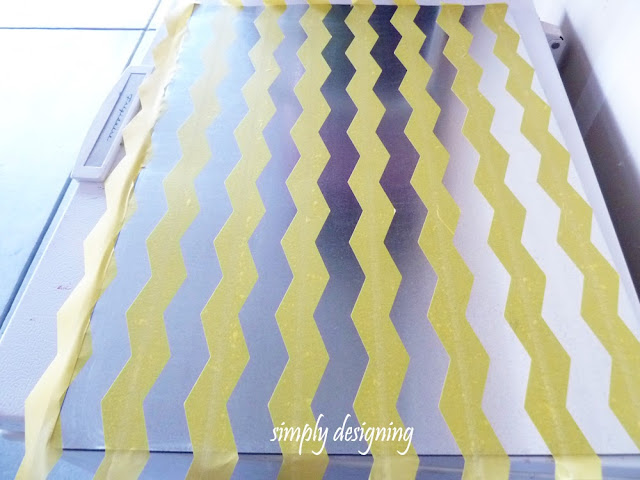
After the metal was cut, apply your Frog Tape Shape Tape to the metal board.  You can purchase this at some hardware stores, but you can also buy it HERE. (affiliate link)

Frog Tape Shape Tape Chevron | used for a fun DIY project | #diy #frogtape #chevron

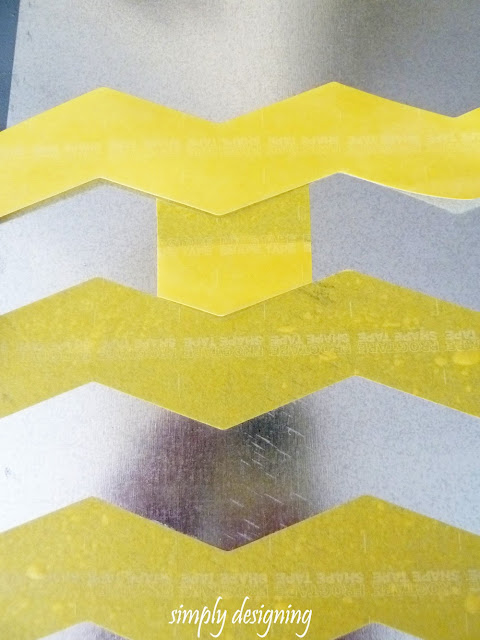
I wanted my chevron lines spaced evenly so I used a small piece of the tape in between each chevron line as a guide.

DIY Chevron Magnetic Bulletin Board | includes a full tutorial on how to create this project | from Simply Designing | #diy #chevron #organization

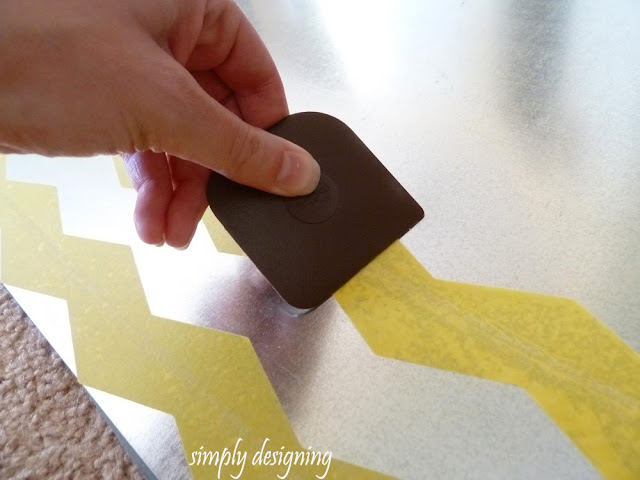
And I wanted to be sure that the edges were all adhered very well, so I used my little scrapper to be sure it stuck down well.

DIY Chevron Magnetic Bulletin Board | includes a full tutorial on how to create this project | from Simply Designing | #diy #chevron #organization

After all of the tape is applied, you will spray paint the metal board any color you want!  I used red.

DIY Chevron Magnetic Bulletin Board | includes a full tutorial on how to create this project | from Simply Designing | #diy #chevron #organization

Take the shape tape off and let your board completely dry!

I'd like to take a moment to tell you how much I really loved using Frog Tape Shape Tape!!  I always worry about paint seeping through and this product did an amazing job of creating clean chevron lines for me!  I really do love it and I will be looking for more ways to use it in the future!

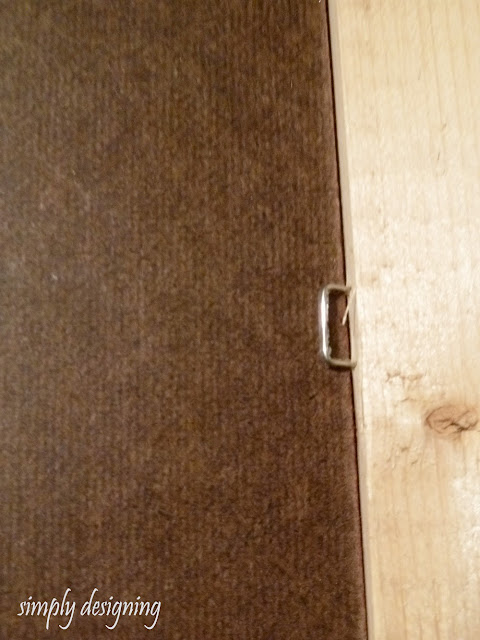
Then place your metal board in your frame, followed by your hardback board.  We used the staple gun to secure all of this into the frame.

Staple Gun to secure items into the back of a Frame | #diy #framing #tools

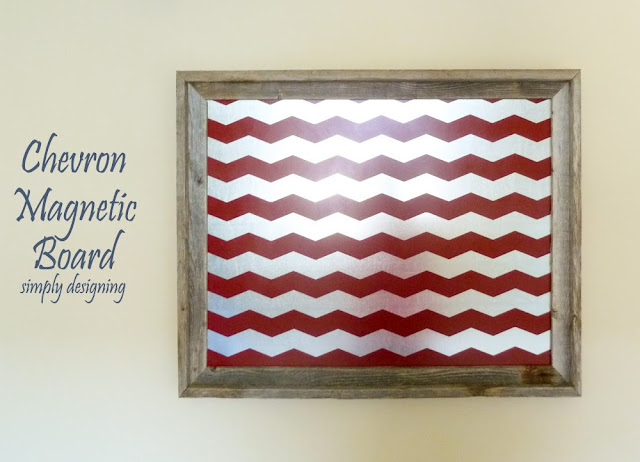
Then hang!

DIY Chevron Magnetic Bulletin Board | includes a full tutorial on how to create this project | from Simply Designing | #diy #chevron #organization

I bought large magnets for my son to use from good 'ole +Target and my son was THRILLED to have a place to hang his artwork and creations!

DIY Chevron Magnetic Bulletin Board | includes a full tutorial on how to create this project | from Simply Designing | #diy #chevron #organization

We found the perfect spot in his room for his new board and we all love how it turned out!  A perfect magnetic bulletin board to keep all of our son's creations on!  I love how it keeps clutter at bay and allows him to choose a few things to display at a time!

Plus I really do love how it turned out!  It could be a piece of artwork all on it's own!

If you like this idea, I would love it if you pinned it!

DIY Chevron Magnetic Board 3

I would love for you to follow me on Facebook, Twitter, Google+, Pintrest and via email.
I participate in the link parties found
here.

This post appeared first on Simply Designing.

More Crafts

  • Salt Scrub Salt Body Scrub 08306 How to make a Salt Scrub 4
    How to make a Salt Scrub
  • Summer Hoop Wreath 06852 Summer Hoop Wreath 5
    Summer Hoop Wreath
  • How to make Farmhouse Christmas Ornaments 06055 How to make Farmhouse Christmas Ornaments 6
    How to make Farmhouse Christmas Ornaments
  • Peppermint Sugar Scrub 04668 Peppermint Sugar Scrub 7
    Peppermint Sugar Scrub

Reader Interactions

Comments

  1. Pam McFarland

    September 18, 2013 at 8:39 pm

    Love this! Great use of the airduct metal! I too have had bad luck with the spray-on Kryon magnetic paint. I thought I got a bad can until I talked to a few others who also didn&#39;t have good luck with this product. Thanks for sharing!<br />Pam @ The Patriotic Pam

    Reply
    • Ashley Phipps

      September 18, 2013 at 9:16 pm

      Thanks so much Pam!<br /><br />And that is really interesting to hear that others haven&#39;t had luck with this particular paint either. What a bummer. :(<br /><br />Ashley

      Reply
  2. missybug

    September 19, 2013 at 9:17 am

    WOW that Frog tape looks awesome..thanks for sharing!

    Reply
    • Ashley Phipps

      September 19, 2013 at 2:37 pm

      It is really fun! Thanks so much for stopping by!

      Reply
  3. Felecia

    September 27, 2014 at 4:04 pm

    Hi Ashley! I absolutely love this board! Great idea! Thank you so much for sharing! Blessings from Bama!

    Reply
    • Ashley Phipps

      September 27, 2014 at 10:03 pm

      Thanks so much!

      Reply

Leave a Reply Cancel reply

Your email address will not be published. Required fields are marked *

Primary Sidebar

Hello Friends!

Ashley Phipps Simply Designing I'm Ashley Phipps and I love sharing SIMPLE DIY, home, travel, food, craft and essential oil ideas with you! Learn more about me here. Contact me here. Find Media/PR info here. Privacy is important to us. Please read my Privacy Policy.
  • Email
  • Facebook
  • Instagram
  • Pinterest
  • Twitter
  • YouTube

Favorite Posts

minimalist living room with white and grey background

Easy Minimalist Living for a clutter-free home and mind

Himmeli Wreath with Shamrocks

St. Patrick's Day Himmeli Wreath


COPYRIGHT: You’re welcome to link to Simply Designing or use a single image with a brief description to link back to any post. Republishing posts in their entirety is strictly prohibited.  Any use for commercial purposes is strictly prohibited. Feel free to pin on Pinterest. Find out more in my Privacy Policy.  Simply Designing with Ashley Phipps LLC is a participant in the Amazon Services LLC Associates Program, an affiliate advertising program designed to provide a means for sites to earn advertising fees by advertising and linking to Amazon.com . Simply Designing with Ashley Phipps LLC and it’s owner, employees and affiliates are not liable in any way for injury or loss (whether physical, emotional, monetary or any other kind of loss) resulting from any inspiration, ideas, directions or information gained from this website. We advise you to always follow manufacturer instructions, take appropriate safety precautions and hire a professional when in doubt. We love it when you use our site for inspiration, but by using it, you agree that you do so at your own risk.

Privacy Policy 

Copyright © 2023