• Skip to primary navigation
  • Skip to main content
  • Skip to primary sidebar

Simply Designing with Ashley

  • DIY
  • Oils
  • Recipes
  • Craft
  • Travel
  • Decor
  • Holiday
menu icon
go to homepage
  • DIY
  • Oils
  • Recipes
  • Craft
  • Travel
  • Decor
  • Holiday
search icon
Homepage link
  • DIY
  • Oils
  • Recipes
  • Craft
  • Travel
  • Decor
  • Holiday
×

DIY Boo Halloween Shirt

Published: Sep 22, 2014 · Modified: Nov 5, 2014 by Ashley Phipps · 360 words. · About 2 minutes to read this article. · 3 Comments · This post may contain affiliate links · This blog generates income via ads and sponsored posts · This blog uses cookies · See our privacy policy for more info Filed Under: Craft, Holiday, Sponsored Post

 I am thrilled to be a member of the DecoArt design team!  

Thanks to DecoArt for making this post possible.

DIY Boo Halloween Shirt | #halloween #crafts #fall

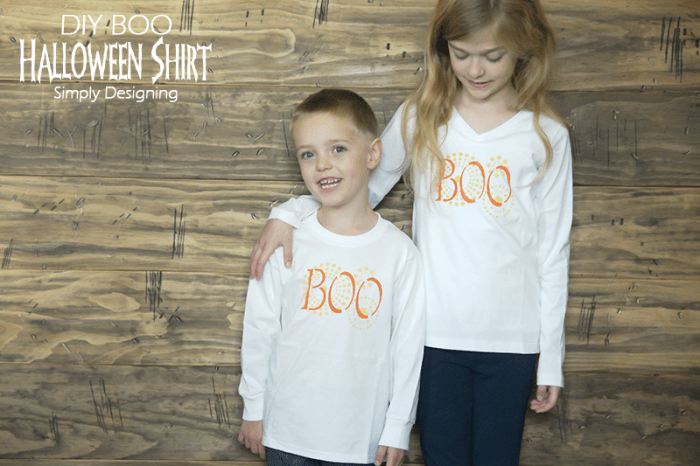
My kids love Halloween!  It is their second favorite holiday (behind Christmas of course) and every year they ask me if they will get a Halloween shirt.  Typically I will make a quick holiday shirt using vinyl, but this year I decided to mix it up and use some of my favorite DecoArt SoSoft fabric paint to stencil a cute DIY Boo Halloween Shirt!

Creating this Halloween shirt was so simple and really didn't take that long to make at all.  And you could even get your kids involved too!  So grab a few stencils, paint and fabric paint and create your own Halloween shirt!

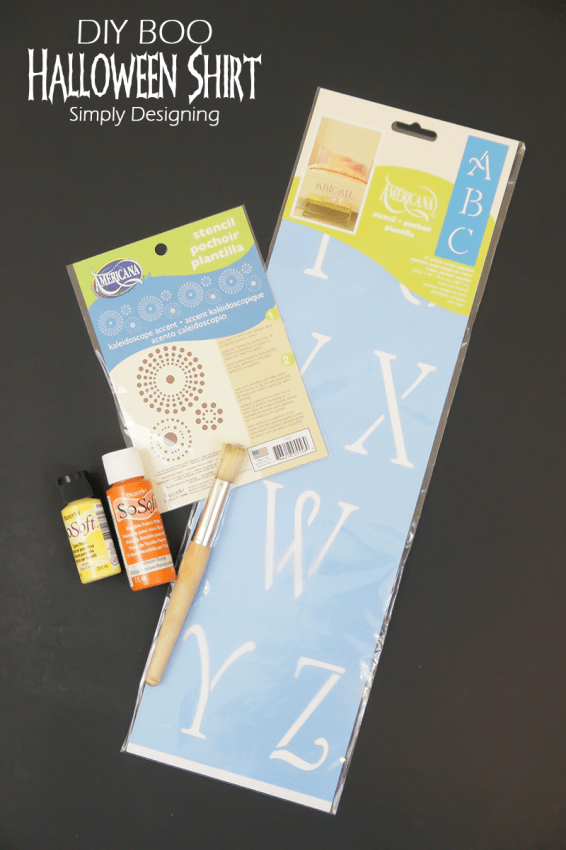
Halloween Shirt Supplies

To create this Halloween shirt you will need:

  • DecoArt SoSoft Fabric Paint in Cadmium Orange and Lemon
  • Stencil paint brush
  • Americana Kaleidoscope stencil
  • Americana  3" Simple Script stencil
  • Paper bag
  • Plain Shirt

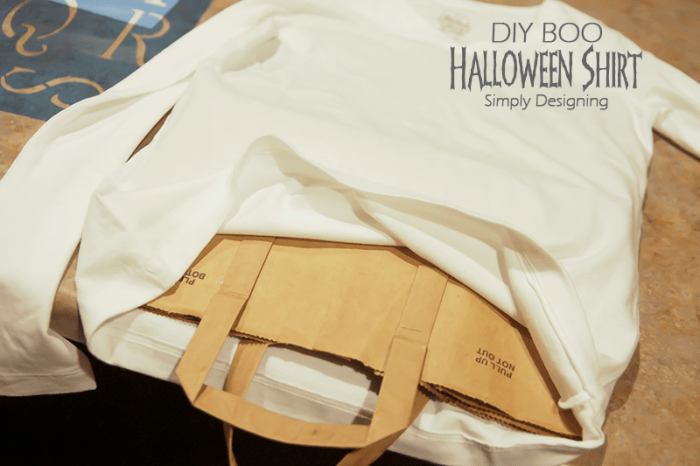
First you will want to place something in between the layers of your shirt so that the fabric paint doesn't leak through.

Stencil a Shirt

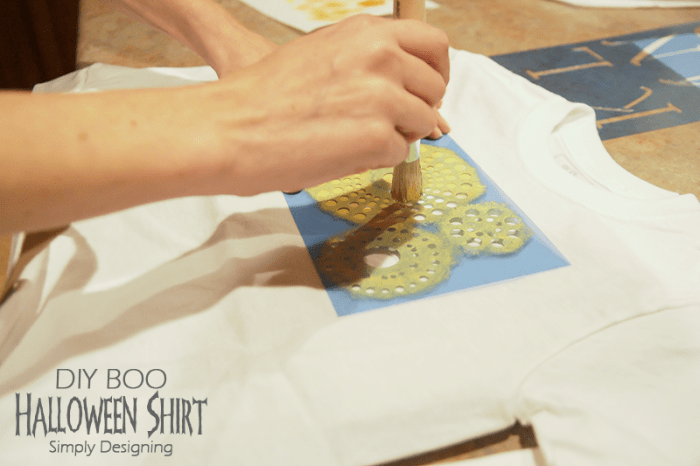
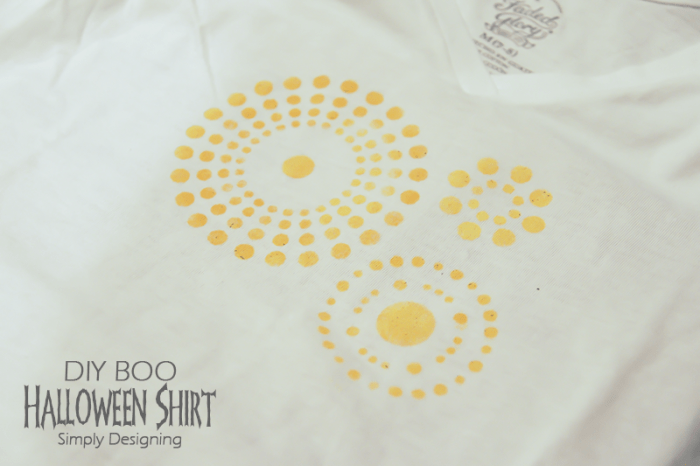
Then I used my kaleidoscope stencil and used my yellow paint to stencil the design on both of the shirts.

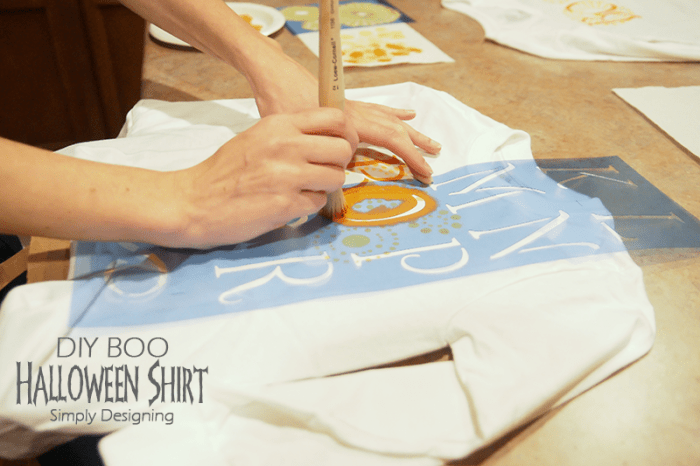
When stenciling, it is important to just put a little bit of paint onto your paint brush and dab off the extra paint off of your brush prior to stenciling the shirt.  You will lightly tap your stencil brush straight up and down on your shirt to apply the paint.  This will help the paint to not bleed onto the shirt.

Stencil a Halloween Shirt

Then I let it dry completely.

DIY Shirt

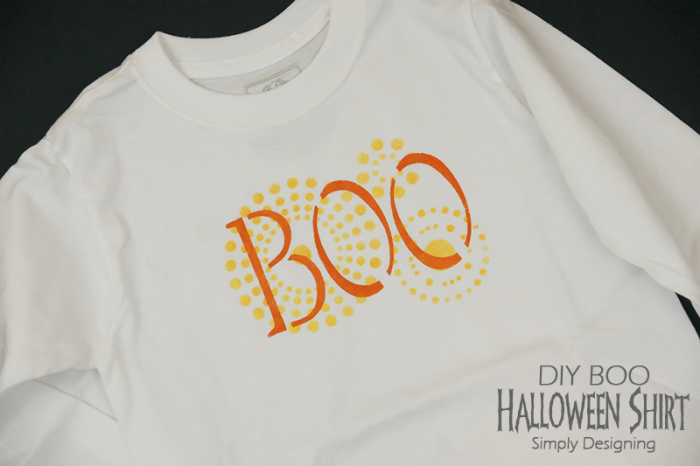
Then I used my alphabet stencil and my orange paint and stenciled the word BOO onto the shirt.

Halloween Shirt

I let this dry completely and let my children wear their new shirts!  The best part about this fabric paint is that you don't have to heat set it!  You simply wait 48 hours and then wash and dry your shirt.  I always recommend reading the back of the paint bottle for complete instructions on the use and care of this product of course!

DIY Halloween Shirt

Do your kids like to wear a Halloween shirt this time of year?

More Crafts

  • looking from the top down on a body scrub made with salt with greenery on the top of the photo and a wood lid to the right
    How to make a Salt Scrub
  • greenery hoop wreath with lavender and burlap bow
    Summer Hoop Wreath
  • DIY farmhouse christmas ornaments
    How to make Farmhouse Christmas Ornaments
  • Peppermint Sugar Scrub in a glass jar with red and white twine around the jar
    Peppermint Sugar Scrub

Reader Interactions

Comments

  1. Felecia

    September 27, 2014 at 3:54 pm

    Hi Ashley! I made my great-nieces a boo shirt but yours is a lot less complicated! They are so cute! Thanks for showing us how to use the stencil and brush. I will try this technique next time! Blessings from Bama!

    Reply
    • Ashley Phipps

      September 27, 2014 at 10:03 pm

      I bet yours turned out great!! Thanks so much for stopping by!

      Reply
  2. ang

    October 02, 2014 at 7:44 am

    This is so totally cute! Thanks for linking up on Cook it! Craft it! Share it! last week - this link is my pick for FAVORITE. Come visit us again to see your post being featured, and link up again 🙂
    Ang

    Reply

Leave a Reply Cancel reply

Your email address will not be published. Required fields are marked *

Primary Sidebar

Hello Friends!

Ashley Phipps Simply Designing I'm Ashley Phipps and I love sharing SIMPLE DIY, home, travel, food, craft and essential oil ideas with you! Learn more about me here. Contact me here. Find Media/PR info here. Privacy is important to us. Please read my Privacy Policy.
  • Email
  • Facebook
  • Instagram
  • Pinterest
  • Twitter
  • YouTube

Join our mailing list

Get our latest updates & exclusive content!

Privacy Policy, Disclaimer & Terms of Use

Favorite Posts

Himmeli Wreath with Shamrocks

St. Patrick's Day Himmeli Wreath

St. Patrick's Day Treats


COPYRIGHT: You’re welcome to link to Simply Designing or use a single image with a brief description to link back to any post. Republishing posts in their entirety is strictly prohibited.  Any use for commercial purposes is strictly prohibited. Feel free to pin on Pinterest. Find out more in my Privacy Policy.  Simply Designing with Ashley Phipps LLC is a participant in the Amazon Services LLC Associates Program, an affiliate advertising program designed to provide a means for sites to earn advertising fees by advertising and linking to Amazon.com . Simply Designing with Ashley Phipps LLC and it’s owner, employees and affiliates are not liable in any way for injury or loss (whether physical, emotional, monetary or any other kind of loss) resulting from any inspiration, ideas, directions or information gained from this website. We advise you to always follow manufacturer instructions, take appropriate safety precautions and hire a professional when in doubt. We love it when you use our site for inspiration, but by using it, you agree that you do so at your own risk.

Privacy Policy 

Copyright © 2025