• Skip to primary navigation
  • Skip to main content
  • Skip to primary sidebar

Simply Designing with Ashley

  • DIY
  • Oils
  • Recipes
  • Craft
  • Travel
  • Decor
  • Holiday
menu icon
go to homepage
  • DIY
  • Oils
  • Recipes
  • Craft
  • Travel
  • Decor
  • Holiday
search icon
Homepage link
  • DIY
  • Oils
  • Recipes
  • Craft
  • Travel
  • Decor
  • Holiday
×

No-Sand Distressed Photo Holder + Giveaway

Published: Jul 30, 2014 by Ashley Phipps · 866 words. · About 5 minutes to read this article. · 25 Comments · This post may contain affiliate links · This blog generates income via ads and sponsored posts · This blog uses cookies · See our privacy policy for more info Filed Under: Craft, DIY, Home Decor, Sponsored Post

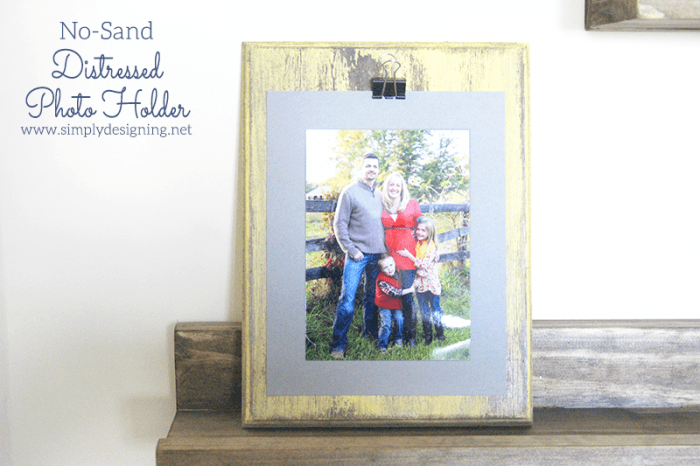
I love finding new techniques to finish wood projects and I am absolutely in LOVE my newest technique that I came up with the other day!  It is a no-sand distressing technique that provides a beautiful, rustic finish to any piece of painted furniture without the difficulty of sanding.  I created a really beautiful new photo holder and used this technique to finish the wood and I just love how it turned out!

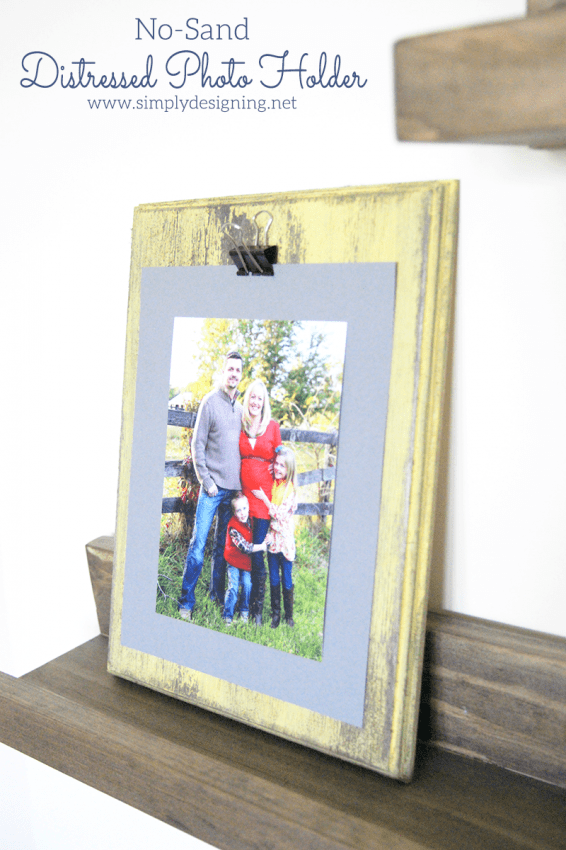
Here is my pretty new No-Sand Distressed Photo Holder!

No-Sand Distressed Photo Holder #diy #crafts

As I have mentioned before, sanding is actually one of my least favorite parts of refinishing furniture or finishing new projects.  I don't know why, but I just don't love sanding.  So I was really excited to discover a way to get a similar look, without the mess or frustration of sanding.

Here is what you will need to create your photo holder:

  • Wood Plaque, unfinished
  • Minwax Dark Walnut Stain (or other)
  • Latex Paint
  • Rag for Staining
  • Foam Brush for Painting
  • Gloves to protect hands
  • HomeRight Heat Pro Deluxe II Heat Gun
  • Binder Clip
  • E6000 Glue
  • Hot Glue

Supplies


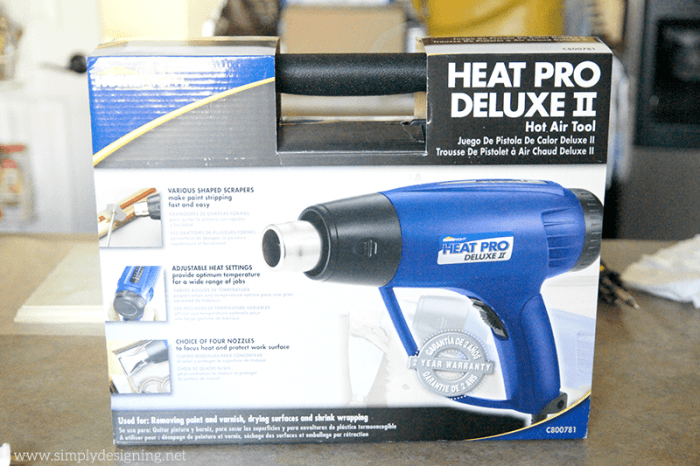
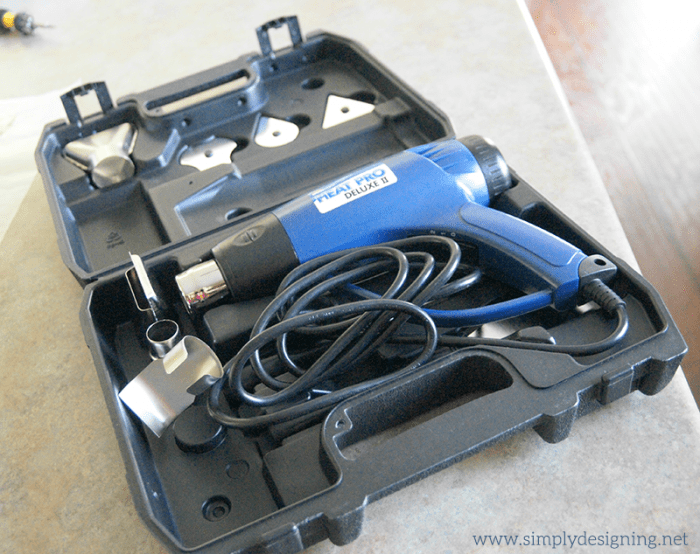
First I want to take just one moment to tell you about this awesome new tool I just received from HomeRight!  Heat guns have so many purposes such as removing paint, shrink wrapping, embossing and may more uses!  And this little tool packs a huge punch, with two fan settings and multiple heat settings, you can really use it for many purposes.

Because I knew you could use this to strip paint, I wanted to see if I could use it to systematically remove paint to create a distressed look, and I was so happy to find out that it works!

HomeRight Heat Gun Deluxe II


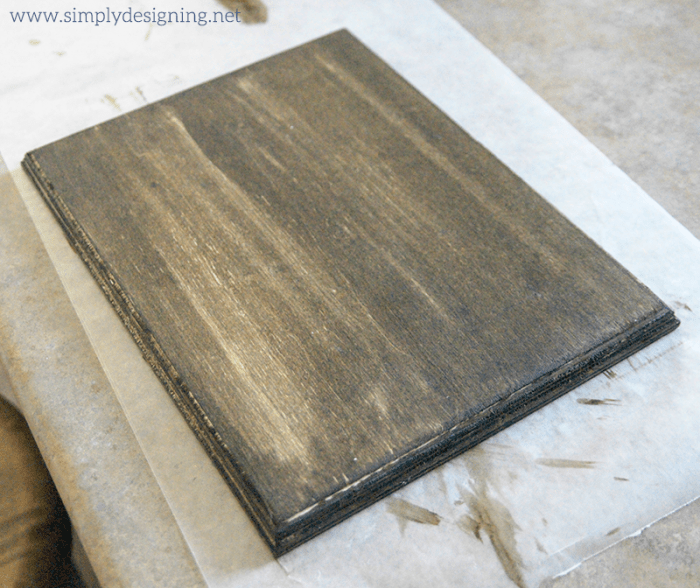
First I stained my wood plaque with a rag and then I let it dry completely.

No-Sand Distressed Photo Holder #diy #crafts

Next I painted my plaque with yellow latex paint.  I used one thick coat and painted it on very quickly.  As soon as my plaque was painted I grabbed my heat gun and got to work.

HomeRight Heat Gun Deluxe II

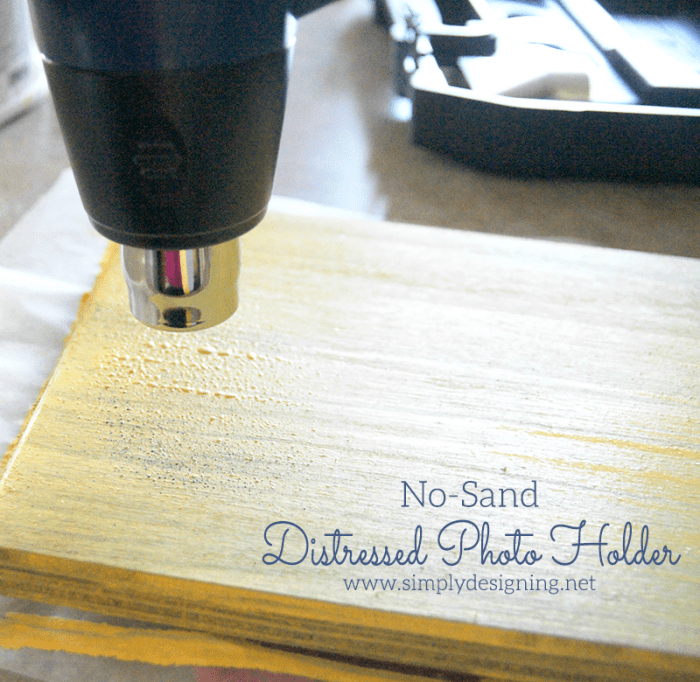
I carefully began to heat my paint up in various places on my plaque.  After only a few seconds, my paint began to bubble.  Once it bubbled in an area, I moved on to heat a new area on my plaque until I had several places on my plaque that were bubbly.  At this point, because of the added heat the rest of my plaque was dry too!

No-Sand Distressed Photo Holder #diy #crafts

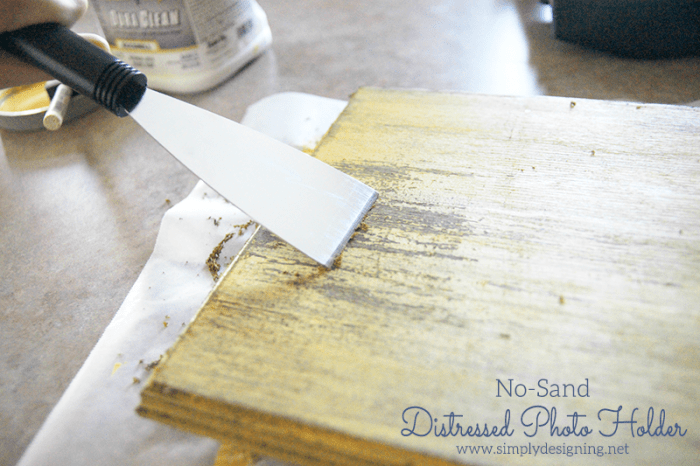
Then I took a scrapper tool and began scraping the paint off of the bubbly areas on my plaque.  The harder you scrape, the more paint will come off.

No-Sand Distressed Photo Holder #diy #crafts

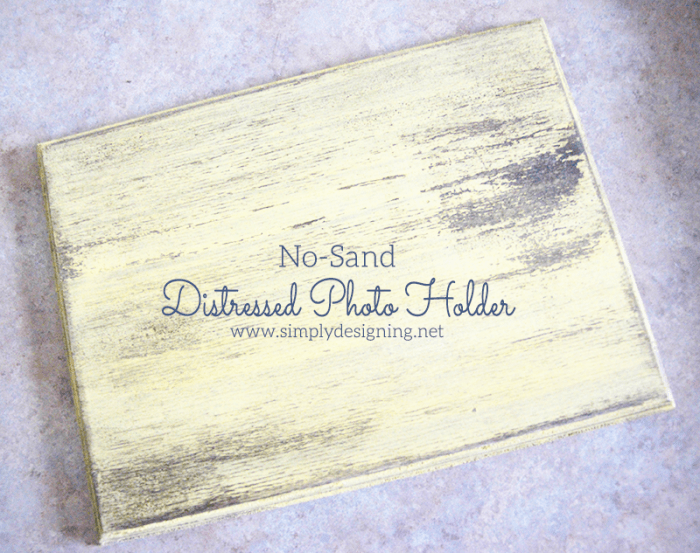
After a few minutes of scraping I had a really pretty distressed board!

No-Sand Distressed Photo Holder #diy #crafts

After I was done, I placed a little bit of E6000 Glue and Hot Glue on the back on my binder clip.  No you don't need both types of glue, however, I wanted to strength and durability that E6000 Glue would give me, but I didn't have the patience to wait overnight or longer for it to fully dry.  So I added a touch of hot glue to create a strong bond instantly, and allowed the E6000 glue time to dry while the hot glue held the binder clip in place.

No-Sand Distressed Photo Holder #diy #crafts

Then I simply added a bit of colored paper and a photo to my photo holder and in not a lot of time, without a lot of work, and without a single bit of sanding, I had a really fun and cute Distressed Photo Holder!

I love my new HomeRight Heat Gun and can't wait to show you other used for it too!

But first, I am really excited to be able to GIVEAWAY a HomeRight Heat Pro Deluxe II Heat Gun to one lucky winner!

Please wait until Rafflecopter fully loads and then enter to win:

a Rafflecopter giveaway
*Winning entries will be verified.  This giveaway is in no way affiliated, administered or endorsed by Facebook, Pinterest, Twitter or Instagram.  No information will be disclosed to Facebook, Pinterest, Twitter or Instagram by entering this giveaway.  No purchase necessary to win.  Odds of winning are based on number of entrants.  Winner for prize package will be chosen randomly through Rafflecopter.  Giveaway will run from July 30, 2014 at 6:30am EST until August 7, 2014 at 12:00am EST.  Winner will be announced on August 7, 2014 in this blog post and the winner will need to respond within 48 hours of announcement via email to claim their prize or another winner will be chosen.  Winner must be 18 years of age or older and a US citizen with a US mailing address in order to win.  Winner is responsible for paying any necessary taxes on winnings.  All prizes will be mailed / emailed / fulfilled by the sponsor and the blog owner(s) involved are not held responsible if the prize is not fulfilled.  A list of winners may be requested after the giveaway has ended.  Please email me with any questions or to obtain additional information at: [email protected]
Thank you to HomeRight for making this post possible.


Follow via | Email | Facebook | Pinterest | Google+ | Instagram | Twitter | YouTube

No-Sand Distressed Photo Holder + Giveaway 1 No-Sand Distressed Photo Holder
This post appeared first on Simply Designing.  All blog posts, text and images are subject to my Privacy and Use Policy here.

More Crafts

  • Salt Scrub Salt Body Scrub 08306 How to make a Salt Scrub 2 No-Sand Distressed Photo Holder
    How to make a Salt Scrub
  • Summer Hoop Wreath 06852 Summer Hoop Wreath 3 No-Sand Distressed Photo Holder
    Summer Hoop Wreath
  • How to make Farmhouse Christmas Ornaments 06055 How to make Farmhouse Christmas Ornaments 4 No-Sand Distressed Photo Holder
    How to make Farmhouse Christmas Ornaments
  • Peppermint Sugar Scrub 04668 Peppermint Sugar Scrub 5 No-Sand Distressed Photo Holder
    Peppermint Sugar Scrub

Reader Interactions

Comments

  1. gail

    July 30, 2014 at 12:53 pm

    oh my gosh Ashley! I LOVE this project. I'm not usually a "yellow" person, but this is so sweet!

    I have this heat gun, and it's fabulous.

    pinning!
    gail

    Reply
    • Ashley Phipps

      July 31, 2014 at 10:14 pm

      Oh thank you so much Gail! And thanks for pinning!

      Reply
  2. Emily

    July 30, 2014 at 1:06 pm

    so super cute! I love the frame/holder and the photo too ;o) All gorgeous! thanks for the giveaway too!

    Reply
    • Ashley Phipps

      July 31, 2014 at 10:13 pm

      Thanks Emily! And you are welcome! Good luck!

      Reply
  3. Amy Anderson

    July 30, 2014 at 2:16 pm

    This looks amazing! I need a heat gun!

    Reply
    • Ashley Phipps

      July 31, 2014 at 10:13 pm

      Thank you Amy!

      Reply
  4. sharon garofalow

    July 30, 2014 at 9:55 pm

    Oh my gosh! I love this technique. What a great idea!

    Reply
    • Ashley Phipps

      July 31, 2014 at 10:13 pm

      Thanks so much Sharon!

      Reply
  5. Leanne

    July 31, 2014 at 2:41 am

    I love the look and the process. It turned out amazing!

    Reply
    • Ashley Phipps

      July 31, 2014 at 10:13 pm

      Thank you Leanne!

      Reply
  6. Kara

    July 31, 2014 at 7:57 am

    Your photo holder is gorgeous! Definitely pinning so I can make one too!!

    Reply
    • Ashley Phipps

      July 31, 2014 at 10:12 pm

      Thanks so much for pinning Kara! And thanks for stopping by!

      Reply
  7. Maryann @ Domestically Speaking

    July 31, 2014 at 1:14 pm

    LOVE how that turned out!

    Reply
    • Ashley Phipps

      July 31, 2014 at 9:19 pm

      Thank you Maryann!

      Reply
  8. Natalie @ A Turtle's Life for Me

    July 31, 2014 at 6:41 pm

    Okay, I don't think I've ever even heard of a heat gun! This is like some kind of magic! Love the way your project turned out and your family is gorgeous!

    Reply
    • Ashley Phipps

      July 31, 2014 at 9:19 pm

      Ah thanks so much!

      Reply
  9. Claire @ A Little Claireification

    July 31, 2014 at 6:54 pm

    How fun is that?? Home Right as the best tools - I so have to try this Hot Air Heat pro tool ASAP!! Pinned!

    Reply
    • Ashley Phipps

      July 31, 2014 at 9:19 pm

      Oh thanks so much! And thanks for pinning!

      Reply
  10. Cass

    July 31, 2014 at 9:12 pm

    This is such a fun craft! And I have tons of those types of plaques that I picked up at a thrift store for $1! Now I finally have a use for them. Also, thanks for the giveaway!

    Reply
    • Ashley Phipps

      July 31, 2014 at 9:18 pm

      Oh thank you and thanks for stopping by! I will have to check thrift stores for plaques! What a great idea!

      Reply
  11. Laura Clark

    August 01, 2014 at 12:06 pm

    Love this use for the Heat Gun and also love how this project turned out!

    Reply
    • Ashley Phipps

      August 02, 2014 at 12:15 pm

      Thanks so much Laura!

      Reply
  12. Heather

    August 07, 2014 at 5:21 pm

    Cute! And you could spray paint the clips as well! Visiting from SITS FB group.

    Reply
  13. Katie Adams

    August 09, 2014 at 11:06 am

    Thanks for linking to Create Link Inspire at The Crafty Blog Stalker. You have been featured and pinned! Thank you for sharing.
    –Katie, TheCraftyBlogStalker.com

    Reply
    • Ashley Phipps

      August 09, 2014 at 12:19 pm

      Thanks so much!

      Reply

Leave a Reply Cancel reply

Your email address will not be published. Required fields are marked *

Primary Sidebar

Hello Friends!

Ashley Phipps Simply Designing I'm Ashley Phipps and I love sharing SIMPLE DIY, home, travel, food, craft and essential oil ideas with you! Learn more about me here. Contact me here. Find Media/PR info here. Privacy is important to us. Please read my Privacy Policy.
  • Email
  • Facebook
  • Instagram
  • Pinterest
  • Twitter
  • YouTube

Favorite Posts

minimalist living room with white and grey background

Easy Minimalist Living for a clutter-free home and mind

body scrub recipe book

Body Scrub Recipe Book with 20 Scrumptious Recipes


COPYRIGHT: You’re welcome to link to Simply Designing or use a single image with a brief description to link back to any post. Republishing posts in their entirety is strictly prohibited.  Any use for commercial purposes is strictly prohibited. Feel free to pin on Pinterest. Find out more in my Privacy Policy.  Simply Designing with Ashley Phipps LLC is a participant in the Amazon Services LLC Associates Program, an affiliate advertising program designed to provide a means for sites to earn advertising fees by advertising and linking to Amazon.com . Simply Designing with Ashley Phipps LLC and it’s owner, employees and affiliates are not liable in any way for injury or loss (whether physical, emotional, monetary or any other kind of loss) resulting from any inspiration, ideas, directions or information gained from this website. We advise you to always follow manufacturer instructions, take appropriate safety precautions and hire a professional when in doubt. We love it when you use our site for inspiration, but by using it, you agree that you do so at your own risk.

Privacy Policy 

Copyright © 2023