• Skip to primary navigation
  • Skip to main content
  • Skip to primary sidebar

Simply Designing with Ashley

  • DIY
  • Oils
  • Recipes
  • Craft
  • Travel
  • Decor
  • Holiday
menu icon
go to homepage
search icon
Homepage link
  • DIY
  • Oils
  • Recipes
  • Craft
  • Travel
  • Decor
  • Holiday
×

Ornament Wreath (repost)

Published: Nov 19, 2010 · Modified: Nov 19, 2010 by Ashley Phipps · 450 words. · About 3 minutes to read this article. · 1 Comment · This post may contain affiliate links · This blog generates income via ads and sponsored posts · This blog uses cookies · See our privacy policy for more info Filed Under: Craft, DIY, Holiday

Ornaments+06 Ornament Wreath (repost) 15
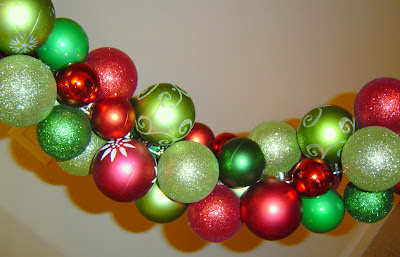
(I wanted to repost this idea with pictures that are a bit easier to see then my original post.) 
I will not claim that this is a new idea. I think it originally came from the Eddie Ross website. But it was sure a lot of fun, very simple, and I love the end result! A Simple Ornament Wreath!

This is a great project to do with your left-over ornaments after you are done decorating the tree this year. Or a great excuse to scour the local dollar store or Christmas shop!

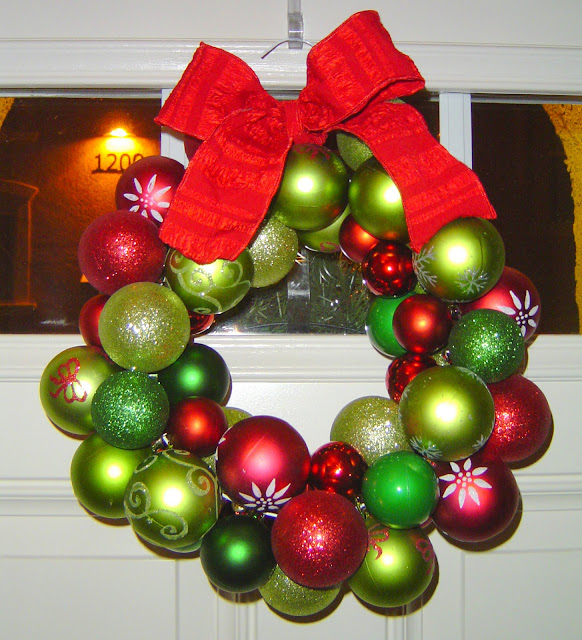
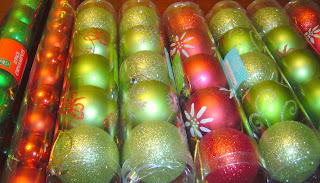
You will need a hot glue gun, a lot of ornaments (shatterproof unless you are very brave) in a variety of sizes (I used 55 total, Eddie Ross used 80 I believe, you can use less though for a smaller wreath), a wire hanger, wire cutters and a bit of patience.

Ornaments+01 Ornament Wreath (repost) 16

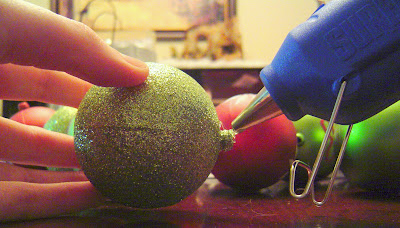
First things first. Take all of the metal or plastic tops off of your ornaments. Seriously. (I mentioned you would need a bit of patience for this first part.)

Then, hot glue them back on.

Really. I am not joking.

We have all had ornaments become detached from their top, well, when placed on a wreath and bent in a circle, they will surely pop off. So save yourself some time in the years to come, and glue the tops on now. (After this is done, the project goes very quickly!  I promise!)

Ornaments+02 Ornament Wreath (repost) 17

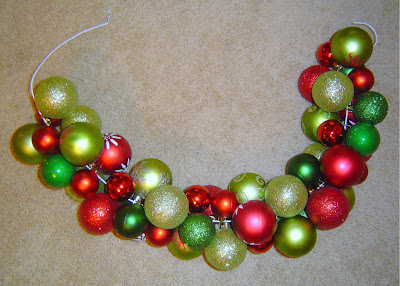
Secondly, untwist the wire hanger, leaving the hook on the top, and start stringing the ornaments on the wire, one at a time, varying sizes and colors as you go.

This can be done with any color ornaments: red and green for Christmas, blue and silver for Hanukkah, red, green and black for Kwanzaa, pastels colors for Easter, browns and golds for the fall etc., let your creativity run wild here and have fun with it!

Ornaments+03 Ornament Wreath (repost) 18
After the entire wreath is full of ornaments, play with the ornaments until the all lay close together, trying to fill in all gaps on all sides of the wreath.
I held mine up and gently shook it until the ornaments settled and then went back and fixed a few ornaments, as needed, until they all lay correctly. (You will be happy you put some smaller size ornaments on the wreath at this point!)

Ornaments+04 Ornament Wreath (repost) 19
Ornaments+05 Ornament Wreath (repost) 20
Next comes the hardest part of the entire project. (I have to confess I enlisted my husband’s help with this part!)
Bend the wire into a circle and twist the opposite side of the hanger-wire back around the hook part until it is secure.
Use your wire cutters to cut off any excess wire left over.

Add a bow and voila! Your ornament wreath is complete!

Ornaments+06 Ornament Wreath (repost) 21

I participate in the link parties found here.

« DIY Simple Homemade Holiday Cards (Christmas, Hanukkah & Kwanzza)
Candy Trees »

Reader Interactions

Comments

  1. Becky

    November 19, 2010 at 4:36 pm

    I was telling my mother in law last weekend that I think I am finally ready to be grown up and display a Christmas wreath this year. I told her it HAD to be cool though and lookie here!!! I just fell in love with this! Thanks so much fo reposting it!

    Reply

Leave a Reply Cancel reply

Your email address will not be published. Required fields are marked *

Primary Sidebar

Hello Friends!

Ashley Phipps Simply Designing I'm Ashley Phipps and I love sharing SIMPLE DIY, home, travel, food, craft and essential oil ideas with you! Learn more about me here. Contact me here. Find Media/PR info here. Privacy is important to us. Please read my Privacy Policy.
  • Email
  • Facebook
  • Instagram
  • Pinterest
  • Twitter
  • YouTube

Favorite Posts

Patriotic Mousse Tarts

Patriotic Mousse Tarts

Patriotic Projects


COPYRIGHT: You’re welcome to link to Simply Designing or use a single image with a brief description to link back to any post. Republishing posts in their entirety is strictly prohibited.  Any use for commercial purposes is strictly prohibited. Feel free to pin on Pinterest. Find out more in my Privacy Policy.  Simply Designing with Ashley Phipps LLC is a participant in the Amazon Services LLC Associates Program, an affiliate advertising program designed to provide a means for sites to earn advertising fees by advertising and linking to Amazon.com . Simply Designing with Ashley Phipps LLC and it’s owner, employees and affiliates are not liable in any way for injury or loss (whether physical, emotional, monetary or any other kind of loss) resulting from any inspiration, ideas, directions or information gained from this website. We advise you to always follow manufacturer instructions, take appropriate safety precautions and hire a professional when in doubt. We love it when you use our site for inspiration, but by using it, you agree that you do so at your own risk.

Privacy Policy 

Copyright © 2022