I have been waiting very patiently to show these to you! I had this idea months ago and have been working on them, but I didn't want to show them too far in advance of the 4th of July, or "America Day" as my daughter so aptly calls it!
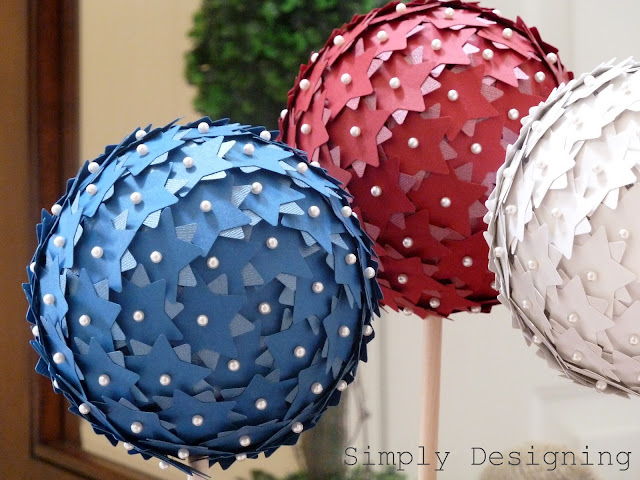
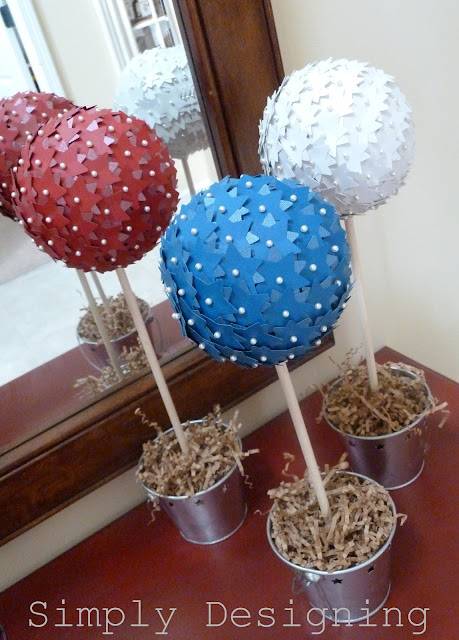
But here they are...my 4th of July Star Topiaries!! (or should I call them "America Day Topiaries! hahaha!)
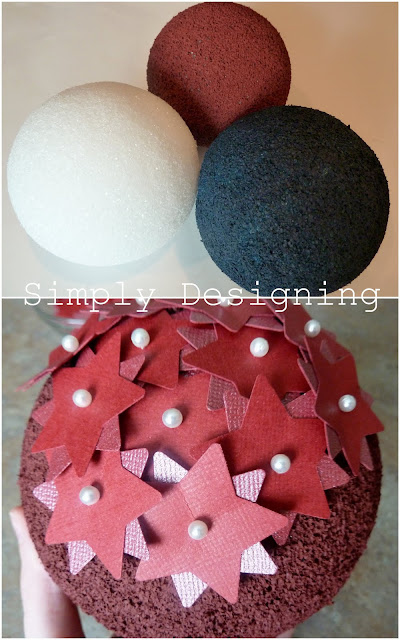
These are so super simple to make. But they do take a little bit of time. But it was well worth the time it took because I think they are so cute!
Lastly, I hid the Styrofoam in the pail with a bit of crinkled paper.
Aren't these just too cute?? I love my 4th of July America Star Topiaries!
Have you started decorating for the 4th of July yet?
I participate in the link parties found here.
Subscribe to Simply Designing by Email



Krystal
Those are completely adorable!!! Great idea!
Lorie
What a great idea! And they are beautiful! I will be sharing a link on my blog tomorrow!
Lolly Jane
those are sonstinkin cute!! (:
Hoosier Homemade
Love these! I stumbled them for you! :-)<br />~Liz
CarliAlice @ GG2Life
I love these! I'm a new follower from Meet Me Monday Blog Hop. http://www.grandmasguidetolife.blogspot.com
GuitarTrump
Aw, those are so cool! What fun decorations...following you - can't wait to read more! :D<br /><br />I really like your blog - I'm trying to get mine off the ground and was wondering if you could come check it out and consider following.<br /><br />http://www.guitartrump.blogspot.com/<br /><br />Hope you have an *amazing* day! :)<br /><br />Alex
Kimberlee, The Spunky Diva
Those are really neat. I don't think I would have the patience to punch all those stars though, LOL! I love how the pearl pins against the papers. Visiting from Inspire Me Monday.<br />~Kimberlee<br /><a href="http://thespunkydiva.net/?p=550/" rel="nofollow"> {Accuquilt Giveaway closes 6/7} </a>
MommyDigger.com
Great idea! They turned out wonderfully!<br /><br />I'm your newest follower from the Give It To Me Monday Hop! I hope you'll stop by my blog http://www.mommydigger.com and follow me as well 🙂
MiriamR
Those look fantastic!! I am pinning these to my pinterest! You are so good!!
Jessica @ My World - Made By Hand
These are super cute. I would love it if you would consider sharing these during my Red, White & Blue Roundup. You can see the details on my right sidebar.<br /><br />Jessica<br />http://myworldmadebyhand.blogspot.com
Married...with a Pup
I love these! How fun! Thanks for sharing the creative tutorial!
Alisha
Super cute!!! I love your blog! 🙂
Kaysi
Super cute Ashley! I'm going to feature this on Friday!
Lexi
This is so cute!
ladybehindthecurtain.com
These are too cute! I love anything Americana. How creative! Thanks!
The Ellis'
Your blog is so cute! We found your blog through the hop and would LOVE for you to follow us back! Thanks!<br /><br />www.sixsistersstuff.blogspot.com
Ashley
soooooooooo cute!!!!<br />totally love them<br />new follower:)
Kristina
What a cool idea! I like them in the silver galvanized buckets too.
the cape on the corner
great idea! i love that you did this as a set of 3, red white and blue. so cute!
Megan
Love it! I need to start decorating for the 4th of July.
Jennifer
This comment has been removed by the author.
Jennifer
Fantastic! This idea could be used for all holidays.<br /><br />Jen<br />www.dishesandsocks.com
Michelle@Somedaycrafts
LOVE THese!!!! I will feature these tonight at somedaycrafts.blogspot.com.
Kim@todayismysome-day
Very nice! I know these were time consuming! I did some rolled flower balls and they took FOREVER! Came over via Diamond in the Stuff linky party.
Kim@todayismysome-day
This comment has been removed by the author.
Kim@todayismysome-day
This comment has been removed by the author.
Kim@todayismysome-day
This comment has been removed by the author.
Chris
These are so lovely. What a fun way to recognize our country's founding.
Chad and Mary Beth @ Nothing But Country
OH MY HECK.. I LOVE THE STARS!!<br /><br />Love your project!! And love that you shared your creation with our readers this week too.<br /><br />Thanks for linking up at <a href="http://www.nothingbutcountry.com/" rel="nofollow">Nothing But Country</a> Creative Creations Tuesday. You rock!!
Tania
These are so cute. I pinned it on my Patriotic Board on Pinterest.<br /><br />http://pinterest.com/tanias/patriotic/
Robin
ADORABLE! This is so going on my Pintrest boards!
Steph @ Crafting in the Rain
I've seen these in a few places and just had to tell you they look wonderful!
GuppyAl
These are so great! I posted a link to this on our site--just wanted to let you know!<br /><br />Here's the link:<br />http://www.thecheddarguppies.com/2011/06/tgicf_10.html<br /><br />Cheers!
Sommer
These are fantastic! They turned out so very cute! Please come link to my party this weekend =) http://designergarden.blogspot.com/2011/06/vip-party-18.html
Emily
I pinned these to my crafting board on Pinterest. They are so stinkin' cute. I hope to copy them one day.
Pamela
Amazing. I think I can do this! I hope so...you made it sound easy. ;-)<br /><br />I'm a new follower from Home is Where My Story Begins.<br /><br />Have a joy-filled day!<br />Pamela
At The Picket Fence
Those are so creative and just adorable! Thank you so much for sharing this with us at Inspiration Friday this week!<br />Vanessa
Buttercup Bliss
I love this idea!!! They are just adorable!! Super job :-)))
Rebecca @ My Girlish Whims
SO awesome looking and SO festive! haha turned out great :)<br /><br />Thanks for linking up to Your Whims Wednesday!!
Jerri
I love your topiaries! Thanks for linking up with me. I just pinned this to my pinterest page.
Midnight Mommy
I love these Topiaries! I hope I can pull something off like that for the 4th of July! You have given me some great ideas! Thanks for sharing!! Also, I am your newest follower from http://www.midnightmommy.com, hope you have time to take a look around my blog when you get the chance! 🙂
craftsncoffee
Hi Ashley, These are so cute! What a fun idea for July 4th. I would like to include them on our blog, http://www.craftsncoffee.wordpress.com, later this week, along with a couple of ruffled topiaries that I made. Would that be o.k.? Thanks! Sharon, http://www.craftsncoffee.wordpress.com; http://www.styrofoamcrafts.com.
Bethany @ A Fish Who Likes Flowers
These are absolutely adorable!!! You did such a good job.
Desiree @ The 36th Avenue
I just want to let you know that I featured your cute decor idea on my blog... Thank you so much for sharing it at my link party. Feel free to come and button up 😉
Karen @ Goodbyecityhellosuburb
These are amazing! You definetely have a lot of patiences! Thanks for linking to <a href="http://goodbyecityhellosuburbs.blogspot.com" rel="nofollow"> WorkShop Wednesday</a>! Hope to see you this week!
The DIY Show Off
Ashley - I LOVE these! I'm sorry that I didn't get them featured in time...I would have loved to have "shown off" these cuties! Thank you so much for sharing your creativity. I just love your style, your projects and your blog! :)<br /><br />Roeshel
Blue Velvet Chair
Found you on the Along for the Ride link party. These are one of the best 4th decorations of the year! I've been collecting the 'best of the best' in my Pinterest collection and these were definitely added as a 'must try' for next year. Love them - thanks for the inspirationo!<br />Michael<br /><br />have a look at the pinterest collection if you get a chance.<br />http://
Meredith
I love these! Featuring you today on Favorite Pins Friday :)<br />Meredith<br />www.waittilyourfathergetshome.com
Jessica
I love these! Do you know approximately how big yours stars are? I'm hoping to find a file I can cut with my Silhouette.
Ashley Phipps
They are only about one inch tall!