• Skip to primary navigation
  • Skip to main content
  • Skip to primary sidebar

Simply Designing with Ashley

  • DIY
  • Oils
  • Recipes
  • Craft
  • Travel
  • Decor
  • Holiday
menu icon
go to homepage
  • DIY
  • Oils
  • Recipes
  • Craft
  • Travel
  • Decor
  • Holiday
search icon
Homepage link
  • DIY
  • Oils
  • Recipes
  • Craft
  • Travel
  • Decor
  • Holiday
×

XOX Valentine's Decor {Pottery Barn Inspired}

Published: Feb 10, 2014 · Modified: Apr 11, 2016 by Ashley Phipps · 451 words. · About 3 minutes to read this article. · 8 Comments · This post may contain affiliate links · This blog generates income via ads and sponsored posts · This blog uses cookies · See our privacy policy for more info Filed Under: Craft, Holiday


I was thrilled to be able to guest post at Infarrantly Creative last week showing off a really fun Shabby Valentine's Day XOX Decor!

I was inspired to create this project from a Pottery Barn Knock-Off decoration I created for Christmas.  You can check it out HERE.  So I modified it a bit and created my own Valentine's Day version of it.  And can I just say, I love it!

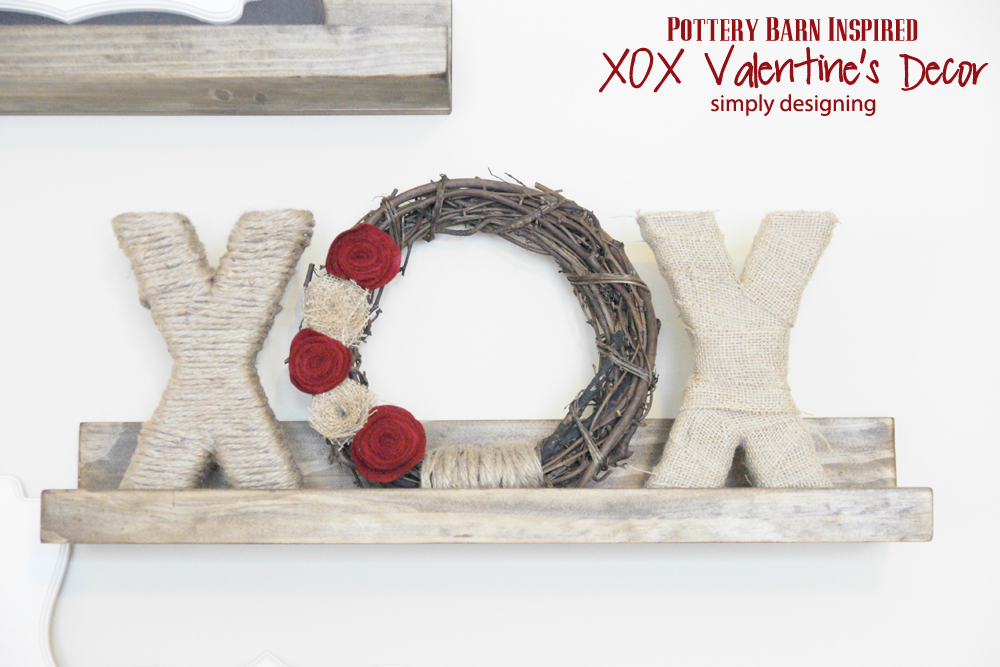
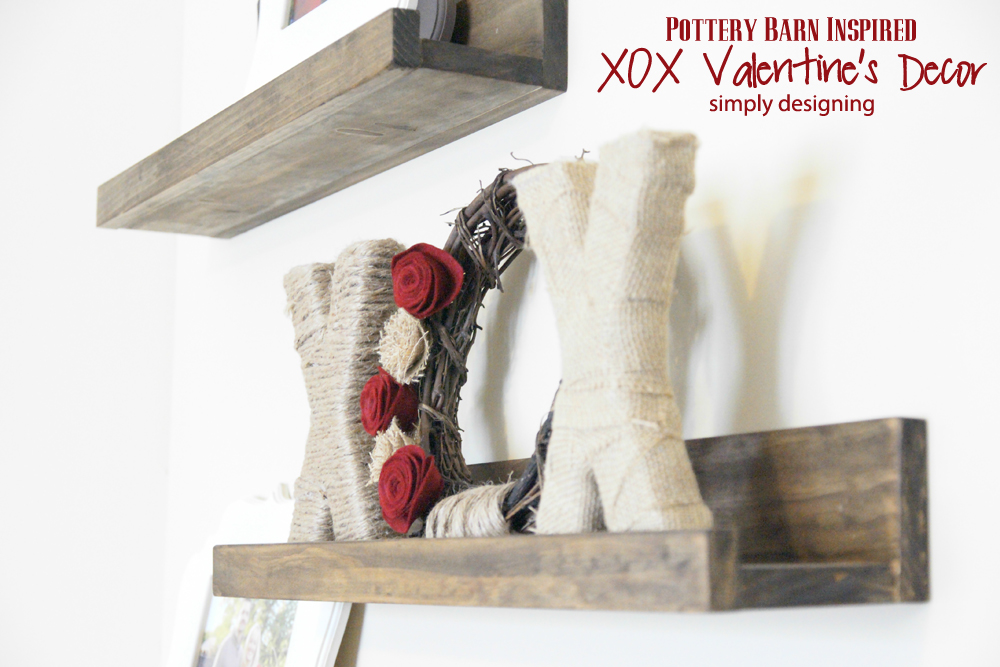
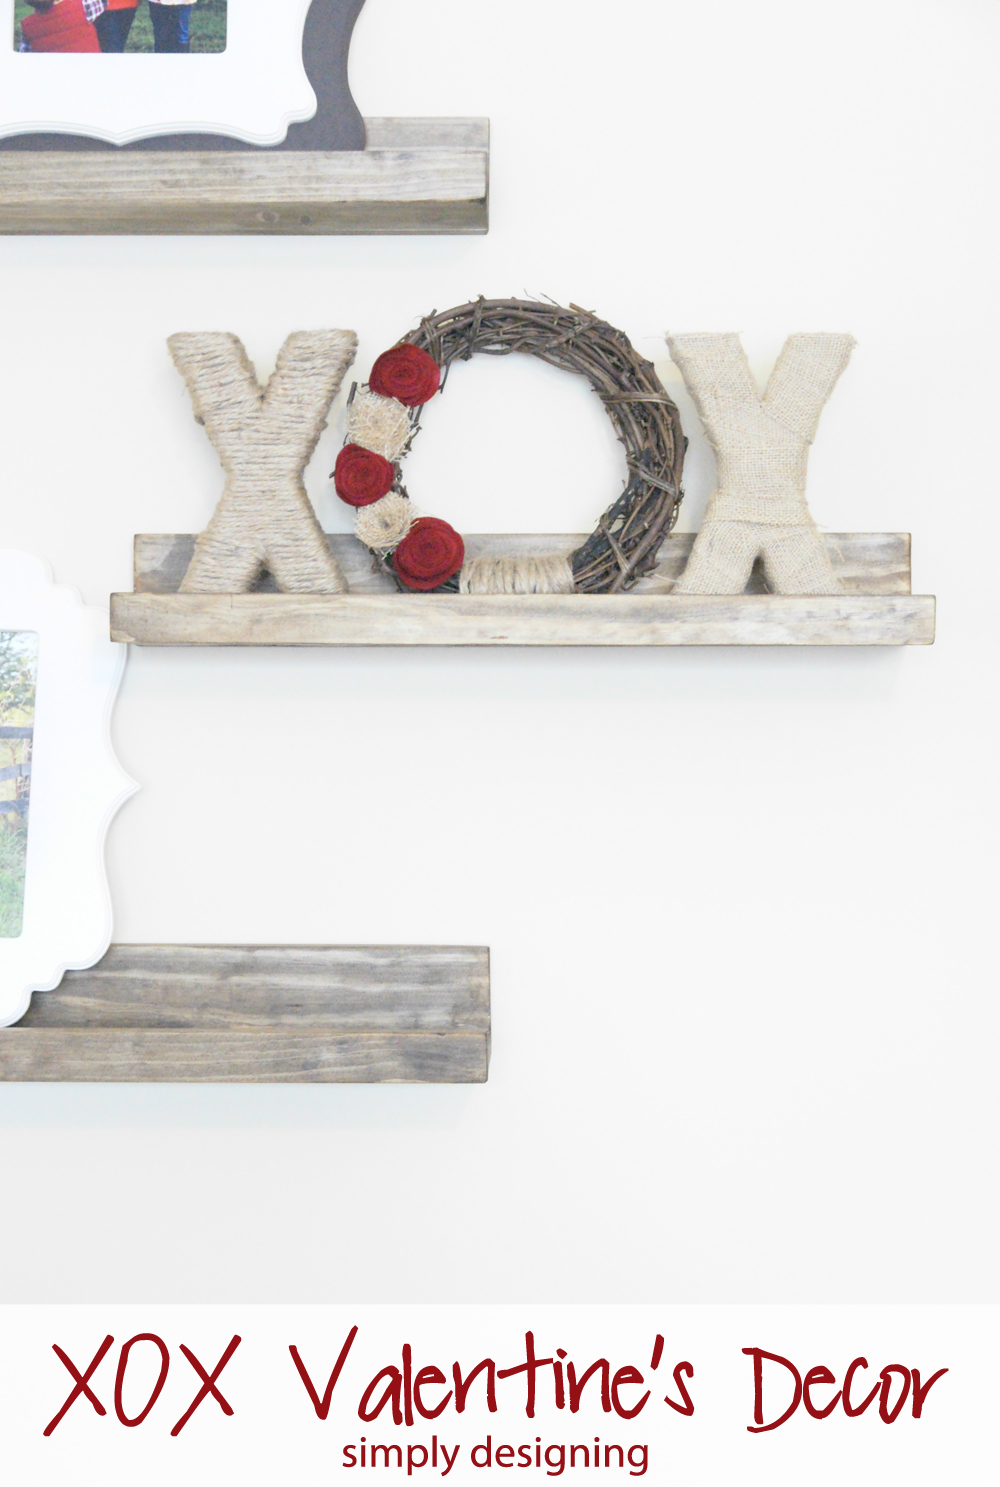
Here is my XOX Valentine's Decor

XOX Shabby Valentine's Decor {Pottery Barn Inspired} | #tutorial #crafts #diy #valentinesdecor #decor #valentinesday #xoxo

I just love how rustic it looks!  It is definitely not your typical "cheesy" Valentine's decor.  It is a little more rustic and shabby and I simply love it!

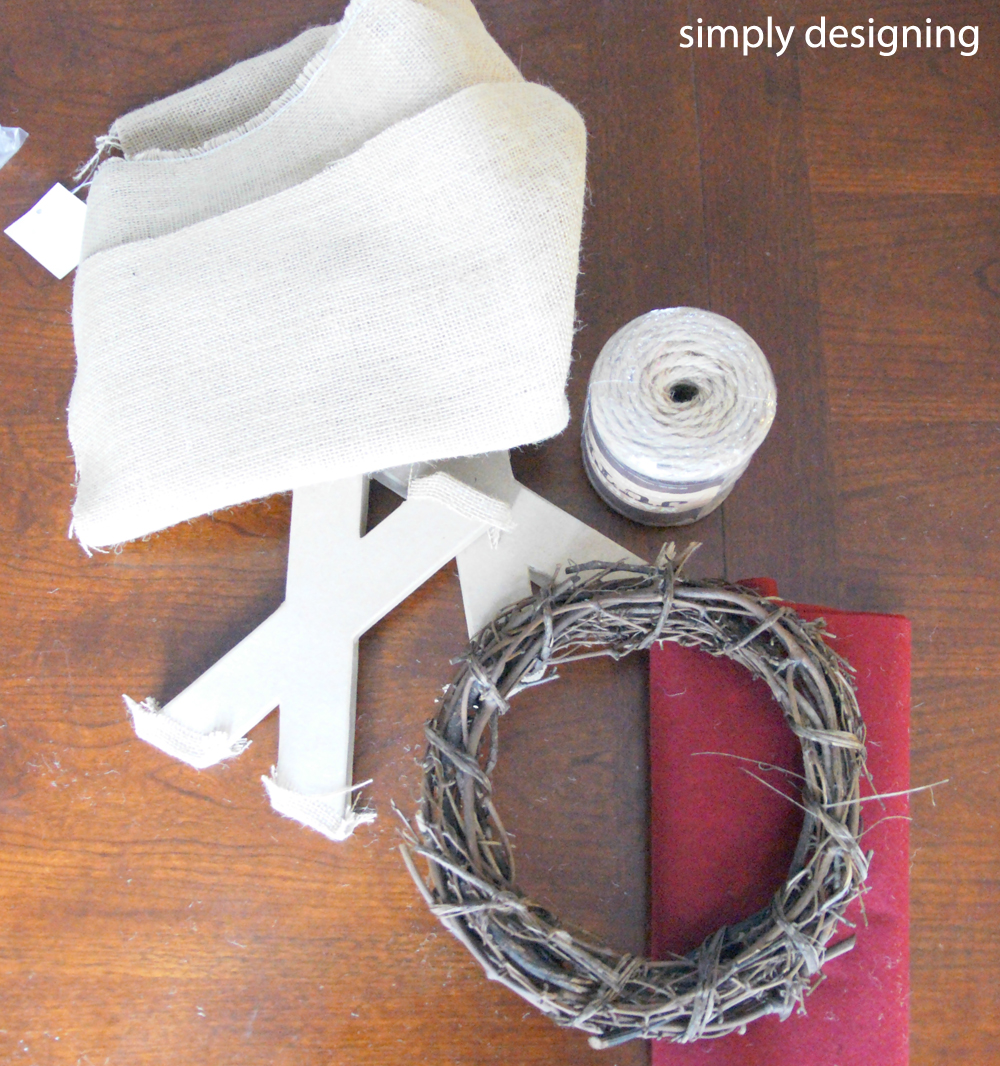
To create this project, you will need:

  • (2) cardboard "X"'s, approximately 12" high
  • (1) 12" round grapevine wreath
  • Jute
  • Burlap
  • Red felt
  • Hot glue gun
  • Fabric scissors
XOX+Supplies XOX Valentine's Decor {Pottery Barn Inspired} 11

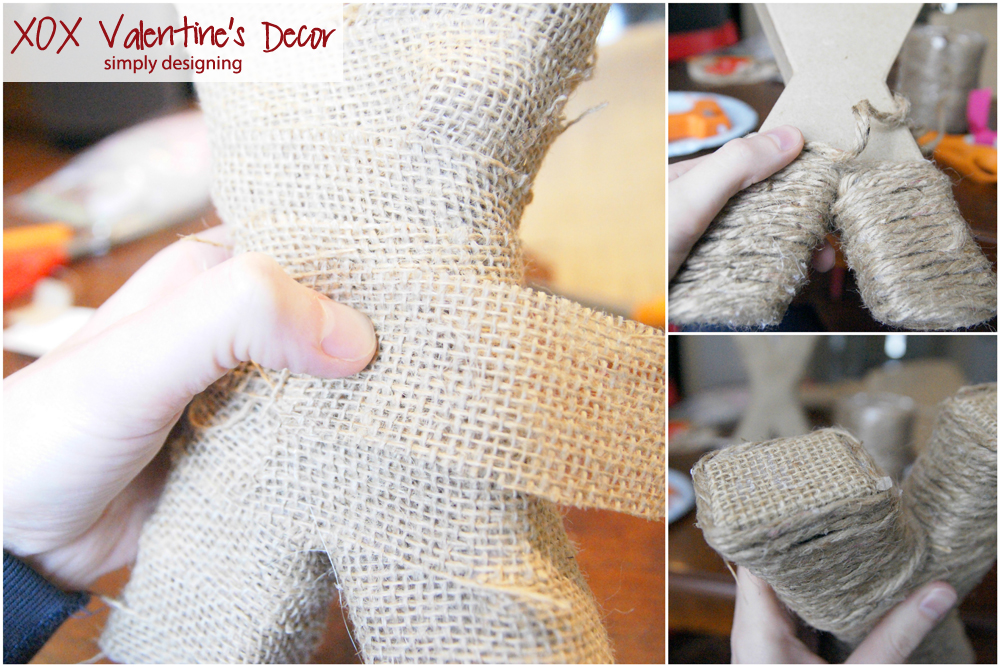
First, I used my hot glue gun to attach a small piece of burlap to all ends of both X's.  This will create the starting point for your burlap covered X, and it will also create a nicely finished bottom for your jute X.

Second, I cut strips of burlap and wrapped it around one of the X's, using hot glue to tack it down as needed.

Then I wrapped jute around the second X and used hot glue to tack it down as necessary.  I don't recommend putting jute on the bottom of your X as it will be a bit unstable, but I would definitely be sure to put jute on the top of the X.

XOX+Decor+X+collage+a XOX Valentine's Decor {Pottery Barn Inspired} 12

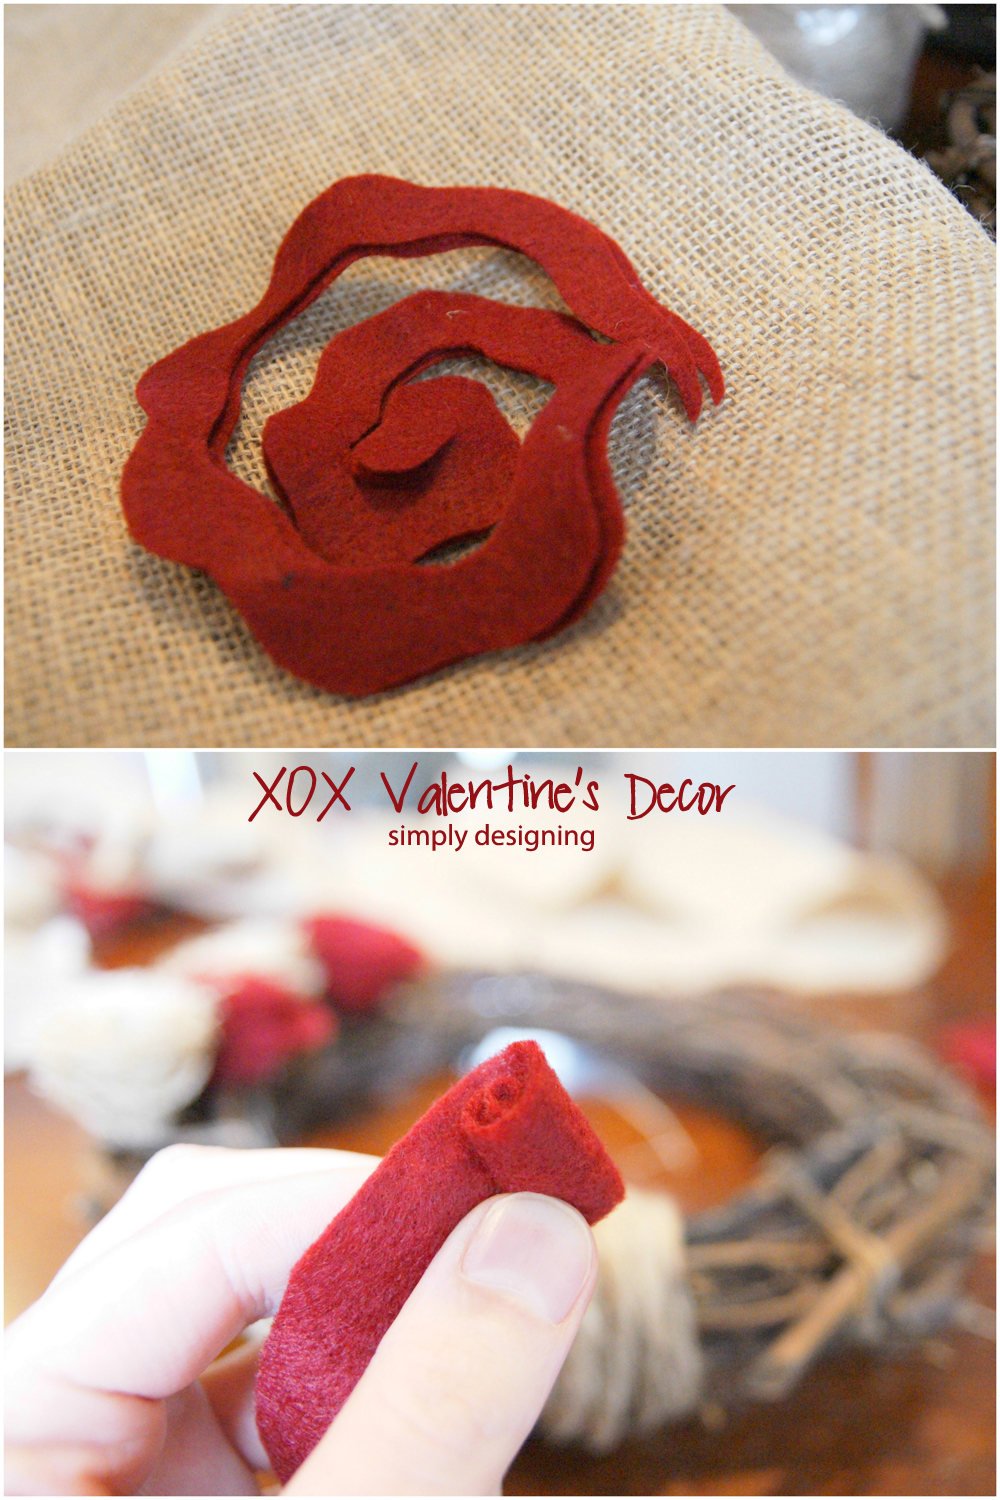
Next you will make a few flowers out of your felt and burlap.  I made 3 red felt flowers and 2 burlap flowers.

To create these flowers you will cut a large circle out of felt.  (You can make the edges wavy or not.)  Then you will cut your felt circle into a spiral.  Start with the outside end and roll the felt spiral into a flower.  Use hot glue on the bottom to tack it all together.

XOX+Decor+Flower+Collage+a XOX Valentine's Decor {Pottery Barn Inspired} 13

I wrapped a bit of jute around the bottom of my wreath and then hot glued my flowers onto the side of my wreath.

XOX+Wreath XOX Valentine's Decor {Pottery Barn Inspired} 14

I love the great texture that the jute and burlap give to ordinary cardboard letters!  And the overall XOX decor is a sophisticated shabby look that I just love right now!

XOX Shabby Valentine's Decor {Pottery Barn Inspired} | #tutorial #crafts #diy #valentinesdecor #decor #valentinesday #xoxo

These sit perfectly on these new shelves that I just built too!  (You can see how to build these shelves HERE.)  But they would also work on a mantle, on a bookcase or even on a counter!

XOX Shabby Valentine's Decor {Pottery Barn Inspired} | #tutorial #crafts #diy #valentinesdecor #decor #valentinesday #xoxo

I love that this Valentine's Day decoration fits the style of my home!  Plus they were super simple to make!

Do you decorate for Valentine's Day?

XOX Valentine's Decor {Pottery Barn Inspired} 15

I would love for you to follow me on Facebook, Twitter, Google+, Pintrest and via email.
I participate in the link parties found
here.

This post appeared first on Simply Designing.

More craft Recipes

  • xfq8gz24 Pine Cone Squirrel 16
    Pine Cone Squirrel
  • winter+burlap+banner1 Burlap Winter Banner 17
    Burlap Winter Banner
  • xfq8gz25 How to Make Your Own Squirrel Feeder 18
    How to Make Your Own Squirrel Feeder
  • xfq8gz26 DIY Felt Squirrel 19
    DIY Felt Squirrel

Reader Interactions

Comments

  1. Lisa

    February 10, 2014 at 10:13 am

    This is so cute!!

    Reply
    • Ashley Phipps

      February 10, 2014 at 5:22 pm

      Thank you so much Lisa!

      Reply
  2. Colleen

    February 10, 2014 at 10:29 am

    That is Awesome. Makes for pretty wall decor and they look so nice sitting on your shelves.

    Reply
    • Ashley Phipps

      February 10, 2014 at 5:23 pm

      Oh thank you Colleen!

      Reply
  3. Vanessa Hanger

    February 10, 2014 at 8:44 pm

    Love them! They made my mouth drop open because they are so adorably CUTE!

    Reply
    • Ashley Phipps

      February 13, 2014 at 11:59 pm

      Oh thank you so much Vanessa!!! You are so kind!

      Reply
  4. I Play Outside The Box

    February 11, 2014 at 5:41 am

    So cute!!! 🙂

    Reply
    • Ashley Phipps

      February 13, 2014 at 11:59 pm

      Thank you!!

      Reply

Leave a Reply Cancel reply

Your email address will not be published. Required fields are marked *

Primary Sidebar

Hello Friends!

Ashley Phipps Simply Designing I'm Ashley Phipps and I love sharing SIMPLE DIY, home, travel, food, craft and essential oil ideas with you! Learn more about me here. Contact me here. Find Media/PR info here. Privacy is important to us. Please read my Privacy Policy.
  • Email
  • Facebook
  • Instagram
  • Pinterest
  • Twitter
  • YouTube

Favorite Posts

minimalist living room with white and grey background

Easy Minimalist Living for a clutter-free home and mind

Back to School Ideas


COPYRIGHT: You’re welcome to link to Simply Designing or use a single image with a brief description to link back to any post. Republishing posts in their entirety is strictly prohibited.  Any use for commercial purposes is strictly prohibited. Feel free to pin on Pinterest. Find out more in my Privacy Policy.  Simply Designing with Ashley Phipps LLC is a participant in the Amazon Services LLC Associates Program, an affiliate advertising program designed to provide a means for sites to earn advertising fees by advertising and linking to Amazon.com . Simply Designing with Ashley Phipps LLC and it’s owner, employees and affiliates are not liable in any way for injury or loss (whether physical, emotional, monetary or any other kind of loss) resulting from any inspiration, ideas, directions or information gained from this website. We advise you to always follow manufacturer instructions, take appropriate safety precautions and hire a professional when in doubt. We love it when you use our site for inspiration, but by using it, you agree that you do so at your own risk.

Privacy Policy 

Copyright © 2022