• Skip to primary navigation
  • Skip to main content
  • Skip to primary sidebar

Simply Designing with Ashley

  • DIY
  • Oils
  • Recipes
  • Craft
  • Travel
  • Decor
  • Holiday
menu icon
go to homepage
  • DIY
  • Oils
  • Recipes
  • Craft
  • Travel
  • Decor
  • Holiday
search icon
Homepage link
  • DIY
  • Oils
  • Recipes
  • Craft
  • Travel
  • Decor
  • Holiday
×

$1 DIY Desktop Organization

Published: Feb 26, 2014 by Ashley Phipps · 383 words. · About 2 minutes to read this article. · 6 Comments · This post may contain affiliate links · This blog generates income via ads and sponsored posts · This blog uses cookies · See our privacy policy for more info Filed Under: Craft, Home Decor

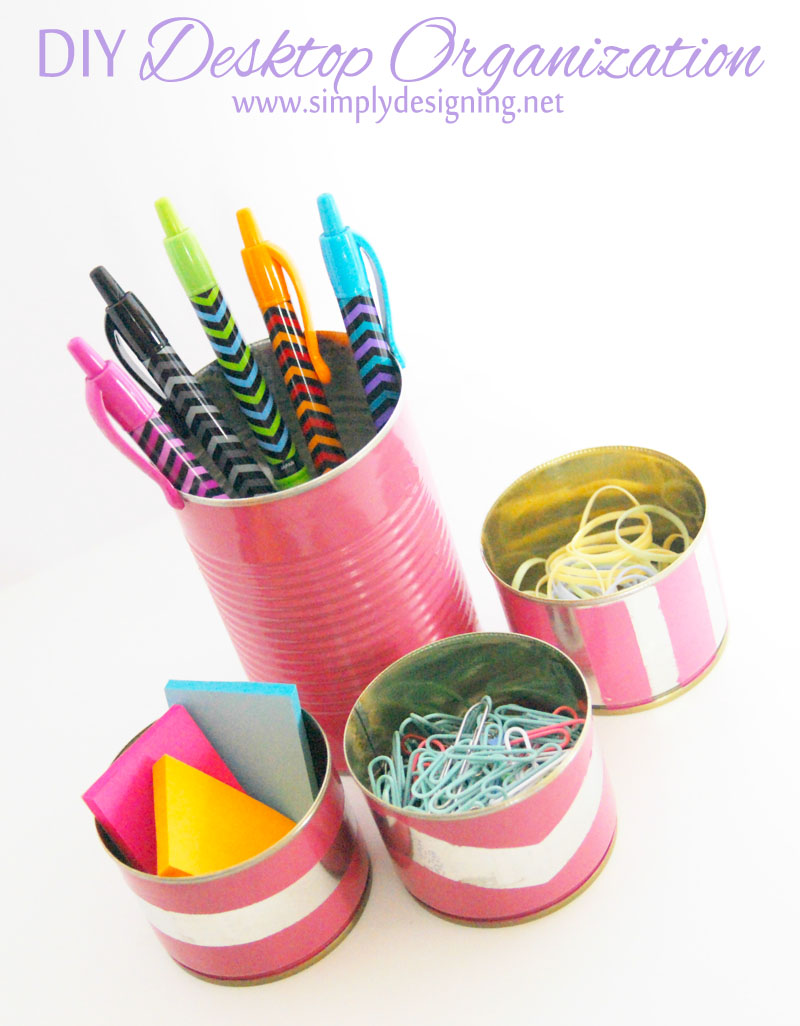
I am always looking for simple and inexpensive ways to organize my desk supplies that are currently a bit out of control!  I wanted to find a way to organize my office supplies with items I already had at home, or items that were very inexpensive!  And I came up with the perfect DIY Office Desk Top Organization!  

And the best news is that each piece cost me less then $1 to make!  Seriously!

$1 DIY Desktop Organization | for less then $1 you can DIY your own cute desktop accessories | #desk #office #diy

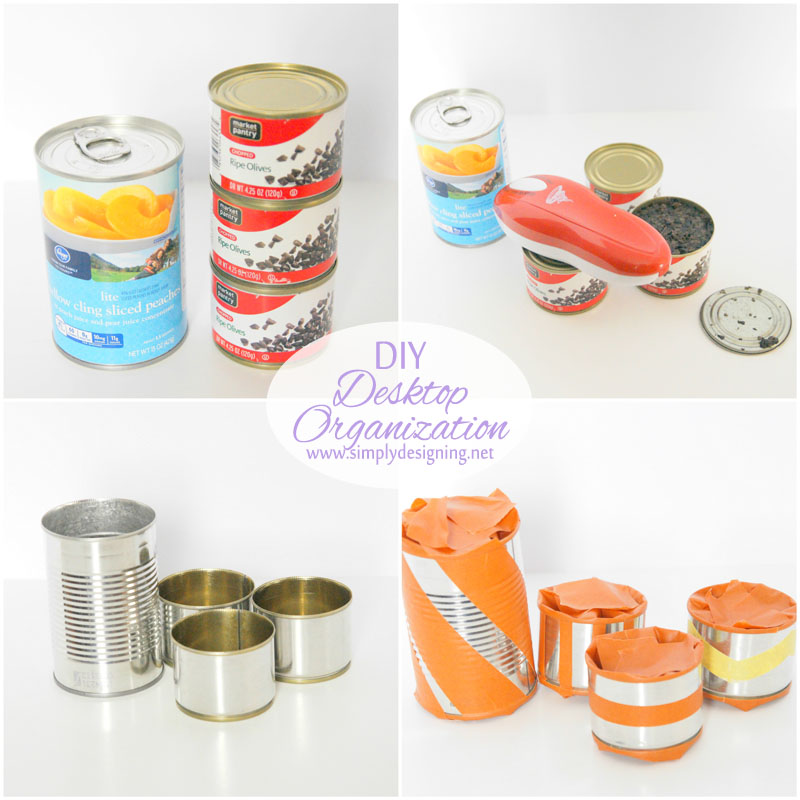
To create your own desktop organization containers, you will need:

  • cans
  • smooth edge can opener
  • painters tape
  • spray paint

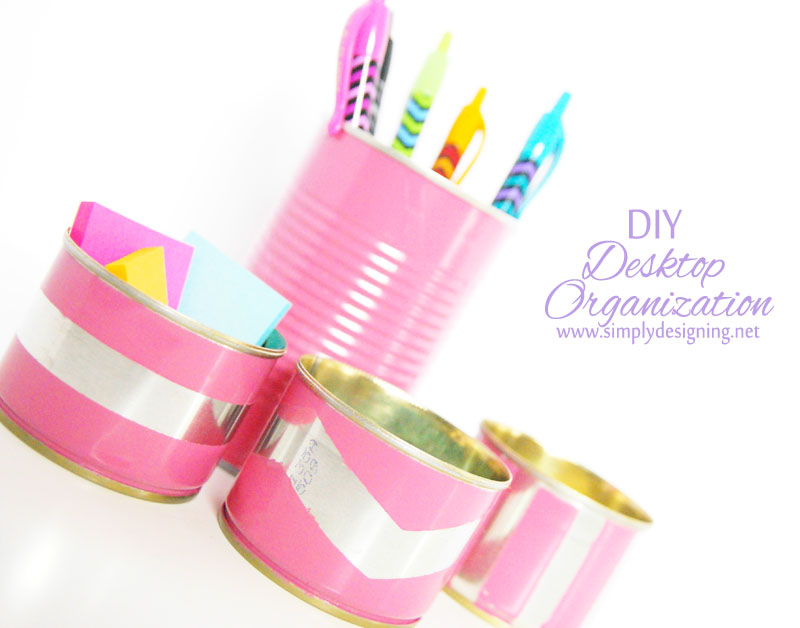
$1 DIY Desktop Accessories | for less then $1 you can DIY your own cute desktop organization | #desk #office #diy

I already had the can of peaches that I had planned on opening and using, but I grabbed the olive cans at the store.  These cans are the perfect size for items like paper clips, rubber bands or post-it notes!

So see what cans you already have in your pantry, or shop for the perfect size cans at the store.  Either way, this should not cost you more then 50 cents - $1 per can!

You will simply use your smooth edge can opener to open all the cans.  This is non-negotiable.  If you use a normal can opener, your edges will be sharp and you will risk getting hurt while reaching in for a paper clip!  So please please please use a smooth edge can opener!

Use or discard the food inside of the cans (I HATE wasting food, but I do not eat olives...ew!  The peaches were eaten!)  Then wash the cans out well.

Use painters tape to tape off any edges or designs you may want to create.  Then spray paint the cans and enjoy your newly created $1 (or less) Desktop Accessories!!

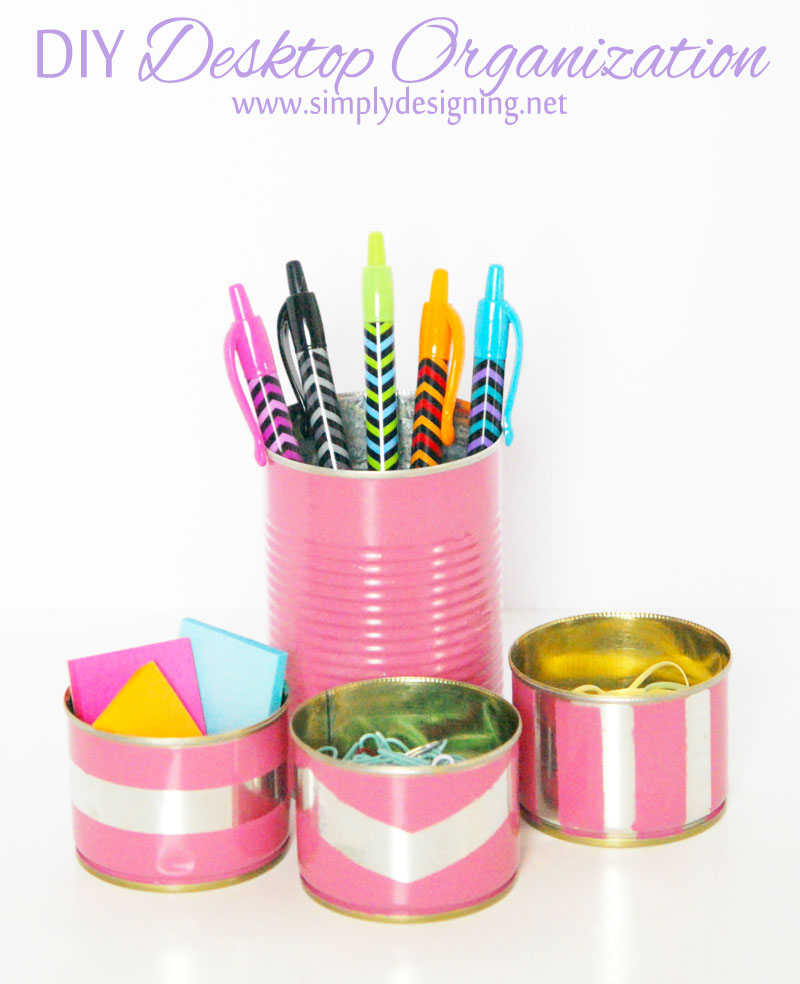
DIY Desktop Organization | for less then $1 you can DIY your own cute desktop accessories | #desk #office #diy

These took only a few minutes to make and are so inexpensive!  They are a perfect desktop solution for containing your pens and paperclips!

But they would also be perfect for bathroom storage like bobby pins and hair clips!  The options are truly endless!

$1 DIY Desktop Accessories | for less then $1 you can DIY your own cute desktop organization | #desk #office #diy

And what a great way to reuse cans that would normally be thrown away!  And a perfect way to start #springcleaning this year!

You might also enjoy:
Mason Jar Laundry Soap Containers + DIY Chalkboard Tags
Homemade Dishwasher Detergent that Works!
Reusable Swifter Duster Covers

Follow via | Email | Facebook | Pinterest | Google+ | Instagram | Twitter | YouTube
$1 DIY Desktop Organization 3
This post appeared first on Simply Designing.  All blog posts, text and images are subject to my Privacy and Use Policy here.  I participate in the link parties found here.

More Crafts

  • Salt Scrub Salt Body Scrub 08306 How to make a Salt Scrub 4
    How to make a Salt Scrub
  • Summer Hoop Wreath 06852 Summer Hoop Wreath 5
    Summer Hoop Wreath
  • How to make Farmhouse Christmas Ornaments 06055 How to make Farmhouse Christmas Ornaments 6
    How to make Farmhouse Christmas Ornaments
  • Peppermint Sugar Scrub 04668 Peppermint Sugar Scrub 7
    Peppermint Sugar Scrub

Reader Interactions

Comments

  1. Kathy Moreland

    February 26, 2014 at 4:51 pm

    I did the same thing recently, but used turquoise tape to make stripes around the can, painted it with craft paint, and used stickers to decorate it too. Fun little project, and the price is RIGHT!

    Reply
    • Ashley Phipps

      March 03, 2014 at 2:43 pm

      I bet those turned out so cute! Thanks for stopping by Kathy!

      Reply
  2. KAL DELLROY OH

    February 27, 2014 at 8:29 pm

    Love these! You could use Washi tape too for the stripes or any design. For the paper clips, you could line the inside of the can with a magnetic strip. An old refrigerator magnet cut to size might work - like the kind they give out for promotions in the shape of business cards.

    Reply
    • Ashley Phipps

      March 03, 2014 at 2:44 pm

      What great ideas! Thanks for stopping by to share!

      Reply
  3. Jodie

    August 01, 2017 at 1:36 pm

    Love these! THEY ARE GREAT...
    Would love for you to share at Reader Tip Tuesday (its brand new) http://www.jodiefitz.com/2017/08/01/reader-tip-tuesday-along-new-food-craft-party/
    Have a great day...

    Reply
  4. Michelle

    July 11, 2019 at 6:26 pm

    Very cool idea!

    Reply

Leave a Reply Cancel reply

Your email address will not be published. Required fields are marked *

Primary Sidebar

Hello Friends!

Ashley Phipps Simply Designing I'm Ashley Phipps and I love sharing SIMPLE DIY, home, travel, food, craft and essential oil ideas with you! Learn more about me here. Contact me here. Find Media/PR info here. Privacy is important to us. Please read my Privacy Policy.
  • Email
  • Facebook
  • Instagram
  • Pinterest
  • Twitter
  • YouTube

Favorite Posts

Color-Blocked Easter Eggs Featured Image

Color Blocked Easter Eggs

body scrub recipe book

Body Scrub Recipe Book with 20 Scrumptious Recipes


COPYRIGHT: You’re welcome to link to Simply Designing or use a single image with a brief description to link back to any post. Republishing posts in their entirety is strictly prohibited.  Any use for commercial purposes is strictly prohibited. Feel free to pin on Pinterest. Find out more in my Privacy Policy.  Simply Designing with Ashley Phipps LLC is a participant in the Amazon Services LLC Associates Program, an affiliate advertising program designed to provide a means for sites to earn advertising fees by advertising and linking to Amazon.com . Simply Designing with Ashley Phipps LLC and it’s owner, employees and affiliates are not liable in any way for injury or loss (whether physical, emotional, monetary or any other kind of loss) resulting from any inspiration, ideas, directions or information gained from this website. We advise you to always follow manufacturer instructions, take appropriate safety precautions and hire a professional when in doubt. We love it when you use our site for inspiration, but by using it, you agree that you do so at your own risk.

Privacy Policy 

Copyright © 2023