• Skip to primary navigation
  • Skip to main content
  • Skip to primary sidebar

Simply Designing with Ashley

  • DIY
  • Oils
  • Recipes
  • Craft
  • Travel
  • Decor
  • Holiday
menu icon
go to homepage
  • DIY
  • Oils
  • Recipes
  • Craft
  • Travel
  • Decor
  • Holiday
search icon
Homepage link
  • DIY
  • Oils
  • Recipes
  • Craft
  • Travel
  • Decor
  • Holiday
×

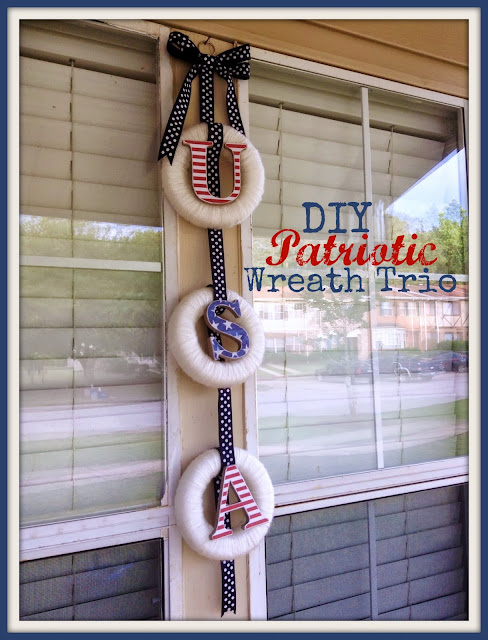
DIY Patriotic Wreath Trio

Published: Jun 25, 2013 · Modified: Jul 8, 2023 by contributor · 653 words. · About 4 minutes to read this article. · 1 Comment · This post may contain affiliate links · This blog generates income via ads and sponsored posts · This blog uses cookies · See our privacy policy for more info Filed Under: Craft

The Fourth of July is one of my favorite holidays. Maybe even my most favorite. It ranks right up there with Christmas and Easter for me. Growing up, The Fourth of July often meant parades, pancake breakfasts and watermelon under Grandma and Grandpa's cherry tree in their back yard. It always meant fireworks and lots of patriotic sentiment. Hooray for the Red, White and Blue! 
DIY Patriotic Wreath Trio #patriotic #4thofJuly #memorialday #redwhiteblue

Of course I want to make this holiday as special for my own children as it is to me. Seasonal decorating always seems to bring the excitement and anticipation up a notch so I thought it would be fun to share a little patriotic DIY with you for the upcoming holiday.

USA Wreath Supplies #patriotic #4thofJuly #usa #memorialday #redwhiteblue

Start by gathering your materials. You will need:
--Three 5 ⅞" Styrofoam wreath forms
--Yarn in the color of your choice
--Ribbon of your choice (you'll need around 2 yards or so)
--Patterned paper (my picks were from The Paper Studio, available at Hobby Lobby)
--A pencil
--Chipboard letters (also from The Paper Studio)
--Hot glue gun and glue
--Adhesive for adhering paper to letters
--An emery board or other fine grit sandpaper
--Scissors
--A small metal or plastic ring for hanging the wreaths (I used an extra key ring we had laying around)

I started by wrapping my wreath forms with yarn. This is pretty self-explanatory. Just start and wrap the yarn around the wreath form passing the yarn through the hole in the center of the wreath for each loop of yarn and pulling it tight to the wreath until it's completely covered.  Tuck the loose end of the yarn under a couple of the other yarn loops on the back side of the wreath. Wrapping the wreaths is super easy, but a little tedious. It's a little like folding laundry--a great opportunity to catch up on your British television. 😉
Set the wreaths aside.

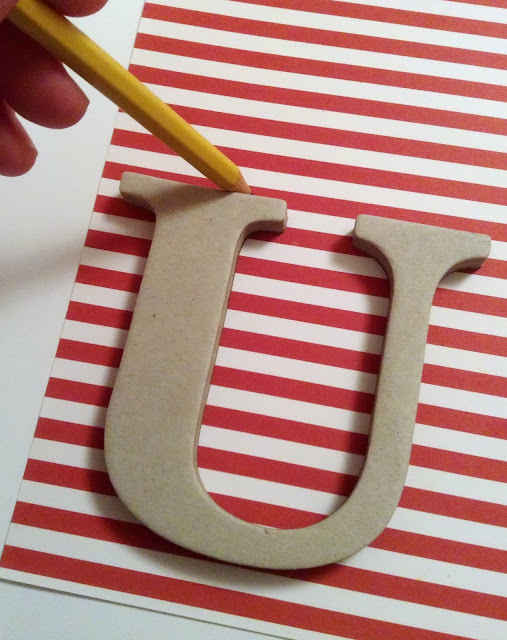
On to the letters! Trace each letter onto the patterned paper with your pencil. Cut out the patterned paper letter just inside your pencil line and adhere it to the chipboard letter. I used a tape runner for this part but plain old Elmer's  or Mod Podge would work great too.

Patriotic Wreath Supplies #patriotic #4thofJuly #usa #memorialday #redwhiteblue

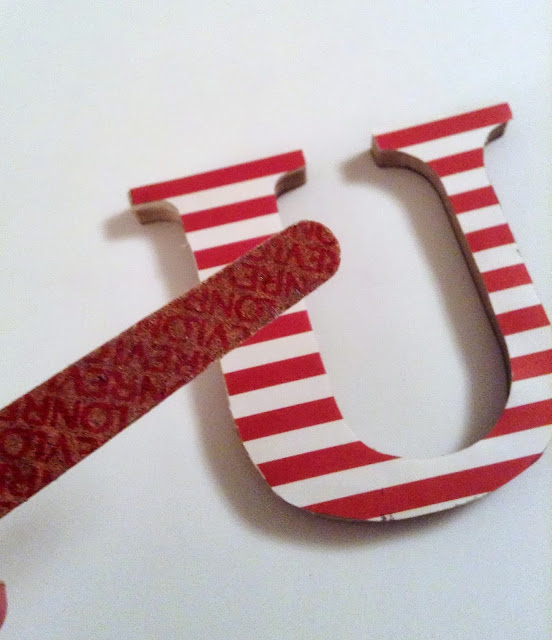
The paper may still be slightly larger than the letter. That's okay. Trim it with scissors or an X-ACTO knife if you want. Now take your emery board or sand paper and just lightly sand around all the edges of the letter. This will take care of any overhanging edges and give the letter a nice distressed look.

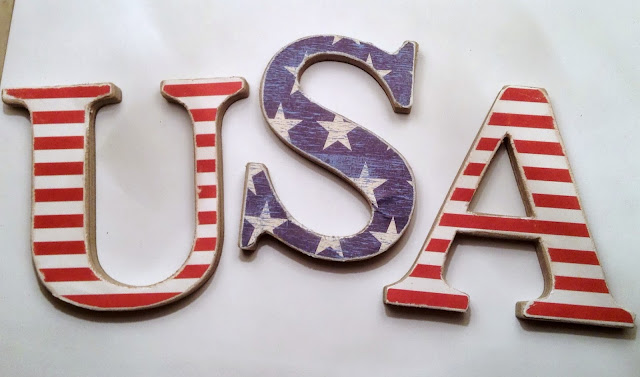
USA Letters #patriotic #4thofJuly #usa #memorialday #redwhiteblue

When you're all done your letters should look something like these:

Distresed USA Letters #patriotic #4thofJuly #usa #memorialday #redwhiteblue

 Next up: the ribbon and bow.

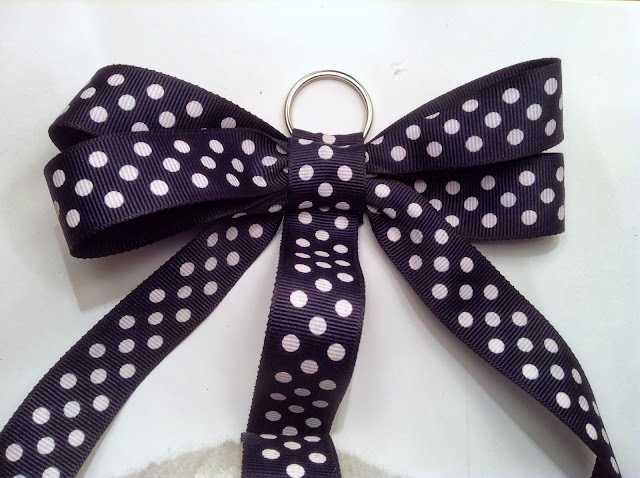
Patriotic Ribbon #patriotic #4thofJuly #usa #memorialday #redwhiteblue

I used this method for my double bow. Fuss with it until you are satisfied with how it looks. I ended up hot gluing another small piece of ribbon around the knot on mine to make it look a little tidier.

Attach your three wreaths together with ribbon, leaving a tail at each end of the trio. I looped the ribbon around each individual wreath and hot glued things in place as I went. You could measure if you want to be sure your wreaths are spaced evenly but I just eye-balled it. Using hot glue, attach one of your chipboard letters to the front of each wreath.

Cut a swallow tail ("V") notch on the bottom end of the ribbon. Loop the top end through a ring for hanging and secure it by sewing or with hot glue. Trim ribbon ends as necessary. Hot glue your bow just beneath the ring.

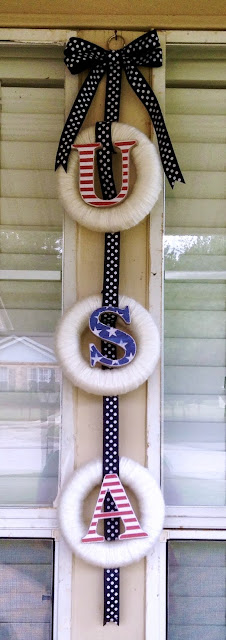
USA Wreath Trio #patriotic #4thofJuly #usa #memorialday #redwhiteblue

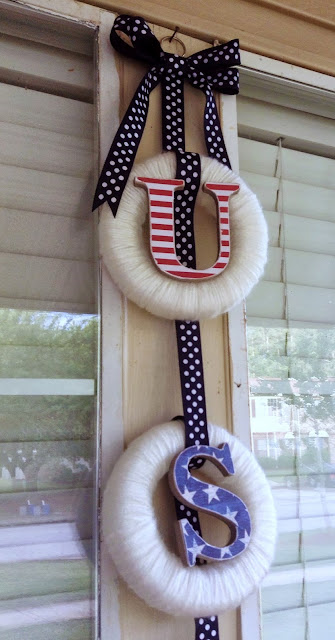
That's it. Hang your wreath trio where everyone can admire it and where you can enjoy it throughout the summer.

Patriotic Wreath Trio #patriotic #4thofJuly #usa #memorialday #redwhiteblue
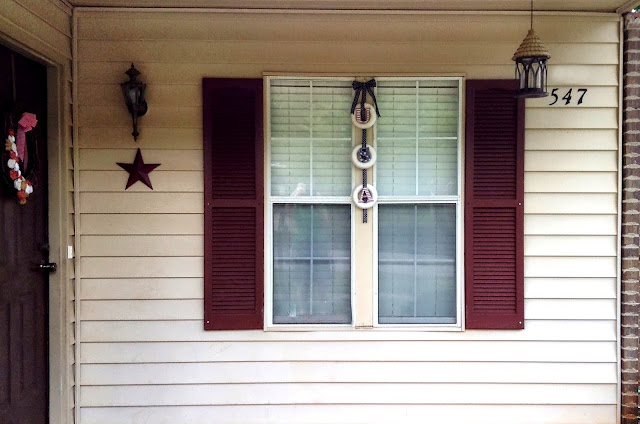
4th of July Wreath Trio #patriotic #4thofJuly #usa #memorialday #redwhiteblue
When the Fourth of July rolls around this year, this is going to be hanging at our new place in New York. Crazy! Lots of changes are coming for our family but I'm sure there will still be fireworks and watermelon. 
Happy Fourth to you and yours!
byline+for+Simply+Designing+posts | DIY Patriotic Wreath Trio | 5 |
| DIY Patriotic Wreath Trio | 6 |

I would love for you to follow me on Facebook, Twitter, Google+, Pintrest and via email.
I participate in the link parties found
here.

More Crafts

  • looking from the top down on a body scrub made with salt with greenery on the top of the photo and a wood lid to the right
    How to make a Salt Scrub
  • greenery hoop wreath with lavender and burlap bow
    Summer Hoop Wreath
  • DIY farmhouse christmas ornaments
    How to make Farmhouse Christmas Ornaments
  • Peppermint Sugar Scrub in a glass jar with red and white twine around the jar
    Peppermint Sugar Scrub

Reader Interactions

Comments

  1. Sharon Currier

    June 26, 2013 at 11:50 am

    Very cute! Pinned & tweeted!

    Reply

Leave a Reply Cancel reply

Your email address will not be published. Required fields are marked *

Primary Sidebar

Hello Friends!

Ashley Phipps Simply Designing I'm Ashley Phipps and I love sharing SIMPLE DIY, home, travel, food, craft and essential oil ideas with you! Learn more about me here. Contact me here. Find Media/PR info here. Privacy is important to us. Please read my Privacy Policy.
  • Email
  • Facebook
  • Instagram
  • Pinterest
  • Twitter
  • YouTube

Join our mailing list

Get our latest updates & exclusive content!

Privacy Policy, Disclaimer & Terms of Use

Favorite Posts

St. Patrick's Day Treats

Himmeli Wreath with Shamrocks

St. Patrick's Day Himmeli Wreath


COPYRIGHT: You’re welcome to link to Simply Designing or use a single image with a brief description to link back to any post. Republishing posts in their entirety is strictly prohibited.  Any use for commercial purposes is strictly prohibited. Feel free to pin on Pinterest. Find out more in my Privacy Policy.  Simply Designing with Ashley Phipps LLC is a participant in the Amazon Services LLC Associates Program, an affiliate advertising program designed to provide a means for sites to earn advertising fees by advertising and linking to Amazon.com . Simply Designing with Ashley Phipps LLC and it’s owner, employees and affiliates are not liable in any way for injury or loss (whether physical, emotional, monetary or any other kind of loss) resulting from any inspiration, ideas, directions or information gained from this website. We advise you to always follow manufacturer instructions, take appropriate safety precautions and hire a professional when in doubt. We love it when you use our site for inspiration, but by using it, you agree that you do so at your own risk.

Privacy Policy 

Copyright © 2025