• Skip to primary navigation
  • Skip to main content
  • Skip to primary sidebar

Simply Designing with Ashley

  • DIY
  • Oils
  • Recipes
  • Craft
  • Travel
  • Decor
  • Holiday
menu icon
go to homepage
  • DIY
  • Oils
  • Recipes
  • Craft
  • Travel
  • Decor
  • Holiday
search icon
Homepage link
  • DIY
  • Oils
  • Recipes
  • Craft
  • Travel
  • Decor
  • Holiday
×

Frayed Flower

Published: Jul 22, 2010 by Ashley Phipps · 328 words. · About 2 minutes to read this article. · 11 Comments · This post may contain affiliate links · This blog generates income via ads and sponsored posts · This blog uses cookies · See our privacy policy for more info Filed Under: Craft, DIY, Gift Ideas, Giveaway

Frayed+Flower+06 | Frayed Flower | 15 |

Sorry for the late post today.

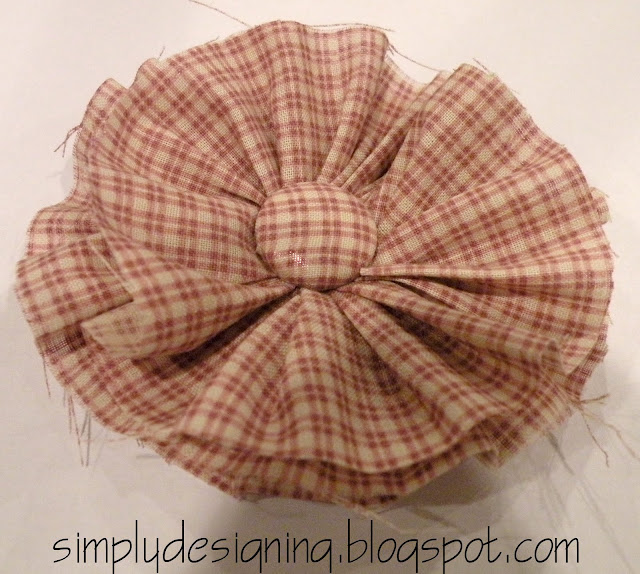
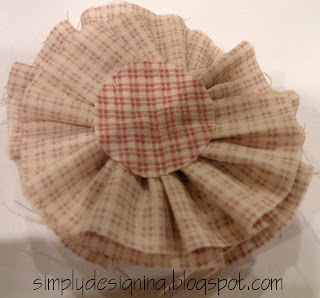
Today I'm going to show you how to make a Frayed Flower!  (AND I'm giving one away too!)

You will need:
(1) piece of fabric that is ½ the diameter of the final flower that you want and about 40-44"" long
a needle
thread
button making kit plus extra fabric to make a button with
enough fabric to make a small circle out of (or felt)
hot glue gun
prelined alligator clip

Step 1:

You need to fray your piece of fabric. 

Step 2:

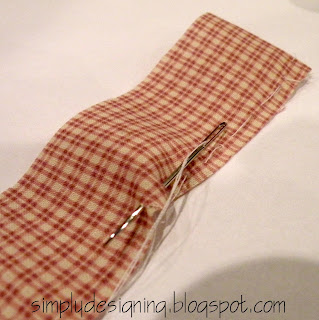
Take your needle and thread and make a long running stitch along one edge of the fabric.

Frayed+Flower+01 | Frayed Flower | 16 |
Step 3: 
Gather your fabric as below as loosely or as tightly as you wish.
Frayed+Flower+02 | Frayed Flower | 17 |
Step 4: 
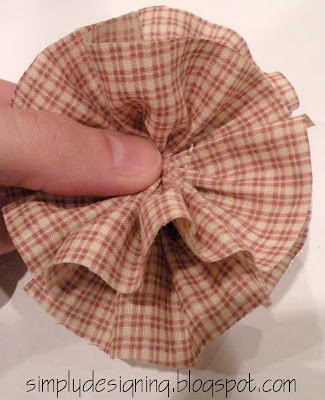
Twist your gathered fabric around in a circle until it makes a "flower" as below.
Frayed+Flower+03 | Frayed Flower | 18 |
Step 5:
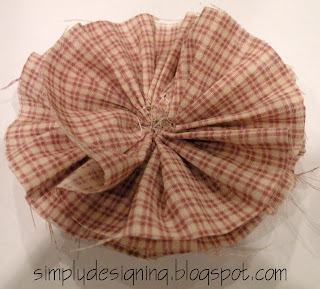
Fold the end top part of the flower under to create a nice finished look (you can see this in the photos above and below).  Then using a needle and thread, sew the middle of the flower together making sure to get all edges and ends sewn together so that the flower can stay together on its own. 
Frayed+Flower+04 | Frayed Flower | 19 |
Step 6:
Cut a small circle of fabric and hot glue it to the back of the flower as shown.  This will help to hold the flower together and it also helps to hide the sewn together part of the flower.
Frayed+Flower+05 | Frayed Flower | 20 |
Step 7:
Using a button making kit, create a button for the middle using matching or contrasting fabric.  Hot glue this in place.
Frayed+Flower+07 | Frayed Flower | 21 |

Enjoy!

Now on to the giveaway!  Anyone who leaves a comment TODAY on any post, will be automatically entered to win this flower!  You get one entry for every comment you leave, so the more comments you leave today, the more chances you have to WIN!  Check back Monday when I announce the winner of this frayed flower and this vinyl giveaway!

Good luck!

Remember to link up at tomorrow's link party and stop by for ANOTHER GIVEAWAY!!!  (Seriously a fun week huh?!?!)

I participate in the link parties found here.

More Crafts

  • looking from the top down on a body scrub made with salt with greenery on the top of the photo and a wood lid to the right
    How to make a Salt Scrub
  • greenery hoop wreath with lavender and burlap bow
    Summer Hoop Wreath
  • DIY farmhouse christmas ornaments
    How to make Farmhouse Christmas Ornaments
  • Peppermint Sugar Scrub in a glass jar with red and white twine around the jar
    Peppermint Sugar Scrub

Reader Interactions

Comments

  1. RenaeF

    July 22, 2010 at 11:38 am

    I hope I win this cute flower! I need some major hair clips as my daughter is starting school soon!!!

    Reply
  2. Collaborations

    July 22, 2010 at 1:40 pm

    Too cute!!

    Reply
  3. CraftyMummy

    July 22, 2010 at 5:40 pm

    Thanks for visiting me earlier. Love the flower. And as always your tutorial makes it look so easy!

    Reply
  4. Alison

    July 23, 2010 at 1:53 am

    WOW! This is seriously one of my FAVORITE flowers I've seen. So cute! I'll be trying this one for sure!

    Reply
  5. Nana's Fun Stuff

    August 02, 2010 at 12:45 am

    Very cute flower 🙂 Love the frayed edged!

    Reply
  6. Kaysi

    August 02, 2010 at 2:30 pm

    Super cute, love the button in the middle!

    Reply
  7. Kathy

    September 12, 2010 at 10:33 pm

    This is such a cute flower

    Reply
  8. Maggie

    September 13, 2010 at 2:21 am

    Very kewl luv the frayed flower..<br />Maggie

    Reply
  9. Maria Gridley

    September 13, 2010 at 6:33 pm

    found this post through keeping it simple! I was thinking how cute this was, and its so funny cause just this morning I was making litte fabric flowers just like this! 🙂 For some reason it clicked into my head to make them this way.. and was wondering why i hadnt thought of it earlier. LOL Then I come check out some linky parties.. and bam.. I see your tutorial. 🙂 What a coincidence. 🙂

    Reply
  10. Ginger

    September 16, 2010 at 11:54 am

    Love the frayed edged! So clever!<br />hugs

    Reply
  11. Crystelle

    December 01, 2010 at 6:17 pm

    Love it! The frayed edges are awesome! So vintage looking!

    Reply

Leave a Reply Cancel reply

Your email address will not be published. Required fields are marked *

Primary Sidebar

Hello Friends!

Ashley Phipps Simply Designing I'm Ashley Phipps and I love sharing SIMPLE DIY, home, travel, food, craft and essential oil ideas with you! Learn more about me here. Contact me here. Find Media/PR info here. Privacy is important to us. Please read my Privacy Policy.
  • Email
  • Facebook
  • Instagram
  • Pinterest
  • Twitter
  • YouTube

Favorite Posts

Free Fall Print

Large Free Fall Printable : Life Starts Over Again When it Gets Crisp in the Fall

Fall Centerpiece

Fall Pumpkin Centerpiece


COPYRIGHT: You’re welcome to link to Simply Designing or use a single image with a brief description to link back to any post. Republishing posts in their entirety is strictly prohibited.  Any use for commercial purposes is strictly prohibited. Feel free to pin on Pinterest. Find out more in my Privacy Policy.  Simply Designing with Ashley Phipps LLC is a participant in the Amazon Services LLC Associates Program, an affiliate advertising program designed to provide a means for sites to earn advertising fees by advertising and linking to Amazon.com . Simply Designing with Ashley Phipps LLC and it’s owner, employees and affiliates are not liable in any way for injury or loss (whether physical, emotional, monetary or any other kind of loss) resulting from any inspiration, ideas, directions or information gained from this website. We advise you to always follow manufacturer instructions, take appropriate safety precautions and hire a professional when in doubt. We love it when you use our site for inspiration, but by using it, you agree that you do so at your own risk.

Privacy Policy 

Copyright © 2023