If you follow me on Facebook, you may have seen that I just got a new Silhouette CAMEO 3 (thanks Expressions Vinyl), and so today I wanted to walk you through the process of how to set up a Silhouette CAMEO 3 so that you can easily set yours up too! You can check out all of my fun and easy Vinyl Projects HERE for some great inspiration and then come back here to learn how to set up your Silhouette CAMEO and get started on your projects!
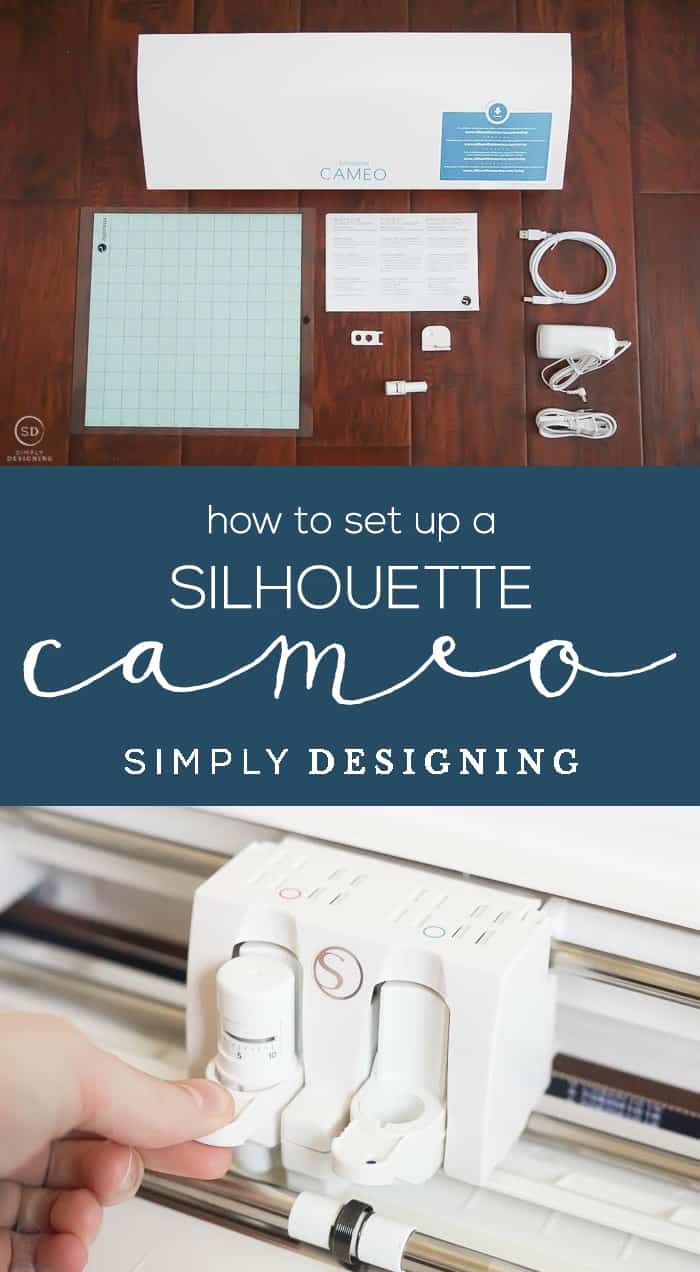
A big thank you to Expressions Vinyl for sending this Silhouette CAMEO 3 my way! All opinions and thoughts are mine.
If you just got a new Silhouette CAMEO, I am sure you can't wait to open it up and get designing! Follow my step-by-step instructions below and you will be up and running in no time.
How to Set Up a Silhouette CAMEO 3
Buy your own Silhouette CAMEO 3 HERE!
STEP 1 : Open your Silhouette CAMEO 3 box up
Open that box up! Come on, you know you want to. Just open it up. And take everything out. We will go through what everything is for in a minute.
STEP 2 : Let's Check Out What's In The Box
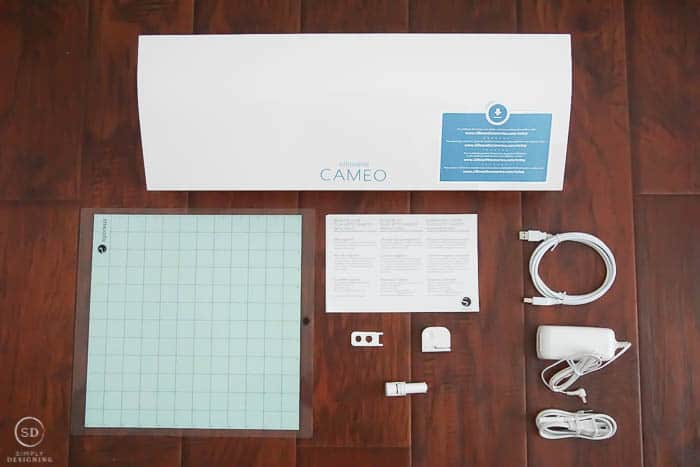
Let's go through what everything is in your box. Here goes:
Silhouette CAMEO 3
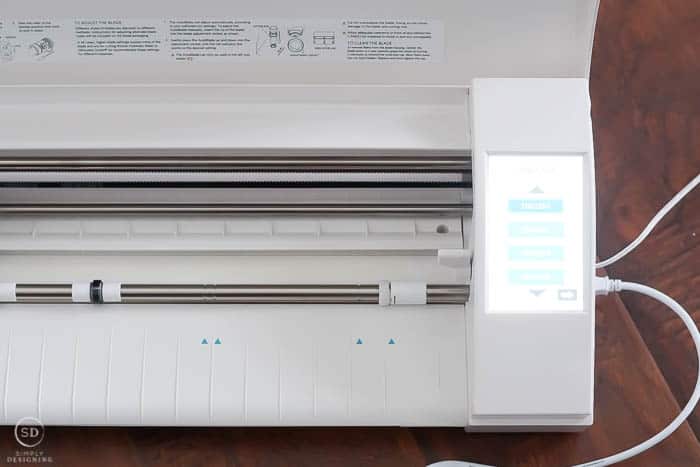
Here it is! Your big beautiful CAMEO 3! Pull it out and set it to the side.
12" Cutting Mat
You will use your cutting mat when you cut cardstock. You can use it when you cut vinyl, but you don't need to.
AutoBlade
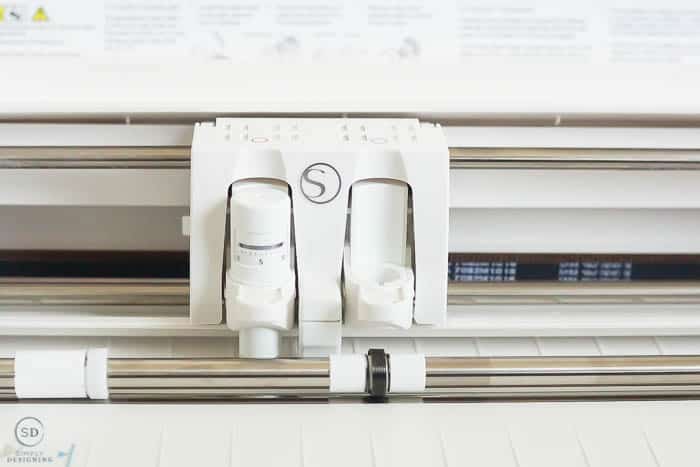
This is a HUGE selling point of the CAMEO 3! The Autoblade!
You don't need to adjust your blade manually anymore! Woot woot! You will set your blade setting in the Silhouette Software program and then the CAMEO 3 will automatically adjust it for you. This is exclusive to the CAMEO 3 and a pretty amazing feature if you ask me!
Crosscutter
This allows you to cut the vinyl off the roll at the back of the Silhouette! So super cool!
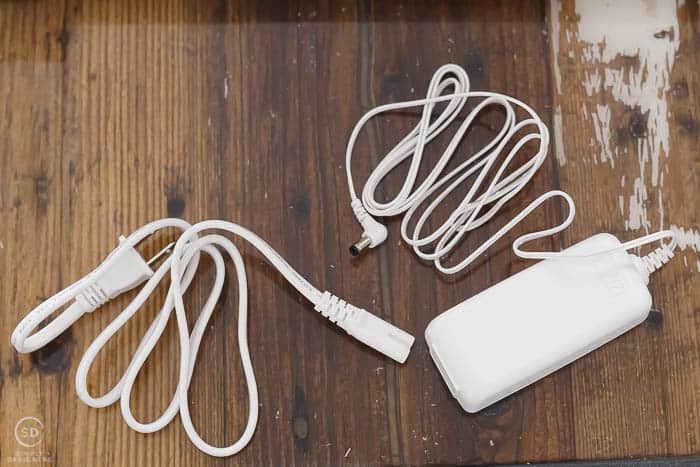
Power Cable
Plug the two pieces together, into your machine and then into the wall!
USB Cable
This is to connect your machine to your computer. (Note: I connected mine this way, but my Silhouette CAMEO 3 also has Bluetooth so I do not need to continue to keep it in if I set up the Bluetooth. So super cool!
Silhouette Studio Software (Download)
Yup, your purchase comes with a free Silhouette Studio Software download. I already had this, so I did not need to download it (although I did need to update it).
This is the program on your computer where you will design and then send to cut to your Silhouette. It is such a great program with so many ways to customize your designs...it is the best!
Also, your Silhouette will come with free designs that should automatically download once you get your program running and head to the library / files section.
Paperwork / Registration
You will want to register your CAMEO, so be sure to do that right away. Also if you bought your CAMEO from Expressions Vinyl, you will receive a limited extended warranty for as long as you own the machine.
Other Tool that comes with your Silhouette CAMEO 3
I can't seem to find an official name for this tool, it doesn't even mention that it comes with this tool on the Silhouette site. But just because it doesn't have a name, or a specificed purpose, doesn't mean it is important! Let's talk about what it can do.
- It can help you take the end cap off of the Autoblade if you need to clean the fibers out of it. Be sure the blade is set to zero, then use the smooth circle to twist the end cap off.
- If you are using a ratchet blade, the other not-smooth-circle is meant to help you change the setting on it.
- And the pointy ends? Those can help you remove the Bluetooth dongle should you need to take that out for any reason.
Yup, so that tiny tool is actually really important. To make sure I keep it safe, I am going to put it in my front crosscutter storage compartment.
STEP 3 : Let's Get Going
Plug the two pieces of the power cord together, then plug it into the wall and into your Silhouette.
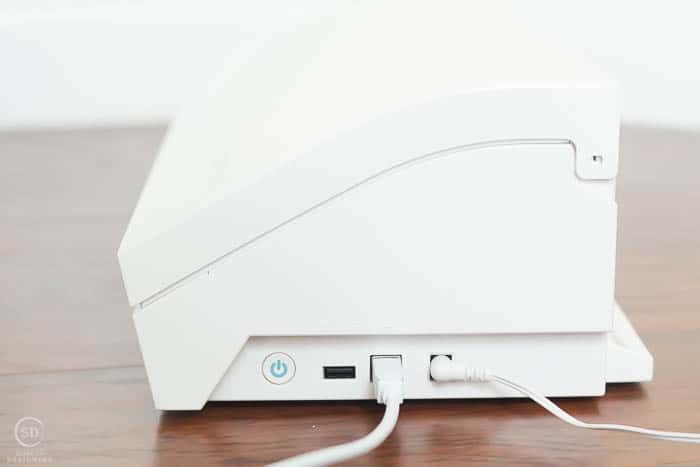
Plus the USB cable into your Silhouette (using the square-ish end, not the USB end) and then plug the USB end into your computer.
Download the Silhouette Studio Software program from HERE.
STEP 4 : Turn it on
On the side where you plugged the power cord and the USB cable, there is an on/off button. Press that to turn the machine on!
The screen will light up and have a few questions for you to answer. I enabled help icons and I did take a few minutes to go through the tutorials and I think that is important to do!
STEP 5 : Silhouette Studio
By now your Silhouette Studio Software program should be loaded onto your computer, and your computer should recognize your new device plugged into it! Woot woot!
It's time to open your Silhouette Studio and test things out! I won't go into detail on how to do this today, but the latest version of Silhouette Studio has a lot of great tutorials when you first open it up!
STEP 6 : A Few More Items
A few more items that are important to note about your brand new Silhouette CAMEO 3:
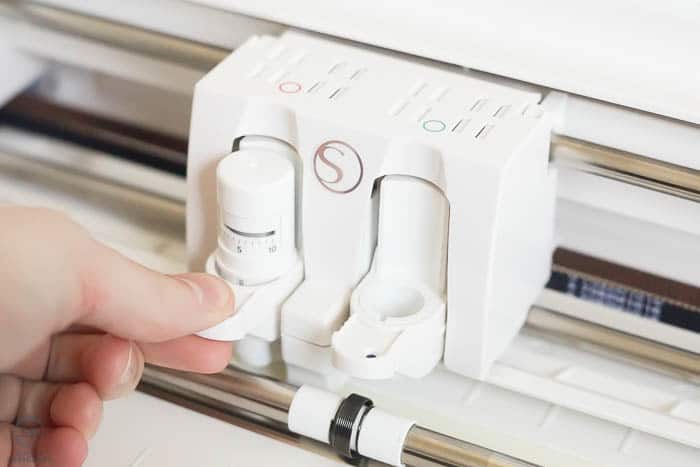
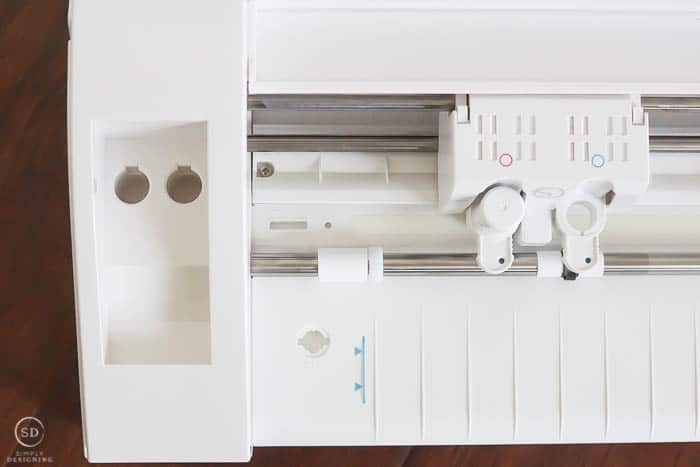
- Your Autoblade should only be placed in the blade holder with the RED dot. Pull the lever open, line the two groves up in the back, slide it in all the way, then push the lever closed.
- The blue dotted slot can help any number of devices! Just imagine, being able to cut and draw at the same time! Woot woot!
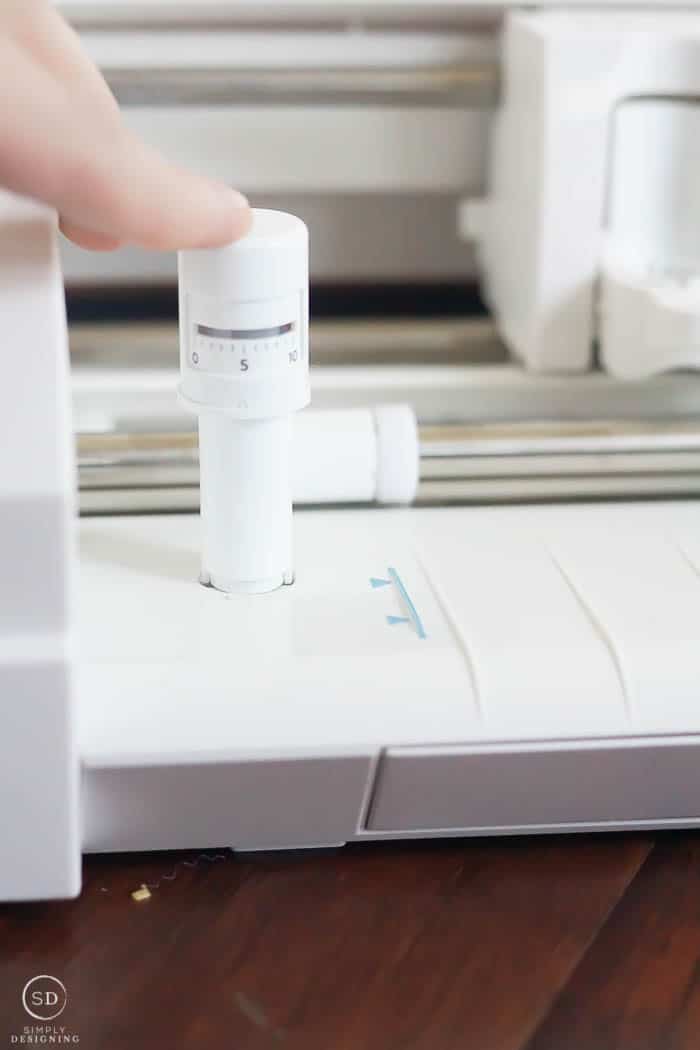
- The Autoblade will Automatically adjust to the desired settings within the Silhouette Studio program, but if you need or want to adjust it manually, there is a spot to set it in on the machine. Simply push it down until you've reached the desired setting.
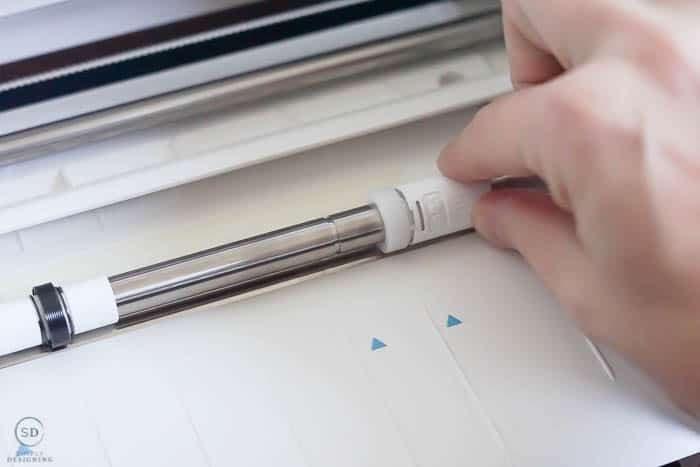
- If you choose to cut without a cutting mat, you will need to move the rollers in. Lift the lever on the right side to bring the roller up, then squeeze and twist the white roller until it moves from the locked to the unlocked position. Move the roller to the desired spot, and then twist to lock it. Be sure that the lock is fully secured in place before locking the lever again.
- On the back of the machine is a spot for your crosscutter to be used! I love that I can cut vinyl off the roll after I cut it!
- There is an awesome storage compartment for additional blades and other goodies on the left side.
- Behind the blade is another storage place that is great for pens, blades, extra tools, or anything else that will fit there.
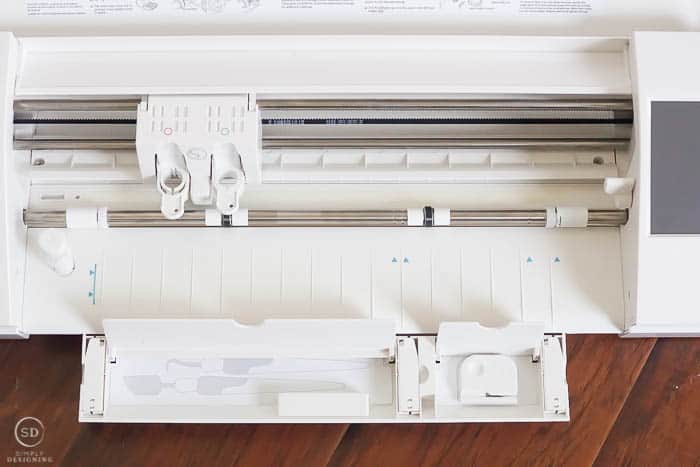
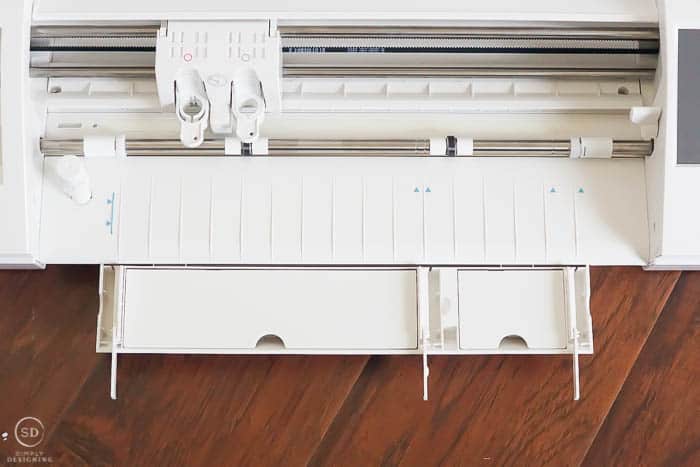
- And there is an even MORE awesome storage compartment for Silhouette tools and the crosscutter in a hidden pull-out compartment below the front of the Silhouette. You can also flip up the tracks to give extra support to your vinyl or cutting mat. I can't even get over how cool this is!
Whew! I think that is it!
I have already had time to play with my new machine a bit and it is oh-so-amazing!
I love the new Autoblade so much, and the storage compartments make my organizational heart happy!
This machine is a huge upgrade over my original CAMEO that I previously had. I can't wait to share more projects with you soon!
Buy your own Silhouette CAMEO 3 HERE!
In the meantime, check out these fun Silhouette CAMEO projects:
How to add Vinyl to a Tote Bag





Leave a Reply