• Skip to primary navigation
  • Skip to main content
  • Skip to primary sidebar

Simply Designing with Ashley

  • DIY
  • Oils
  • Recipes
  • Craft
  • Travel
  • Decor
  • Holiday
menu icon
go to homepage
  • DIY
  • Oils
  • Recipes
  • Craft
  • Travel
  • Decor
  • Holiday
search icon
Homepage link
  • DIY
  • Oils
  • Recipes
  • Craft
  • Travel
  • Decor
  • Holiday
×

Tied Burlap Wreath

Published: Oct 6, 2016 by Ashley Phipps · 375 words. · About 2 minutes to read this article. · 4 Comments · This post may contain affiliate links · This blog generates income via ads and sponsored posts · This blog uses cookies · See our privacy policy for more info Filed Under: Craft, DIY, Uncategorized

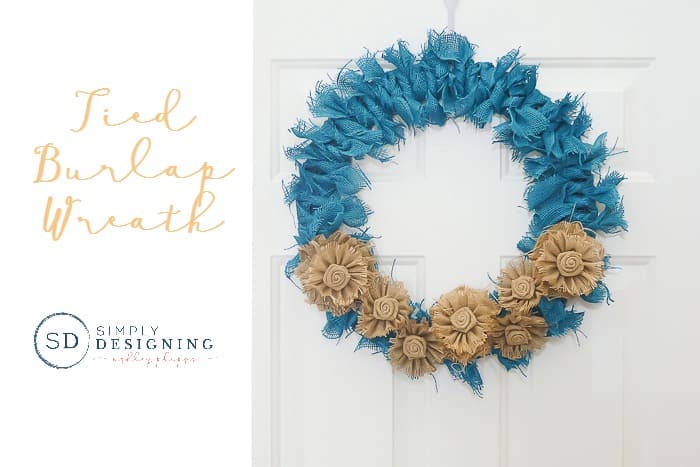
With a new season comes new decor (I'm not alone in that, right?) and other new things like our sweet baby girl. 😉 So, I decided to create a new wreath for my front door!  A cute little burlap wreath that is perfect for fall!  It is fun and bright and a great way to transition from summer to winter with a pop of color! Sure, Halloween is right around the corner, but I wanted to go with something rustic and a bit different for the beginning of fall.

tied-burlap-wreath-horizontal

Plus it only takes a few minutes to throw together, maybe 20-30 minutes tops!  And is a great way to update your front door without a lot of time or expense!

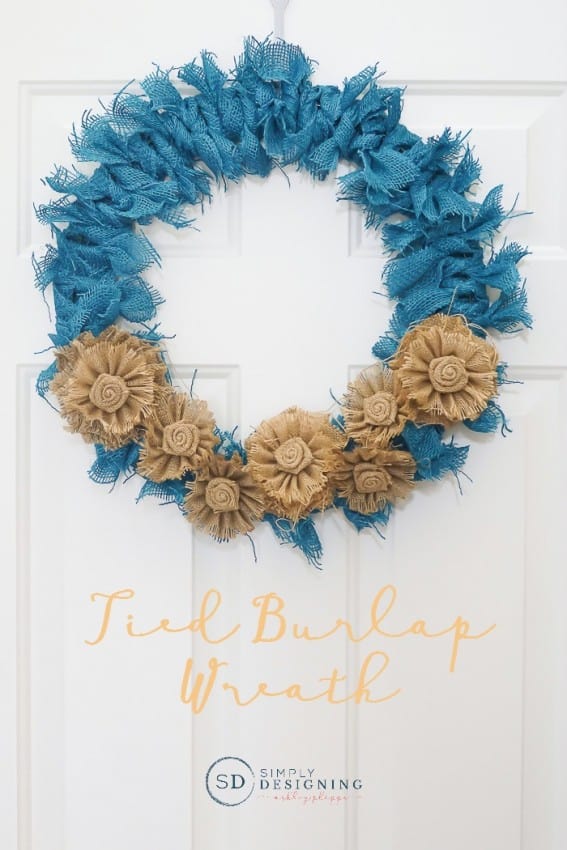
Fall Burlap Wreath

And I really love the burlap flowers on it too!  Don't worry, I bought those!  You don't have to make them!

Fall Burlap Wreath Supplies

To create this you will need:

  • 18" Metal Wreath Form
  • (2) 2.5" Turquoise Burlap Ribbon
  • (3) 4" Burlap Flower
  • (4) Large Burlap Flower, 2-pack
  • Scissors
  • Hot Glue Gun
  • Ruler

Fall Burlap Wreath Tie burlap on

First you will begin by cutting your burlap ribbon into 12" long cuts.  They do not have to be exact, but if they get too much shorter then 12" it will be difficult to tie these on.  I used nearly 2 full rolls of burlap ribbon to complete this.

Tie Burlap Wreath

Then you will take your burlap cuts and tie it around the wire wreath form.  I did not knot it, I just did one tie and it was really secure.  If you plan to do two, you will need to allow for more ribbon on each cut.

Smush the tied ribbons close together so that no wreath form shows.  Fill the entire wreath form in this manner.

Fall Burlap Wreath - add flowers

Next use the hot glue gun to attach the flowers!

I glued a smaller burlap flower into each of my three large flowers.  You don't have to do this, but I wanted the extra depth, dimension, variety and visual interest in my wreath.

Fall Burlap Wreath

After you have glued all your flowers on, your wreath is ready to hang!

tied-burlap-wreath

I love how simple yet beautiful this is!  And I think the jeweled tone turquoise is perfect for fall!  It doesn't feel like a holiday wreath so it will last all fall season long!

More Crafts

  • looking from the top down on a body scrub made with salt with greenery on the top of the photo and a wood lid to the right
    How to make a Salt Scrub
  • greenery hoop wreath with lavender and burlap bow
    Summer Hoop Wreath
  • DIY farmhouse christmas ornaments
    How to make Farmhouse Christmas Ornaments
  • Peppermint Sugar Scrub in a glass jar with red and white twine around the jar
    Peppermint Sugar Scrub

Reader Interactions

Comments

  1. Antonella | White House Crafts

    October 12, 2016 at 9:57 am

    This is a very lovely wreath. I am a huge fan of burlap 🙂 I hope you will share your project with us at The Crafty Corner link party. 🙂

    Reply
  2. swapna

    October 13, 2016 at 7:02 am

    OMG I actually came over to check out how you made those flowers! LOL, they're lovely!

    Reply
  3. Natasha

    October 13, 2016 at 9:08 pm

    Super cute! I love those flowers and how you layered them. =)

    Reply
  4. Ken

    November 21, 2016 at 4:37 pm

    Where did you buy the flowers?

    Reply

Leave a Reply Cancel reply

Your email address will not be published. Required fields are marked *

Primary Sidebar

Hello Friends!

Ashley Phipps Simply Designing I'm Ashley Phipps and I love sharing SIMPLE DIY, home, travel, food, craft and essential oil ideas with you! Learn more about me here. Contact me here. Find Media/PR info here. Privacy is important to us. Please read my Privacy Policy.
  • Email
  • Facebook
  • Instagram
  • Pinterest
  • Twitter
  • YouTube

Favorite Posts

Lazy Girl's Spring Cleaning Checklist {FREE PRINTABLE}

use a steam cleaner on an area rug

How to Steam Clean a Rug


COPYRIGHT: You’re welcome to link to Simply Designing or use a single image with a brief description to link back to any post. Republishing posts in their entirety is strictly prohibited.  Any use for commercial purposes is strictly prohibited. Feel free to pin on Pinterest. Find out more in my Privacy Policy.  Simply Designing with Ashley Phipps LLC is a participant in the Amazon Services LLC Associates Program, an affiliate advertising program designed to provide a means for sites to earn advertising fees by advertising and linking to Amazon.com . Simply Designing with Ashley Phipps LLC and it’s owner, employees and affiliates are not liable in any way for injury or loss (whether physical, emotional, monetary or any other kind of loss) resulting from any inspiration, ideas, directions or information gained from this website. We advise you to always follow manufacturer instructions, take appropriate safety precautions and hire a professional when in doubt. We love it when you use our site for inspiration, but by using it, you agree that you do so at your own risk.

Privacy Policy 

Copyright © 2023